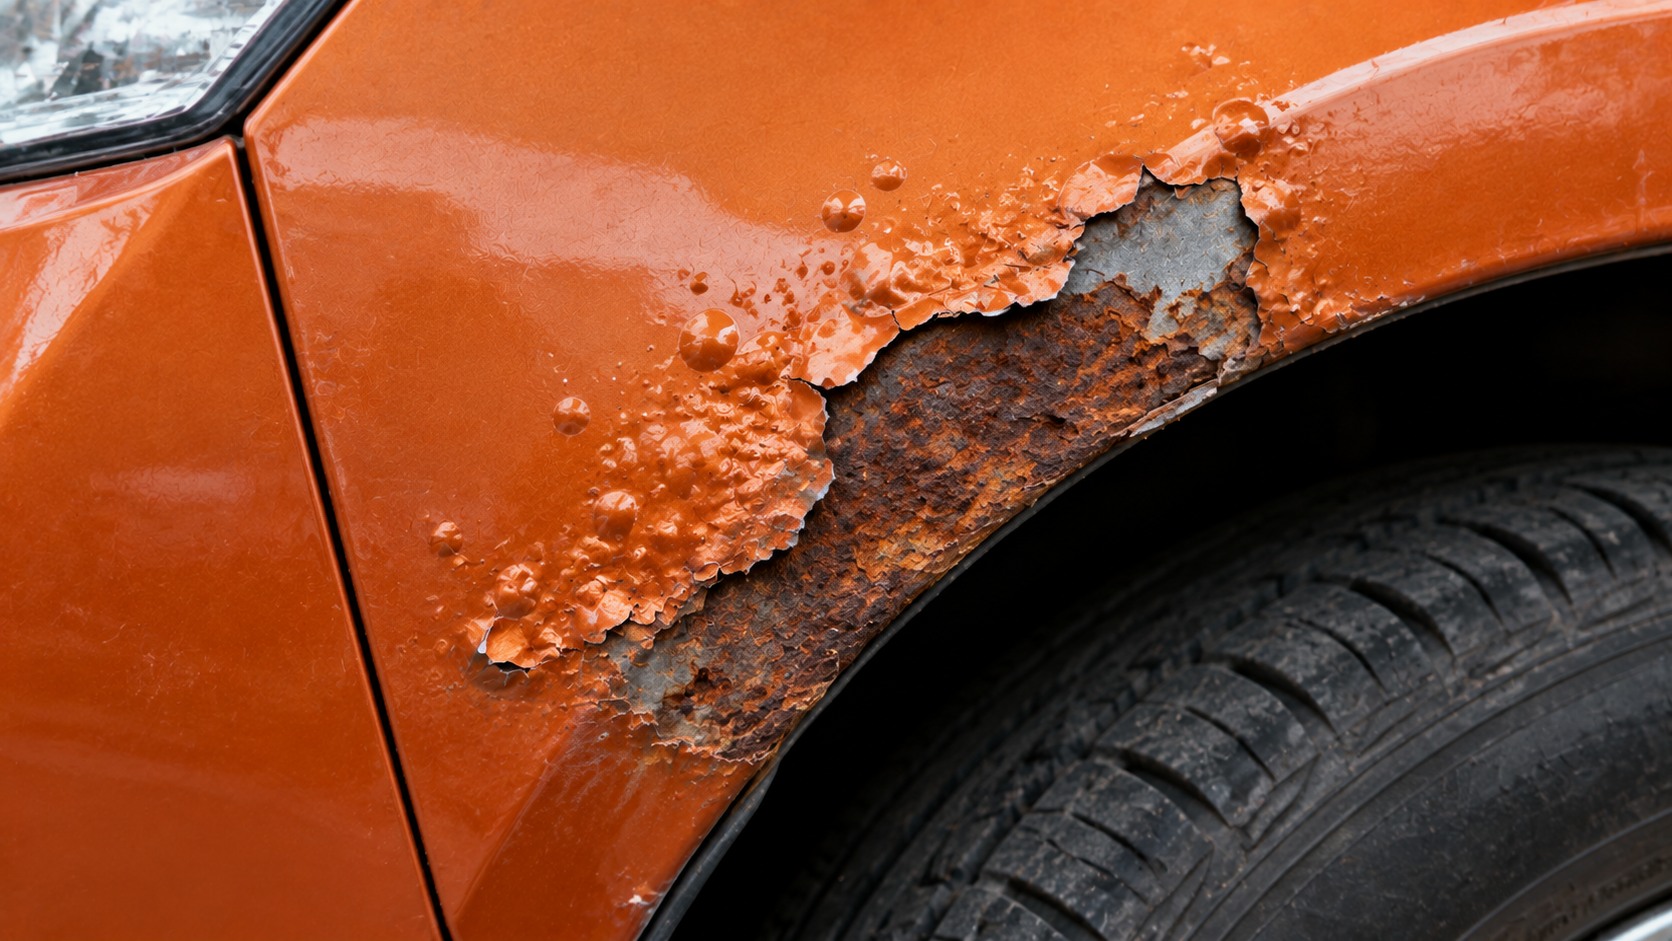
Discovering a patch of orange flaking car rust on your vehicle's fender can quickly ruin your pride of ownership and devalue your investment. If left unchecked, this localized oxidation spreads aggressively across the sheet metal, compromising structural safety, ruining exterior aesthetics, and leading to expensive failures that can cause a vehicle to fail safety inspections.
Fortunately, NXT Motors provides a systematic, manual-guided restoration methodology that shows you how to repair rust before it reaches safety-critical structural elements.
This comprehensive guide details the exact mechanical grinding, chemical conversion, and painting procedures needed to eliminate car rust and restore your vehicle's original factory finish.
Before disassembling panels or grinding to treat car rust, find the correct workshop repair manual for your vehicle's specific body clip layouts and underbody shield fasteners.
Key Takeaway
- Identify the Type of Corrosion: Before attempting a repair, classify the rust as surface, scale, or penetration to choose the right remediation method.
- Scrape and Grind Down to Bare Metal: Success in a car rust repair depends on mechanical grinding that extends at least two inches past the visible boundaries of oxidation.
- Apply Chemical Rust Converter: Treat the exposed steel with a phosphoric-acid-based converter to neutralize microscopic car rust and seal the panel's pores.
- Never Apply Filler Over Active Corrosion: Applying body filler directly over active car rust traps moisture, accelerates subsurface decay, and ruins the final paint.
- Consult Factory Diagrams for Safe Disassembly: Use a manufacturer service manual to safely remove plastic wheel arches, bumper clips, and trim during your car rust restoration.
How to Repair Rust on a Car: Classifying Corrosion Levels
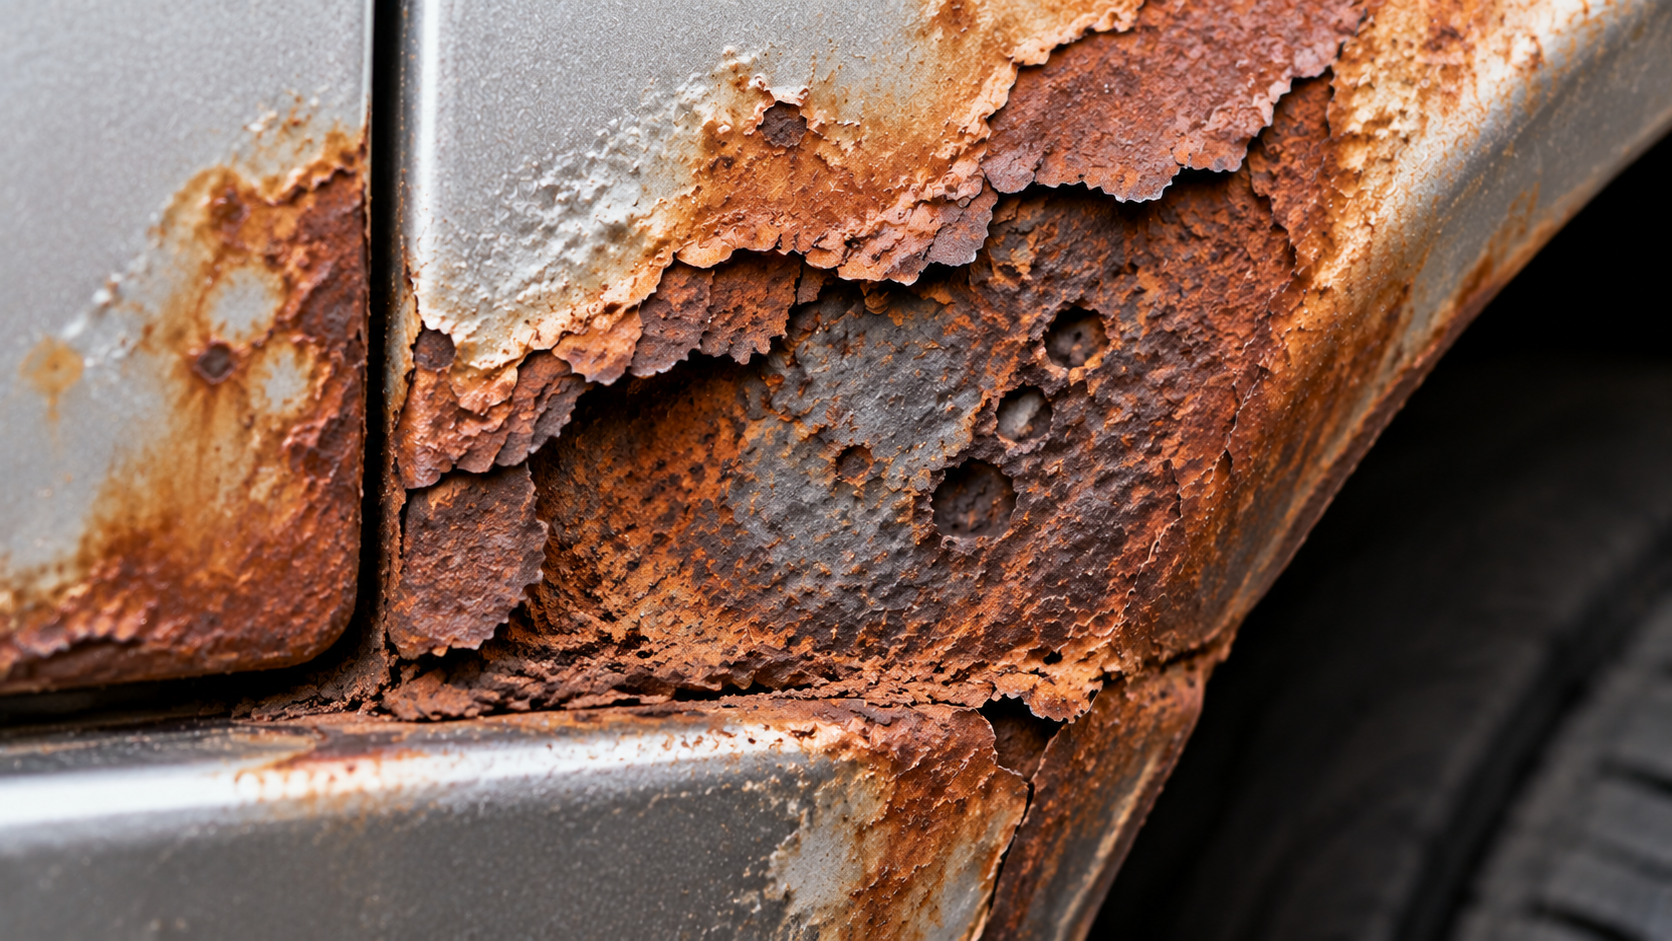
To repair rust successfully, first classify the severity of the rust affecting your vehicle's panels. Surface corrosion is the initial stage where moisture and road salts react with exposed sheet metal, causing paint bubbling and light pitting without destroying the metal's structural thickness.
If neglected, this develops into scale corrosion, where the chemical oxidation eats deep into the panel, creating a rough, flaking crust that must be mechanically ground away to prevent structural loss.
The most advanced stage is penetration corrosion, which creates physical holes through the panel and requires cutting out the ruined metal and welding in fresh steel patches to resolve the car rust completely.
To help you assess the level of oxidation and choose the right repair method, we have compiled a diagnostic and resolution matrix below.
This table breaks down each corrosion stage, outlines the recommended manual-guided correction, and highlights the specific technical references required to resolve your car rust issues safely.
Car Rust Severity and Repair Level Classifications
Corrosion Severity Level | Visual Characteristics | Recommended DIY Repair Process | Workshop Manual Reference Needed |
Surface Car Rust | Light orange oxidation spots, bubbling paint, or blistering primer with solid metal underneath | Sand the paint bare, treat the steel with a phosphoric chemical converter, and apply epoxy primer | Paint code locations and body panel trim disassembly guides |
Scale Car Rust | Rough, bubbling, flaking rust crust that reduces sheet metal thickness and causes deep pits | Grind the surface down to bare metal using a strip disc, apply chemical converter, and level with polyester filler | Fender liner removal instructions and bumper cover mounting diagrams |
Penetration Car Rust | Physical holes, crumbling steel, and completely rusted structural metal along seams or rails | Cut out the ruined steel panel, weld in a fresh metal patch or replace the entire panel, and apply seam sealer | Full body panel replacement flowcharts, welding safety specs, and panel weld locations |
Chassis/Frame Car Rust | Heavy flaking scale or perforation on structural frame rails, subframes, or steering mounts | Consult a certified auto body technician for structural welding, frame alignment, and safety inspections | Frame dimension charts, structural repair safety limits, and weld points |
Essential Tools and Safety Equipment for Car Rust Remediation
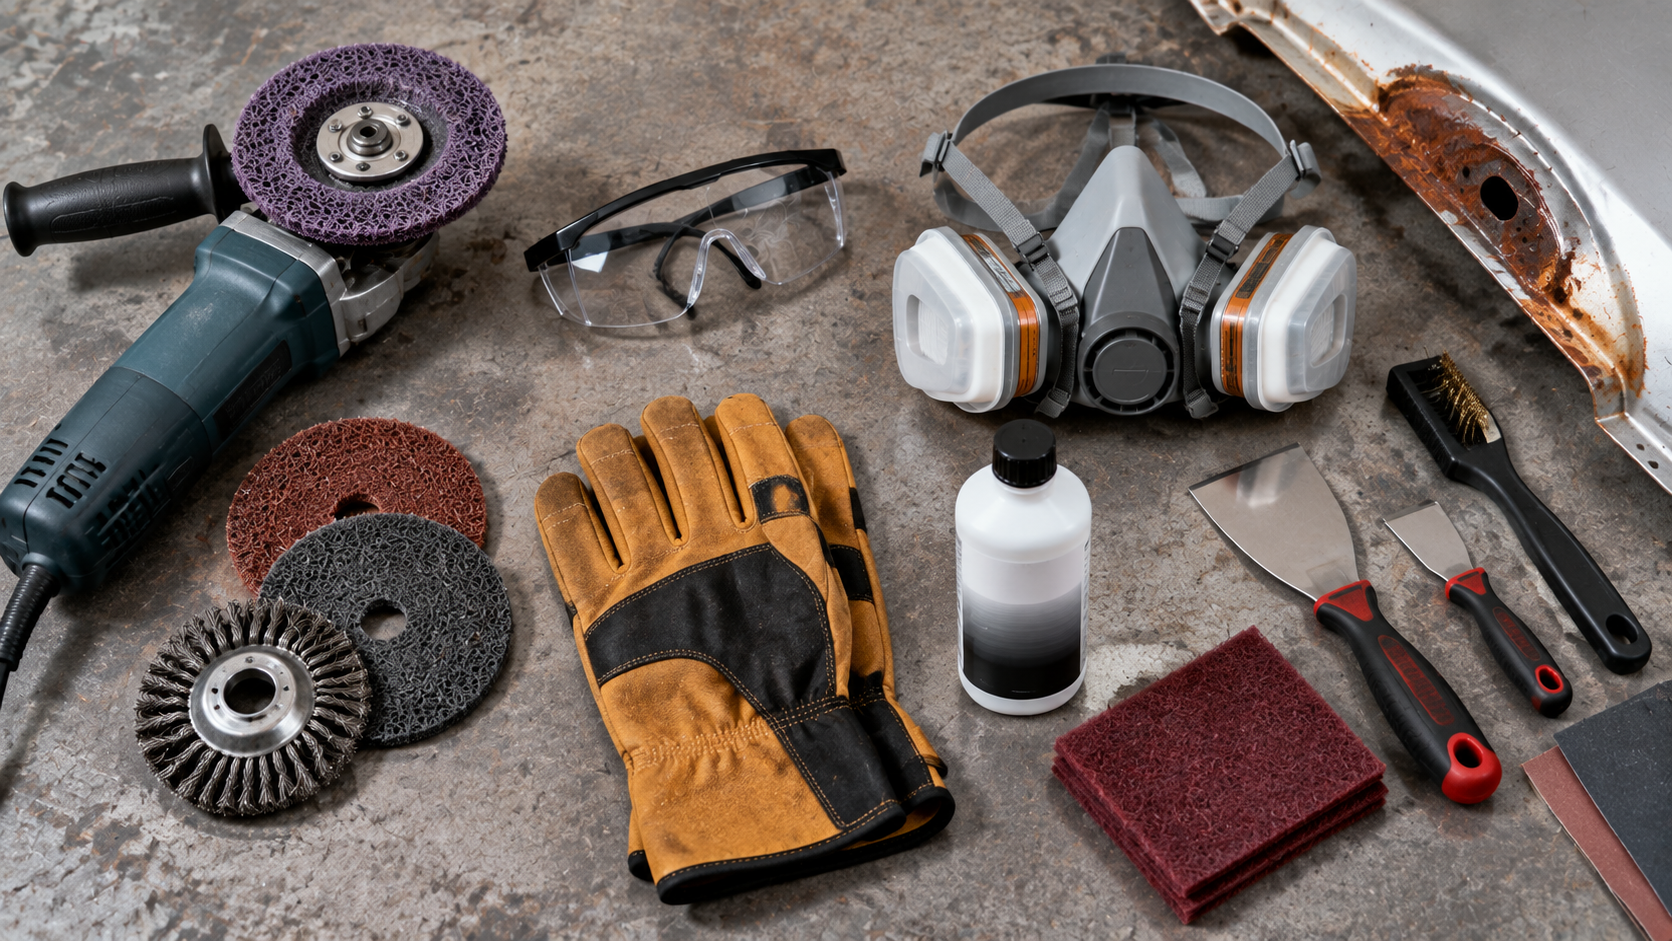
Proper preparation is the cornerstone of any long-lasting body restoration, and assembling the correct tools is essential before attempting to fix car rust.
Because the remediation process involves high-speed grinding, chemical acid applications, and aerosol paint spraying, proper personal safety equipment is paramount to prevent severe injuries.
Never start grinding without a quality dual-cartridge respirator, heavy leather work gloves, and impact-resistant safety goggles to protect your eyes from flying hot metal sparks and microscopic car rust dust.
To ensure you do not damage your vehicle's exterior trim or body during the remediation of car rust, gather the following essential tools before starting:
- An angle grinder with a fiber strip disc to strip paint and scale corrosion without gouging the solid underlying sheet metal.
- A dual-action orbital sander with various sandpaper grits ranging from 80-grit for leveling to 320-grit for painting prep.
- Phosphoric-acid-based chemical rust converter to completely neutralize sub-surface microscopic iron oxide.
- Polyester body filler and a mixing spreader to fill pitted steel contours and level the panel's exterior surface.
- A high-quality wax and grease remover to clean the panel spotless before spraying primer, base coat, or clear coat.
Beyond safety gear, a comprehensive workshop manual is critical for locating and removing delicate overlapping trim components. General DIY resources often skip the specific mechanical fastener layouts and disassembly sequences for your exact vehicle year, which can result in broken clips and misaligned panels.
Experienced restorers review oem-vs-aftermarket-manuals-best-for-diy to ensure they have the exact manufacturer-level assembly data before starting any car rust grinding project.
Step-by-Step Car Rust Grinding and Metal Preparation
The physical restoration begins with the aggressive removal of all paint, primer, and corrosion from the affected panel using mechanical grinding tools.
You must use an angle grinder equipped with a fiber strip disc or a 24-grit grinding wheel to strip the paint and scale down to bare steel, extending the grinding zone at least two inches past the visible boundaries of the car rust.
This wide radius ensures that you eliminate any microscopic oxidation paths branching beneath the paint, which would otherwise continue to grow and ruin your new finish. As you grind the metal, avoid holding the tool in one spot too long, as excessive friction heat can warp thin automotive panels and ruin the car rust repair area.
After stripping the panel with the grinder, switch to 80-grit sandpaper on a dual-action orbital sander to feather the surrounding factory paint edges into the bare metal zone. Before prying away any overlapping fender liners, bumpers, or chrome trim to reach hidden pockets of car rust, you must refer to factory exploded-view diagrams to locate hidden plastic fasteners.
Consulting how-to-read-exploded-view-manual-diagrams lets you safely disassemble surrounding body components, ensuring full access to the corrosion zone without cracking fragile mounts.
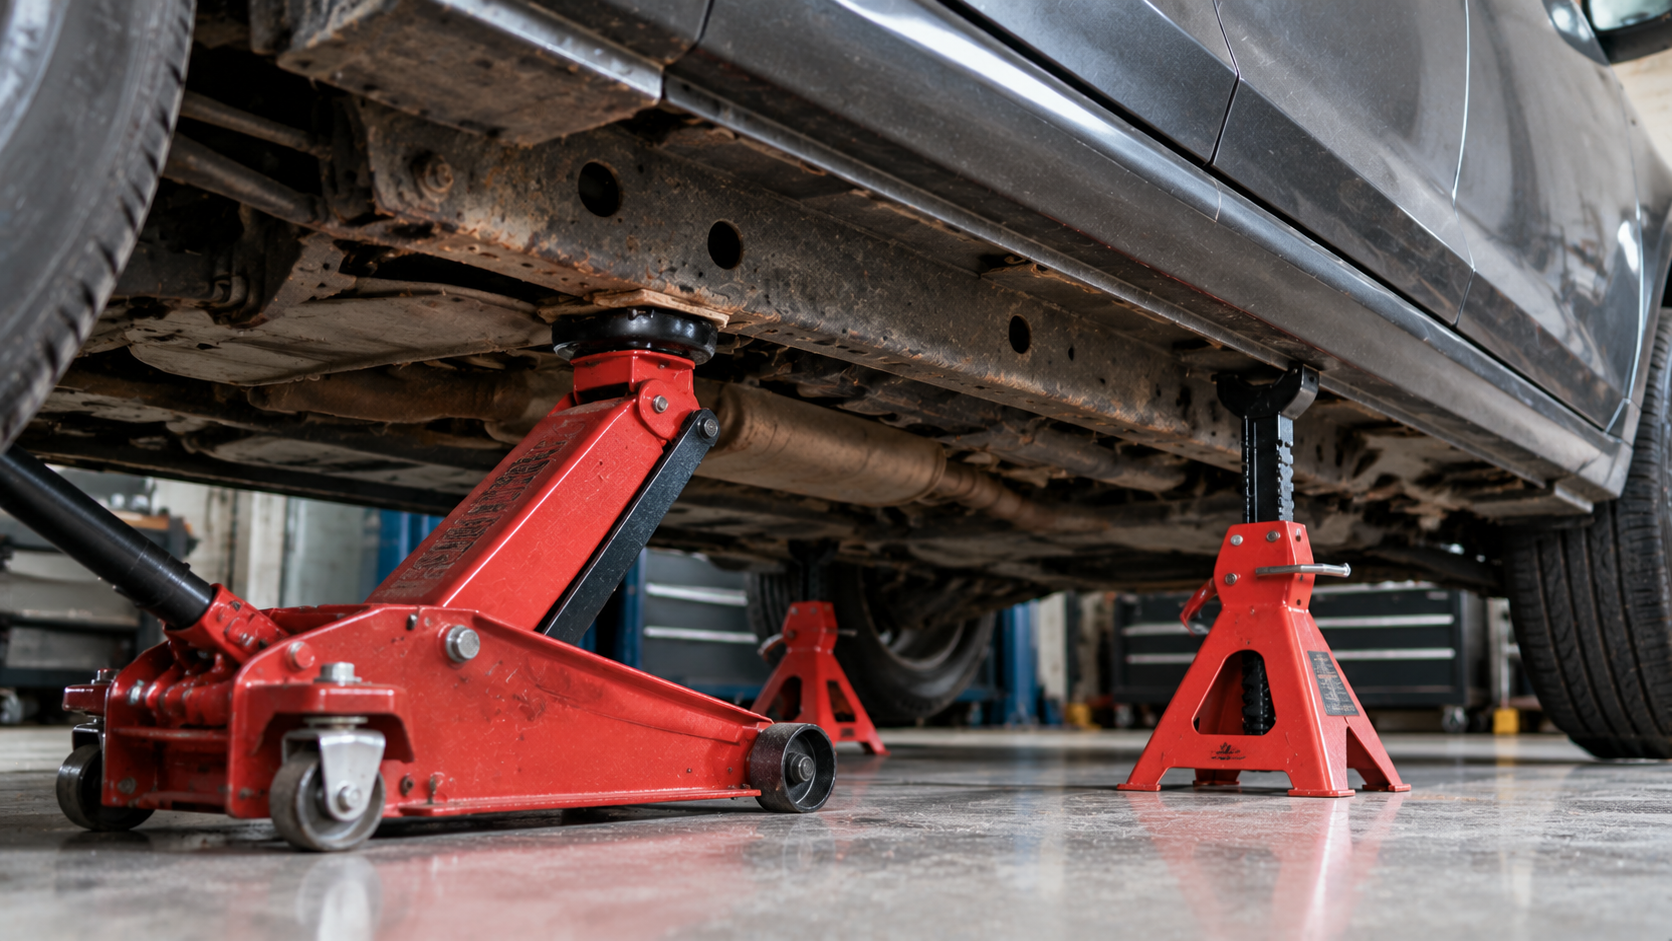
Once grinding is complete, lift and secure your vehicle to inspect the underlying frame, floor pans, and pinch welds for hidden structural rust. Lifting a car with the wrong support points can cause severe damage or catastrophic injury if the jack slips during grinding.
Before positioning any hydraulic floor jacks or jack stands under the chassis, locate your vehicle's designated frame support points in your service manual.
Applying Rust Converter, Body Filler, and Primer to Repair Car Rust
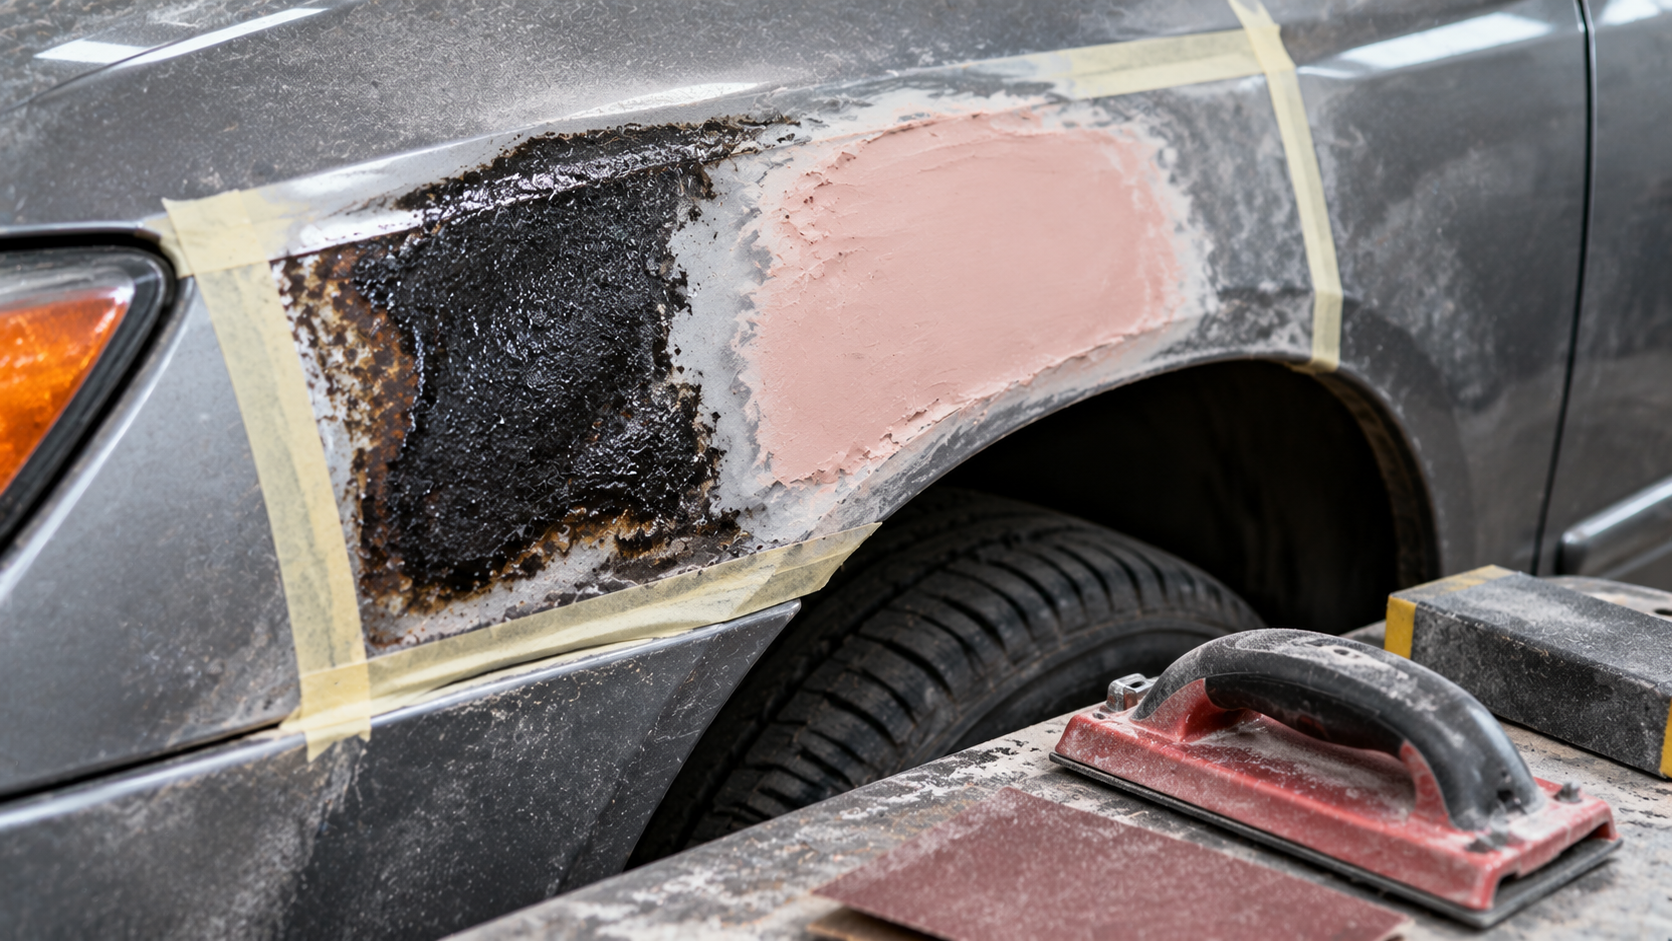
With the panel prepped and clean, you must treat the bare steel with a high-quality phosphoric-acid-based chemical rust converter to neutralize any remaining microscopic car rust. This chemical agent reacts with iron oxide to convert it into a stable, black iron phosphate compound, creating a sealed barrier that completely halts sub-surface oxidation.
After the chemical converter cures for the manufacturer-recommended duration, wipe the panel down with a wax and grease remover to prepare the steel for the application of lightweight polyester body filler to smooth out any pitted car rust zones.
Mix the polyester body filler with its cream hardener on a clean board, then apply it in thin, even layers over the pitted steel using a plastic spreader. Allow the filler to cure until it is firm but sandable, then block-sand the patch using 80-grit sandpaper, followed by 180-grit, and finally 320-grit to match the original panel contours perfectly.
To prevent moisture from penetrating the porous filler and causing sub-surface car rust to reform, immediately apply two to three heavy coats of a two-part epoxy primer, which seals the repaired sheet metal against moisture.
Finishing with Paint, Clear Coat, and Buffing After Car Rust Repair
Achieving a professional-grade color match and factory-quality shine requires meticulous sanding of the epoxy primer and the application of matched automotive base coat and clear coat. You must wet-sand the cured primer with 600-grit sandpaper until the surface is completely flat and smooth, then wipe the zone with a tack rag to remove all dust.
For detailed instructions on maintaining proper spray distance, stroke overlap, and dry times to prevent runs, review car-spray-paint to ensure your base coat blends seamlessly with the surrounding factory paint and covers the repaired car rust area.
Once the color coat is dry, apply two wet coats of polyurethane clear coat to provide essential UV protection and a high-gloss finish over the repaired car rust zone. Allow the clear coat to cure for at least 48 hours, then wet-sand the surface with 2000-grit sandpaper to remove any orange peel texture or embedded dust particles.
Finally, buff the panel with a high-speed orbital polisher using a medium-cut compound, followed by a fine finishing polish, to restore the deep, mirror-like glaze of your vehicle's exterior and complete the car rust restoration process.
DIY Car Rust Repair vs. Professional Auto Body Shop Repair
When deciding whether to tackle car rust repair as a DIY project or to hire a professional auto body shop, you must weigh several critical factors.
A professional body shop has specialized paint booths and frame-straightening machinery, but they typically charge $500 to $2,000 to repair a single rusty fender or quarter panel because of high labor rates.
Repairing it yourself with high-quality materials and a vehicle-specific service manual will cost about $100 to $250, including safety equipment and specialty abrasive discs.
However, if you try to fix car rust without proper safety protocols or vehicle-specific disassembly data, you risk damaging internal body panels or applying materials incorrectly, which can lead to rapid corrosion return.
To help you evaluate these options, we have compared the costs, risks, and requirements of different car rust restoration approaches in the table below. This side-by-side breakdown shows how utilizing a factory manual dramatically increases your safety and the longevity of your car rust repair work.
Car Rust DIY Restoration vs. Professional Body Shop Comparison
Restoration Factor | DIY Repair (With Workshop Manual) | DIY Repair (Without Manual) | Professional Body Shop |
Average Cost | $100 - $250 (materials and safety gear) | $100 - $250 (plus potential replacement panel costs) | $500 - $2,000 (labor and material rates) |
Time Required | 6 - 12 hours (including compound curing) | 12 - 20 hours (due to clip search struggles) | 2 - 4 days (shop scheduling dependent) |
Panel Damage Risk | Low: Detailed diagrams show exact clip and leverage points | High: Severe risk of denting thin steel or cracking trim | None: Body shop bears responsibility for panel issues |
Safety and Airbags | High: Explicit steps on electrical layout and airbag zones | Medium: Risk of grinding near hidden harness lines | High: Techs are fully trained in vehicle frame safety |
Rust Return Rate | Very Low: Correct stripping and phosphoric sealing steps | High: Paint failure from trapped active sub-surface scale | None: Most shops offer warranty on rust repairs |
Ford Car Rust Repair Guide
Ford vehicles frequently develop distinct pattern corrosion along cab corners, wheel arches, and tailgate seams because localized moisture gets trapped in overlapping steel joints.
When performing a car rust repair on these models, thoroughly clean out the double-walled sheet metal seams where dirt and road salt accumulate over time.
To review the correct panel layout and prevent moisture from reforming in these structural voids, consult the Ford Car Rust Repair Guide to access official restoration strategies for your vehicle.
Ford F-150 Car Rust Repair Factors
When performing car rust repairs on a light-duty truck, you must account for the vehicle's massive panel size and the complexity of removing structural cargo accessories and box liners.
For these popular trucks, prying off the plastic bedside moldings and tail lamps without damaging the internal wire harnesses or breaking single-use retaining clips requires exact factory documentation.
To navigate these heavy-duty procedures safely, consult the 2007-2013 Ford F-150 workshop manual, which provides step-by-step disassembly schematics and wiring routing to ensure a complete and long-lasting car rust restoration.
Toyota Car Rust Repair Guide
Toyota models often require careful inspection of rocker panels, lower door edges, and frame rails where gravel impacts can chip away factory undercoating and expose bare metal to moisture.
When addressing rust on these vehicles, carefully inspect the interior drainage holes along the bottom of the doors, as clogged drains trap water inside the doors and cause rapid corrosion.
Utilizing the Toyota Car Rust Repair Guide provides the exact drainage schematics and factory panel specs to guide your car rust repair process.
Toyota Camry Car Rust Repair Factors
The Camry sedan features tightly overlapping fender liners and bumper covers that require a specific disassembly sequence to access inner wheel house areas prone to car rust.
Forcing these plastic liners off without releasing the hidden expansion rivets will tear the mounting brackets, resulting in expensive panel replacement costs.
To do this repair safely, refer to the 1997-2002 Toyota Camry workshop manual for exact clip locations and step-by-step panel-extraction flowcharts to streamline your car rust repair project.
BMW Car Rust Repair Guide
BMW models feature highly precise body panel gaps, multi-stage aluminum-steel body joins, and sophisticated underbody aerodynamic shielding that must be dismantled to address hidden car rust.
The German engineering behind these structures requires absolute precision during trim removal, as forcing components off can damage fragile electronics and void factory corrosion warranties.
Consulting the BMW Car Rust Repair Guide ensures you understand these complex body layouts before starting any car rust grinding.
BMW 3 Series Car Rust Repair Factors
When tackling car rust around the rear wheel wells or trunk lid of a modern 3 Series sedan, be extremely careful around embedded parking sensors and antenna modules.
Unplugging these sensitive electronic components while the battery is active can trigger complex CAN-bus communication codes that require expensive dealer tools to clear.
The 2012-2018 BMW 3 Series F30 workshop manual is an indispensable resource, providing complete electrical connector locations, wiring routing, and diagnostic safety steps to protect your electronics during car rust repair.
Volkswagen Car Rust Repair Guide
Volkswagen vehicles are built with tight tolerances, heavy structural adhesive beads, and dense zinc-galvanized coatings that require specific grinding and preparation techniques to fix car rust.
Attempting to weld or grind galvanized sheet metal without proper ventilation and specialized abrasives can release hazardous zinc fumes and destroy the surrounding factory rust protection.
By reviewing the Volkswagen Car Rust Repair Guide, you can access specific technical advice for working on galvanized body panels during car rust repair.
Volkswagen Golf Car Rust Repair Factors
The Golf hatchback utilizes high-tension rear hatch gas struts, integrated wiper motor assemblies, and hidden license plate light wiring that overlap with common tailgate car rust areas.
Forcing the inner tailgate trim panels off without knowing the location of the metal spring tension clips will tear the plastic mounts clean off the panel.
Refer to the 2008-2013 Volkswagen Golf Mk6 workshop manual to safely release these high-tension clips and protect the sensitive cargo area wiring during your car rust restoration.
Peugeot Car Rust Repair Guide
European models like Peugeot feature highly distinctive structural designs, with classic and modern body styles requiring unique metal preservation methods to resolve car rust.
Whether you are working on a classic steel sedan or a modern galvanized hatchback, understanding the specific frame layout is critical to avoid compromising the vehicle's structural integrity.
Refer to the Peugeot Car Rust Repair Guide to ensure your corrosion restoration steps align with factory standards for car rust repair.
Peugeot 403 Car Rust Repair Factors
Restoring a classic Peugeot 403 presents unique challenges because it features thick, heavy-gauge non-galvanized steel body panels and a complex unitized chassis that is highly susceptible to deep structural car rust.
Unlike modern vehicles with bolt-on plastic panels, classic Peugeot body sections are structural and require precise metal fabrication, lead-loading, and manual tensioning to preserve.
By utilizing the historic 1955-1966 Peugeot 403 workshop manual, you can locate structural chassis reinforcing points, access original metal specifications, and execute an authentic, safe car rust restoration.
Choosing the Right Manual Resources for Car Rust Mitigation
Selecting high-quality documentation is the most important decision you will make when planning a car rust restoration project. While generic online forums and video tutorials can provide a broad overview of the grinding process, they cannot replace the technical precision and safety specifications of a factory service manual.
To help you choose the best resources for your body repair, review our guide on selecting appropriate repair manuals and compare the advantages of official factory documentation. For modern vehicles, interactive digital formats offer unmatched utility during a complex teardown, allowing you to zoom in on high-resolution body exploded views and wiring harness schematics.
If you want to optimize your research, navigating search features in digital manuals can show you how to locate structural specifications, while understanding upgrading to a full service manual is critical when dealing with complex multi-stage body joins.
Sourcing genuine manufacturer service files ensures you work with verified data, and checking the safety risks of unverified online manual sites shields your computer from malware.
Evaluating online manual subscription options helps you budget your project, and learning to find exact body specifications by VIN guarantees parts compatibility. Finally, buying VIN-specific repair manuals ensures your rust remediation steps align with your vehicle's factory build.
Secure Your Custom Car Rust Restoration Plan
Don't let expanding car rust compromise your vehicle's structural safety, ruin its resale value, or destroy its beautiful exterior finish.
By preparing with the correct high-temperature coatings, cleaning the steel down to bare metal, and following a factory-level disassembly sequence, you can achieve a flawless, long-lasting restoration of your panels.
To ensure you have access to the exact clip locations, panel layouts, and torque specifications needed for a professional finish, find the correct workshop repair manual before starting your car rust repair project.
Commonly Asked Questions About Car Rust Repair
What Is The Difference Between Surface Car Rust and Structural Car Rust?
Surface car rust consists of minor oxidation that affects only the outermost layer of paint and metal, causing bubbling without reducing panel thickness.
Structural car rust, however, penetrates deep into frame rails, suspension mounts, or pinch welds, creating flaking metal scale and physical holes that severely compromise vehicle safety. You can sand and fill surface issues, but structural car rust requires cutting and welding in new steel.
Can I Apply Body Filler Directly over Active Car Rust?
No, you must never apply polyester body filler directly over active car rust. Polyester filler is highly porous and will trap moisture against the steel, allowing the underlying oxidation to continue growing rapidly and ruin your repair.
You must grind the steel completely bare, apply a phosphoric chemical converter, and seal it with epoxy primer before applying filler to treat car rust.
Do Cold Temperatures Affect The Curing of Car Rust Paint and Primer?
Yes, cabin temperatures below 60 degrees Fahrenheit severely slow the curing time of epoxy primers, body fillers, and clear coats used in car rust remediation.
Applying these materials in cold, humid conditions can cause solvent trapping, which leads to paint bubbling, cracking, and a weak adhesive bond. Always work in a heated, dry garage to cure your car rust repair materials correctly.
Should I Wash My Vehicle Immediately after A Car Rust Repair?
No, you should avoid washing your vehicle or exposing the repaired panels to moisture for at least 72 hours after completing a car rust repair. Newly applied automotive paints, base coats, and clear coats need time to cure and fully cross-link to form a waterproof barrier.
Introducing water or car wash detergents too early can dull the glossy finish and compromise the car rust seal.
Does Road Salt Accelerate The Formation ff Car Rust?
Yes, road salt contains highly corrosive sodium chloride and calcium chloride compounds that drastically accelerate car rust. When salt mixes with water, it creates an electrolytic solution that speeds up the chemical oxidation of bare automotive steel.
Frequently rinsing your vehicle's undercarriage during winter and sealing paint chips is critical to prevent aggressive car rust.
Is It Safe to Weld Near Fuel Lines During A Structural Car Rust Repair?
No, welding or high-heat grinding near fuel tanks, vapor lines, or fuel lines during structural car rust repairs is highly dangerous. The extreme sparks and heat generated by welding can ignite volatile gasoline vapors, leading to catastrophic explosions or fires.
You must drain and remove the fuel system components, consult your manual's safety protocols, and clear the area before executing structural car rust work.