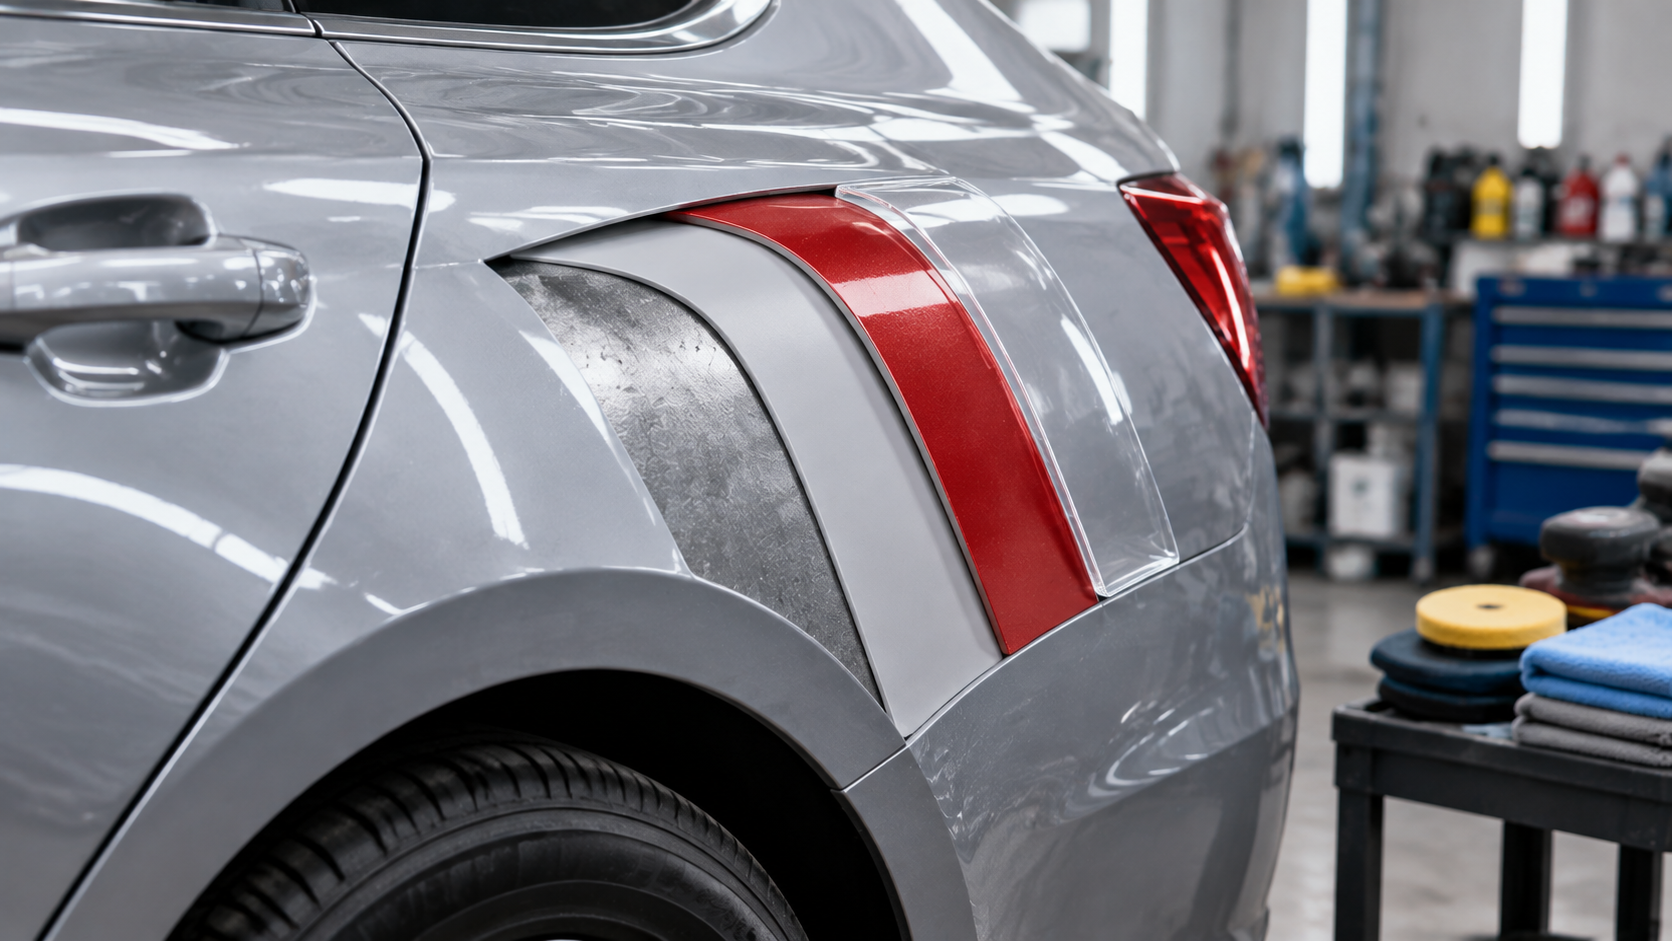
The completion of collision repairs or panel refinishing should be a moment of pride, but discovering a thick layer of chalky white sanding dust covering your dashboard and bodywork can quickly ruin the experience.
Many vehicle owners who attempt learning how to clean a car after body repair make the critical mistake of treating fresh paint like factory-cured enamel, using harsh aggressive rubbing compounds or automatic car washes that permanently gouge the delicate fresh clear coat.
Improper washing techniques after collision work can drag abrasive body filler grit across uncured paint panels, causing deep swirl marks, milky haze, and permanent finish degradation that requires expensive color sanding to fix. By utilizing a systematic, manual-guided approach to post-body-repair cleaning, you can safely remove fine body shop dust, overspray particles, and compound splatter while protecting your vehicle's fresh finish and delicate electronic sensors.
This comprehensive guide outlines the exact tools, chemical precautions, and step-by-step procedures required to restore your vehicle to immaculate showroom condition safely.
Before attempting any pressure washing or interior detailing, make sure to find the correct workshop repair manual for your vehicle's specific body panel seals and electronic sensor locations during your post-body-repair cleaning.
Key Takeaway
- Remove Abrasive Body Dust First: The primary objective during post-body-repair cleaning is neutralizing ultrafine filler dust and sanding particles before applying any wash mitt to prevent severe clear coat micro-marring.
- Respect Fresh Paint Curing Windows: Freshly applied auto body paint requires 30 to 90 days of gas-out time before applying silicones, synthetic sealants, or paste waxes during your post-body-repair cleaning regimen.
- Deep-Clean Interior Air Ducting: Abrasive fiberglass and body filler dust inevitably settles inside HVAC vents during collision repairs, making interior vacuuming and cabin air filter replacement essential for healthy post-body-repair cleaning.
- Protect Sensitive Parking Sensors: Always check factory manual schematics before high-pressure washing around newly painted bumpers to prevent forcing water into delicate ADAS parking sensors during post-body-repair cleaning.
- Utilize Touchless Washing Techniques: Initial rinse cycles should rely on touchless foam cannon soaking and low-pressure rinsing to safely float body shop contaminants off delicate fresh clear coat surfaces.
How to Clean a Car After Body Repair: Removing Dust and Overspray Safely
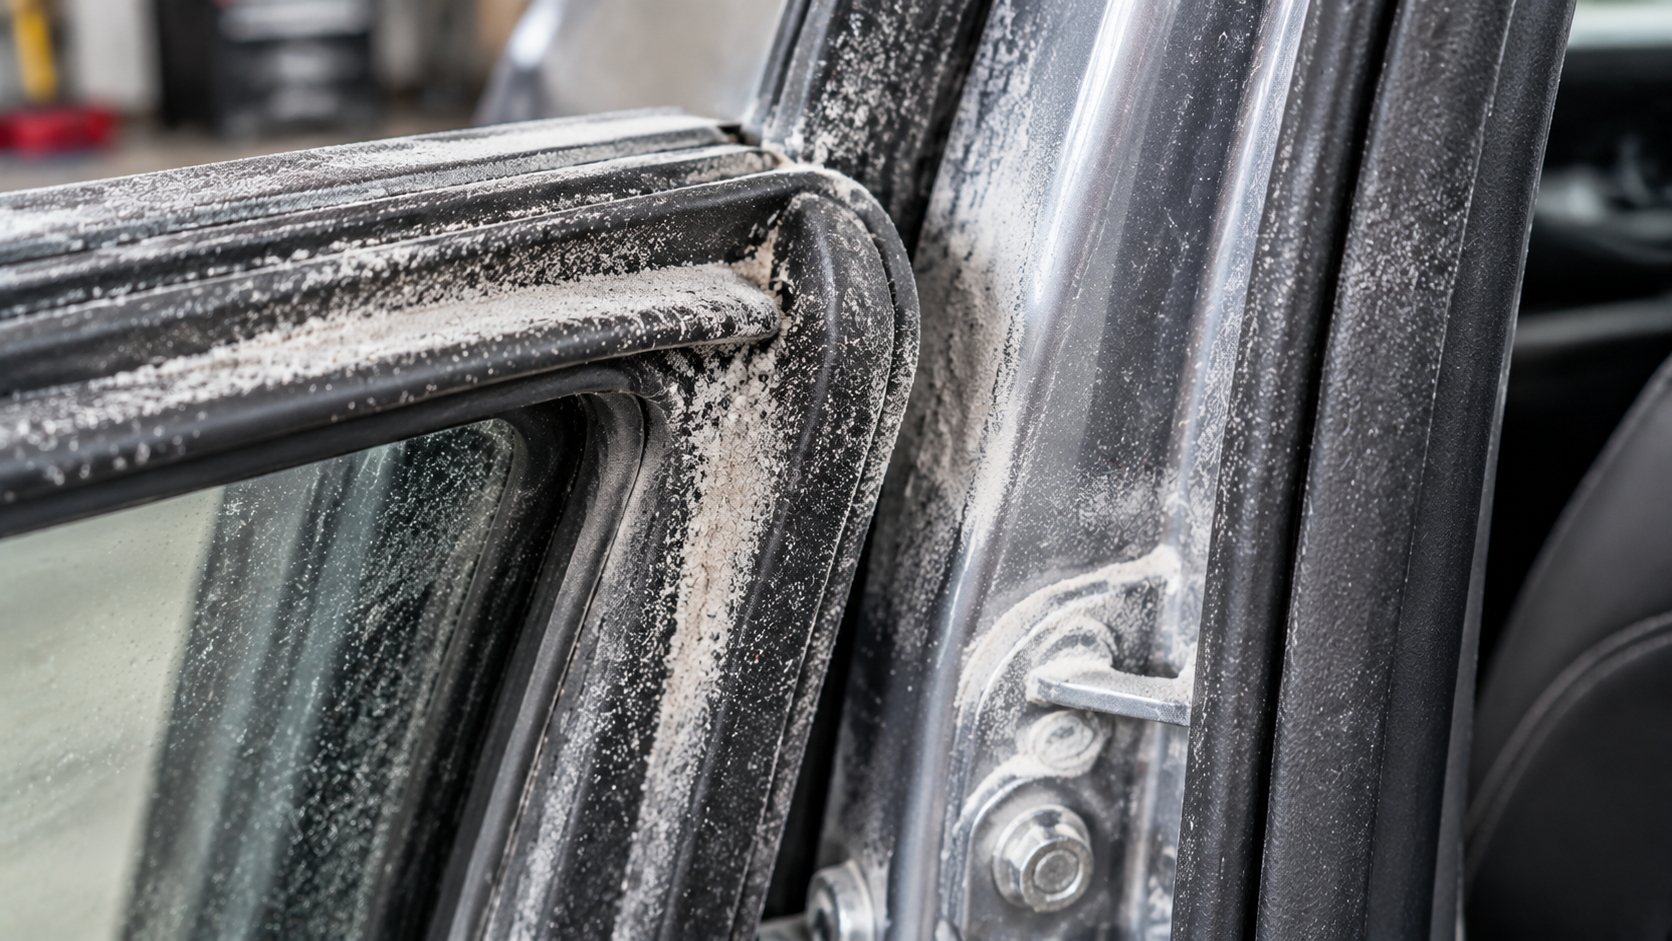
Executing a thorough post-body-repair cleaning requires understanding the unique types of contamination that settle on your vehicle during collision shop work. Unlike ordinary road grime, body shop residue consists of microscopic filler dust, dry primer powder, clear coat overspray mist, and baked-on buffing compound splatter.
Fine body shop dust is extremely hydrophilic and dry, meaning if you attempt to wipe it away with a dry micro fiber towel or a standard sponge, the abrasive particulate acts like sandpaper across your uncured clear coat.
Furthermore, body filler dust wedges itself into rubber window weatherstripping, door jamb channels, and engine bay cowls, where moisture can turn it into a sticky, cement-like paste that degrades factory rubber seals if left unaddressed during post-body-repair cleaning.
To help you diagnose the specific contaminants on your refinished panels and plan your detailing sequence, we have compiled a diagnostic matrix below. Each post-body-repair cleaning challenge targets a specific collision shop residue and outlines the recommended manual-guided remediation method.
Post-Body-Repair Cleaning Contaminant and Resolution Matrix
Contaminant Type | Source in Body Shop | Correct Post-Body-Repair Cleaning Method | Workshop Manual Reference Needed |
Fine Body Filler & Sanding Dust | Panel shaping, dry sanding, and feather-edging prep work | Touchless pre-soak with pH-neutral snow foam followed by low-pressure rinse before touching the panel | Cabin air filter housing location and HVAC ducting disassembly schematics |
Clear Coat Overspray Mist | Airborne paint atomization from adjacent spray booth work | Clay bar treatment using a clay lubricant or specialized overspray solvent after full paint curing | Body panel alignment tolerances and molding clip locations |
Dried Buffing Compound Splatter | Rotary polishing and pad sling around panel edges and moldings | Isopropyl alcohol dilution (70/30) and soft boar-hair detailing brush agitation | Trim piece removal sequence and emblem adhesive tape specs |
Interior Airborne Dust Settling | Unsealed doors or windows during shop maneuvering | HEPA vacuuming with brush attachment followed by steam extraction and cabin filter replacement | Dashboard trim clip layouts and glovebox disassembly flowcharts |
If you encounter heavy overspray or compound sling on newly painted panels, you must avoid aggressive mechanical scrubbing during your initial post-body-repair cleaning. Fresh clear coat takes several weeks to fully cross-link and harden, making it soft and susceptible to marring if scrubbed forcefully.
Referring to a manufacturer service manual ensures you know how to safely detach delicate trim strips, plastic emblems, and rubber weatherstripping to flush out hidden dust pockets without snapping fragile retention tabs.
Essential Preparation for Post-Body-Repair Cleaning
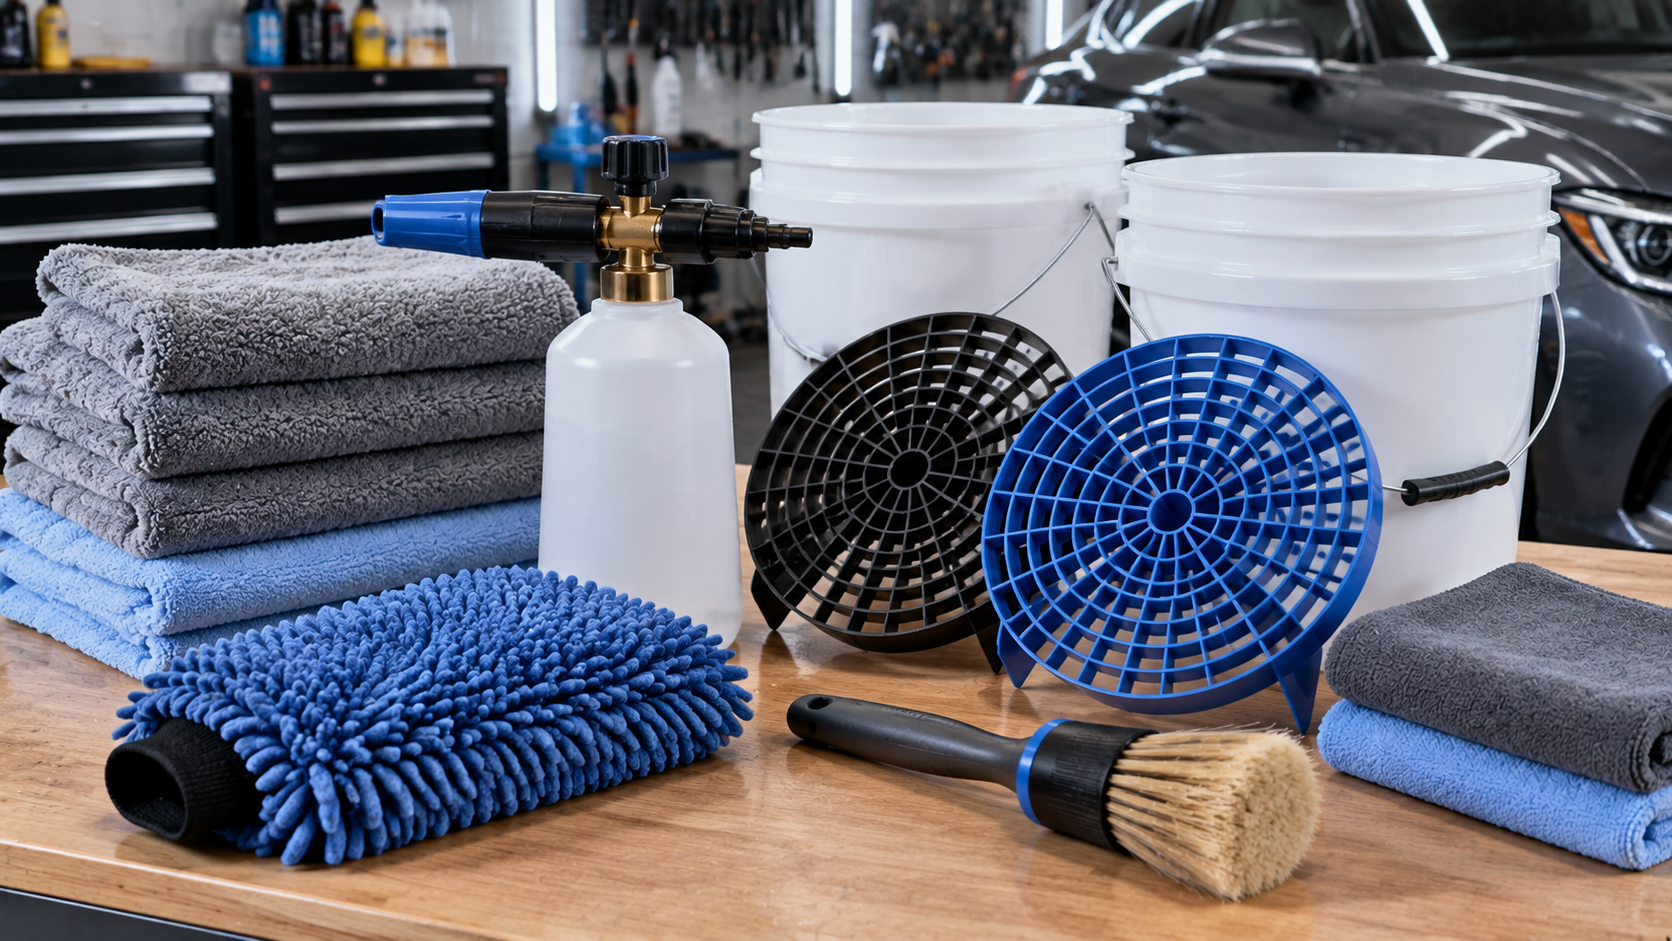
Achieving a flawless finish during post-body-repair cleaning requires gathering specialized detailing equipment and setting up a controlled, shade-protected workspace. You should never attempt post-body-repair cleaning under direct sunlight or on hot panel surfaces.
Direct heat causes water and cleaning chemicals to evaporate rapidly, leaving stubborn mineral spots and soap scum on fresh paint. Before beginning, move your vehicle into a shaded garage or well-ventilated carport and allow the bodywork to cool down completely to ambient room temperature.
To ensure you execute your post-body-repair cleaning safely without scratching delicate clear coat layers, gather the following essential tools before starting:
- Ultra-soft plush microfiber towels (minimum 400 GSM) to gently lift and trap residual body dust away from fresh clear coat surfaces.
- pH-neutral automotive snow foam and dual wash buckets equipped with grit guards to prevent floating filler dust from re-contaminating your wash mitt.
- A variable-pressure foam cannon attachment to apply a thick lubrication blanket that floats abrasive sanding dust off the bodywork without friction.
- A multi-stage HEPA shop vacuum and soft boar-hair detailing brushes to clean fine body dust out of dashboard vents, door jambs, and leather seams.
One of the most critical aspects of preparing for post-body-repair cleaning is understanding the exact curing timeline of your vehicle's new paint finish. Standard automotive refinish paints release volatile organic solvents through outgassing for 30 to 90 days after application.
Applying heavy paste waxes, ceramic coatings, or synthetic paint sealants too early during post-body-repair cleaning creates an airtight barrier that traps escaping solvents, resulting in dull paint haze, blistering, or clear coat delamination.
Consulting oem-vs-aftermarket-manuals-best-for-diy can help you verify factory-level paint curing guidelines and body assembly specifications before applying any detailing products.
Step-by-Step Exterior Washing and Decontamination Procedures
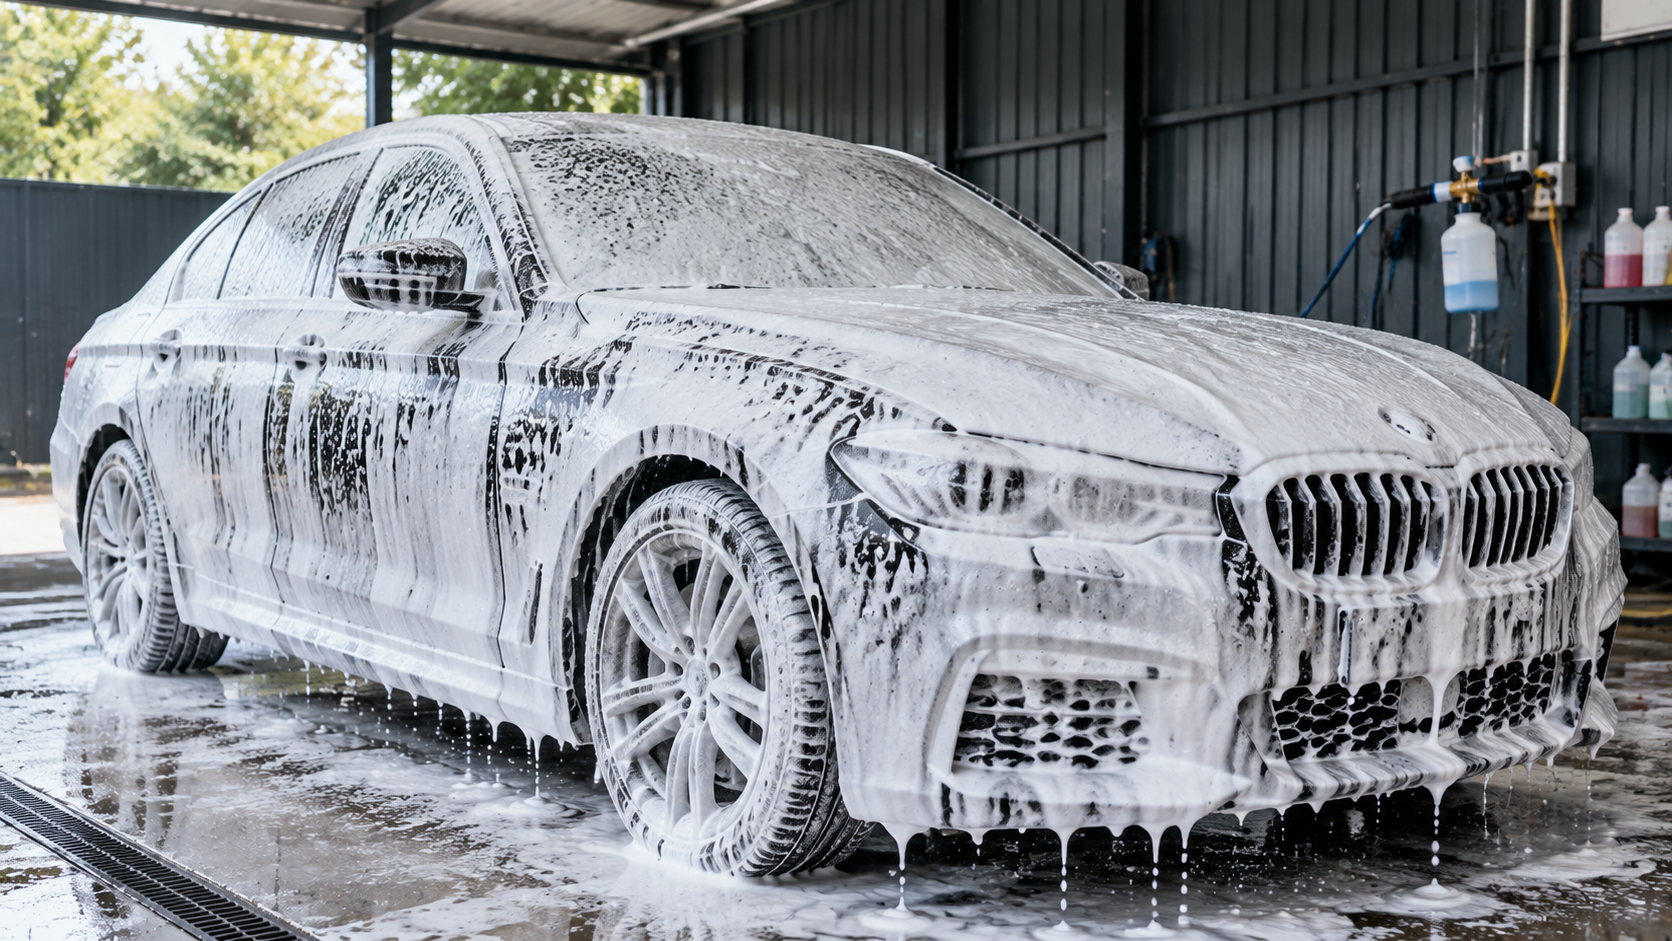
The first active stage of post-body-repair cleaning is a systematic exterior wash designed to float away abrasive body shop dust without contacting the paint directly. Begin by thoroughly rinsing the vehicle with a broad-fan spray nozzle from a distance of at least two feet, starting from the roof and working downward to wash heavy dust deposits off the glass and body panels.
Next, fill a foam cannon with pH-neutral car shampoo and blanket the entire vehicle in a thick layer of lather during post-body-repair cleaning. Allow the foam to dwell on the panels for three to five minutes; this lubricates the bodywork and encapsulates microscopic sanding dust so it slides off harmlessly when rinsed. Reviewing touchless-car-wash provides additional technical insight into how touchless pre-soaking protects delicate automotive finishes from wash-induced marring.
Once the pre-soak is completely rinsed off, proceed to the two-bucket contact wash method using ultra-soft microfiber wash mitts during post-body-repair cleaning. Fill one bucket with clean water and shampoo, and the second bucket with pure rinse water, placing grit guards at the bottom of both. Dip your mitt into the soapy water, gently glide it across one panel in straight linear lines, then submerge and agitate the mitt in the rinse bucket to drop trapped dirt before taking more soap.
If you notice stubborn overspray mist or dried compound sling along panel gaps during post-body-repair cleaning, review car-spray-paint to understand how paint atomization behaves and how gentle chemical solvents can safely dissolve overspray without dulling clear coat gloss.
After the contact wash is complete, perform a final thorough rinse using a gentle sheet of free-flowing water to carry away remaining soap bubbles during post-body-repair cleaning.
Dry the vehicle immediately using a high-volume leaf blower or dedicated car dryer to blow standing water out of window channels, emblem recesses, and door handles without touching the fresh paint.
For remaining water droplets on non-repaired glass or cured factory panels, gently pat the surface dry using a damp, plush microfiber drying towel, taking care never to drag towels across newly painted areas during post-body-repair cleaning.
Deep Cleaning Interior Cabin Space from Body Shop Dust
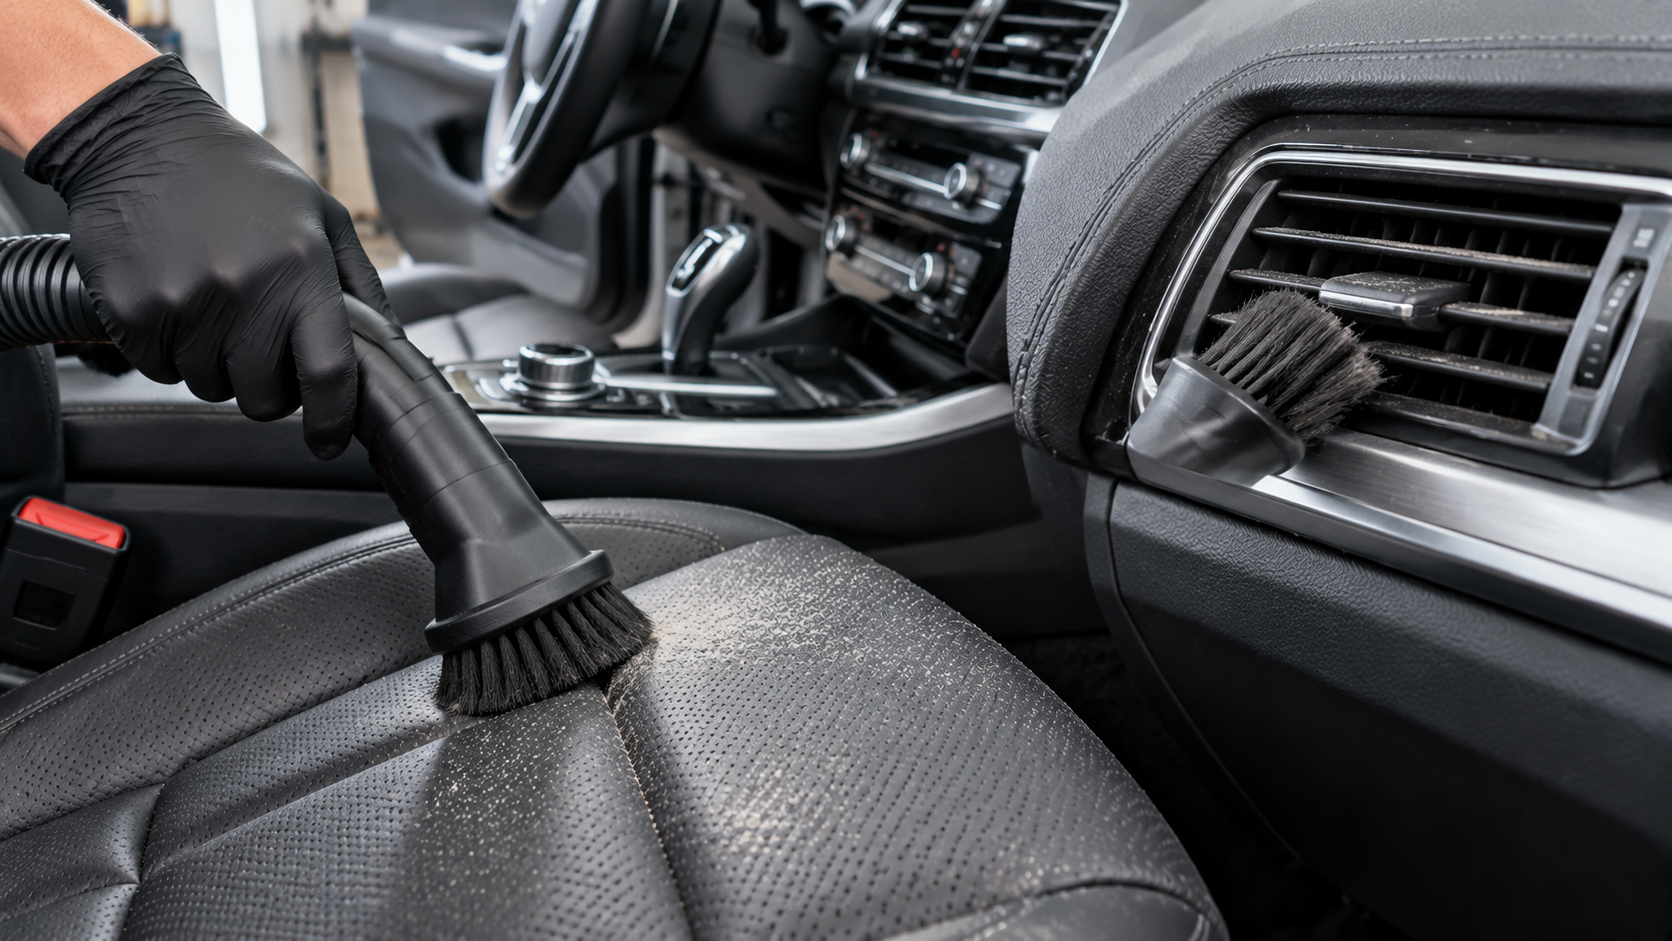
Collision repair processes inevitably allow fine, airborne body filler dust to penetrate the interior cabin, settling deep inside carpet fibers, leather perforations, and HVAC ducting. Executing a thorough interior post-body-repair cleaning is vital for both occupant health and interior preservation, as breathing in airborne fiberglass and resin dust can cause respiratory irritation.
Begin by opening all doors and tailgate hatches in a well-ventilated workspace, then remove all rubber floor mats, trunk liners, and loose personal items to expose the underlying carpet during post-body-repair cleaning.
Start the interior decontamination process by using compressed air at low pressure (20 to 30 PSI) to blow fine dust out of tight crevices, seat seams, and dashboard button gaps during post-body-repair cleaning. Direct the air stream toward the open doors while holding a HEPA vacuum nozzle nearby to catch airborne particles as they emerge.
Next, replace your vehicle's cabin air filter, which almost certainly trapped heavy loads of body shop dust while the vehicle was moved around the repair facility. Accessing the filter housing often requires removing the glovebox assembly, and referring to how-to-read-exploded-view-manual-diagrams will show you the exact location of plastic retention pins and damper cords, allowing you to service the filter without snapping plastic mounts.
After blowing out crevices and replacing the air filter, thoroughly vacuum all carpeting, floor mats, and cloth upholstery using a vacuum equipped with a brush tool during post-body-repair cleaning. For leather or vinyl seating, wipe down the surfaces using a damp microfiber cloth lightly misted with a pH-neutral interior cleaner.
If you need to inspect interior electrical switches or window controls that may have dust jammed in their contacts during post-body-repair cleaning, consulting diagnose-power-windows-with-wiring-schematics alongside decoding-factory-wiring-color-codes will help you safely disassemble door switch bezels without damaging wiring harnesses or blowing fuses.
Cleaning the Engine Bay and Undercarriage After Body Work
The engine compartment and undercarriage frequently accumulate heavy layers of white sanding dust, overspray mist, and masking tape adhesive residue during post-body-repair cleaning. Ignoring the engine bay allows body filler dust to mix with engine oil film and heat, creating a grime layer that can degrade rubber serpentine belts and insulate electrical connectors.
Before washing the engine bay during post-body-repair cleaning, cover the alternator, exposed air intake, fuse box, and aftermarket electronic sensors with plastic wrap to shield them from direct water spray.
Begin engine bay post-body-repair cleaning by applying a gentle, water-based degreaser to the plastic engine covers, inner fender wells, and strut towers. Use a soft boar-hair brush to agitate the degreaser, working it into tight corners where sanding dust clings to wiring looms and hose clamps.
Rinse the area using a low-pressure spray setting, taking care never to point high-pressure water streams directly at sealed electrical connectors or computer modules. To ensure you do not spray water onto sensitive high-voltage components on hybrid or electric vehicles during post-body-repair cleaning, consult safe-hybrid-high-voltage-disconnect-steps to identify high-voltage orange cables and safety disconnect procedures before detailing under the hood.
For undercarriage post-body-repair cleaning, use a low-profile underbody pressure washer attachment to flush out metal body dust and road salt trapped inside frame rails and suspension control arms.
If you need to raise the vehicle on jack stands to gain better access for underbody pressure washing during post-body-repair cleaning, review safe-jacking-lifting-points-in-your-manual to identify factory-approved jacking points and avoid crushing freshly repaired rocker panels or floor pans.
DIY Post-Body-Repair Cleaning vs. Professional Shop Detailing
When deciding whether to execute post-body-repair cleaning yourself or hire a professional automotive detailing shop, you must evaluate costs, chemical safety, and equipment requirements. Professional detailing facilities possess specialized hot-water extractors, paint depth gauges, and dedicated overspray solvents, but they typically charge between $250 and $600 for a thorough post-collision decontamination.
Performing post-body-repair cleaning as a DIY project using high-grade shampoos and microfiber towels costs approximately $40 to $80 in supplies, but requires careful attention to fresh paint curing rules to avoid damaging the finish.
To help you choose the best approach for your vehicle's restoration, we have compared the costs, risks, and requirements of different post-body-repair cleaning methods in the table below.
Post-Body-Repair Cleaning DIY vs. Professional Shop Comparison
Detailing Factor | DIY Post-Body-Repair Cleaning (With Manual) | DIY Cleaning (Without Manual Guidance) | Professional Detail Shop |
Average Cost | $40 - $80 (detailing chemicals & towels) | $40 - $80 (plus risk of paint repair costs) | $250 - $600 (full interior & exterior service) |
Time Required | 3 - 5 hours (systematic decontamination) | 4 - 8 hours (struggling with stubborn dust) | 1 - 2 days (vehicle drop-off required) |
Risk of Clear Coat Marring | Low: Safe snow foam pre-soak and two-bucket touchless wash method | High: High risk of grinding body dust into soft fresh clear coat | None: Professional shop uses paint depth gauges and soft foam pads |
Interior HVAC Cleanliness | High: Complete cabin filter replacement and manual duct cleaning | Low: Surface vacuuming only; dust remains inside HVAC vents | High: Commercial steam extraction and ozone odor treatment |
ADAS & Sensor Safety | High: Factory manual schematics guide washing around parking sensors | Medium: Risk of high-pressure water intrusion into bumper sensors | High: Technicians are trained on electronic sensor water protection |
As the comparison highlights, utilizing a workshop service manual during DIY post-body-repair cleaning ensures you protect both fresh cosmetic paint and delicate onboard electronics. Having access to vehicle-specific disassembly flowcharts allows you to remove trim strips, clean hidden channels, and replace filters with total professional confidence.
Ford Post-Body-Repair Cleaning Guide
Ford utility vehicles and trucks often accumulate heavy body shop dust inside their spacious interior cabins and expansive aluminum body panel seams during post-body-repair cleaning. In popular truck models, fine sanding dust settles heavily in the deep grooves of the bed liner, tailgate hinges, and overhead cab light seals, requiring careful low-pressure flushing.
Ford F-150 Post-Body-Repair Cleaning Factors
When performing post-body-repair cleaning on a modern aluminum-body F-150, you must take extra precautions around the integrated tailgate step, power-sliding rear window track, and front bumper radar modules.
Body filler dust can jam the sliding track mechanism of the rear window, while high-pressure water can compromise the seals on forward-facing ADAS camera housings behind the grille.
To safely clean these specialized truck components during post-body-repair cleaning without causing electrical faults or scratching aluminum bodywork, consult the 2007-2013 Ford F-150 workshop manual. This manual details the exact locations of body electrical harness connectors and provides instructions for removing front grille trim safely.
Toyota Post-Body-Repair Cleaning Guide
Toyota passenger vehicles feature tight body panel gaps and delicate interior console plastics that require gentle handling during post-body-repair cleaning. Fine sanding dust frequently lodges in the intricate mesh of Toyota front grilles and the rubber window scraper seals along sedan doors, where aggressive wiping can cause micro-scratches.
Toyota Camry Post-Body-Repair Cleaning Factors
Executing a thorough post-body-repair cleaning on a Camry sedan requires special attention to the front bumper sonar sensors and the HVAC cabin intake cowl beneath the windshield wipers. Body shop dust trapped in the cowl area will immediately blow into the passenger compartment as soon as the climate control fan is turned on.
To safely remove the windshield wiper arms and plastic cowl clips to clean out accumulated filler dust during post-body-repair cleaning, refer to the 1997-2002 Toyota Camry workshop manual. This factory resource outlines the exact clip release mechanisms and wiper arm torque specs, ensuring your post-body-repair cleaning restores original factory functionality cleanly.
BMW Post-Body-Repair Cleaning Guide
BMW luxury sedans and coupes feature highly integrated electronic sensor networks, complex multi-piece door seals, and soft-touch interior trim that demand extreme care during post-body-repair cleaning. Body shop dust readily settles inside delicate AC vent louvers, leather seat perforations, and the rubber channels of the sunroof cassette assembly.
BMW 3 Series Post-Body-Repair Cleaning Factors
When conducting post-body-repair cleaning on a 3 Series sedan, you must be extremely cautious around the sensitive ultrasonic parking sensors integrated into the front and rear bumper covers. Using high-pressure water wands too close to newly painted bumper covers can force water past sensor O-rings, triggering park-distance control fault codes.
The 2012-2018 BMW 3 Series F30 workshop manual provides crucial technical schematics for the bumper electrical harnesses and details the safe cleaning protocol for sensor bezels during post-body-repair cleaning. This manual also shows how to inspect and clear the four sunroof drain tubes so residual body shop dust does not cause water leaks into the cabin.
Volkswagen Post-Body-Repair Cleaning Guide
Volkswagen hatchbacks and sedans rely on tight German panel gaps, thick rubber weatherstripping, and velvety pillar trim fabrics that readily trap fine sanding dust during post-body-repair cleaning. If sanding dust is allowed to remain in the window guide channels, operating the power windows will drag abrasive grit across the glass, causing deep vertical scratches.
Volkswagen Golf Post-Body-Repair Cleaning Factors
The Golf hatchback requires specific attention during post-body-repair cleaning around the rear hatch glass seal, license plate light housings, and under-hood cowl drainage trays. Fine body filler dust gathers behind the hatch release emblem and inside the door hinge pillars, where it can absorb atmospheric moisture and promote premature corrosion.
To perform a safe disassembly of hatch trim panels or clean out window guide channels during post-body-repair cleaning, utilize the 2008-2013 Volkswagen Golf Mk6 workshop manual. This factory resource provides step-by-step instructions for removing window weatherstripping and door panel covers without breaking delicate internal retention clips.
Peugeot Post-Body-Repair Cleaning Guide
European vehicles like Peugeot feature unique styling contours, specialized trim fasteners, and distinctive interior fabrics that require careful attention during post-body-repair cleaning. Whether detailing a modern hatchback or a classic vintage model, using gentle cleaning chemicals is essential to preserve delicate trim materials.
Peugeot 403 Post-Body-Repair Cleaning Factors
Restoring a classic Peugeot 403 after body repairs requires specialized post-body-repair cleaning techniques to protect original single-stage paint, chrome brightwork, and fabric interior upholstery. Unlike modern clear coat finishes, classic single-stage paint is softer and easily damaged by modern solvent cleaners or aggressive pressure washing.
The historic 1955-1966 Peugeot 403 workshop manual details the exact body trim fastening methods and offers guidance on caring for vintage metal moldings during post-body-repair cleaning. Utilizing this manual ensures you preserve the authentic period-correct finish of your Peugeot 403 without scratching rare chrome bezels or damaging original door seals.
Choosing the Right Manual Resources for Post-Body-Repair Cleaning
Selecting authoritative documentation is essential when planning a comprehensive post-body-repair cleaning project. While basic car washing videos provide generic advice on soap application, they cannot provide the precise vehicle-specific torque values, sensor locations, and clip release angles required for a safe teardown.
A dedicated workshop manual provides verified technical procedures that prevent accidental damage to newly painted panels and delicate interior trim. To help you evaluate documentation options for your vehicle, you can review how-to-choose-the-right-workshop-repair-manual and compare the advantages of OEM service manuals.
For modern computer-equipped vehicles, interactive PDF manuals offer unmatched convenience during post-body-repair cleaning, allowing you to instantly search for cabin filter replacement and bumper sensor wiring schematics. If you want to optimize your technical research workflow, consulting how-to-navigate-interactive-pdf-workshop-manuals can show you how to locate body detailing and trim sections quickly.
Understanding when-to-upgrade-to-a-factory-service-manual is especially critical when dealing with advanced safety camera systems, and knowing where-to-download-genuine-oem-workshop-manuals ensures you work with verified factory data.
For those managing complex restorations or vinyl wraps after body work, reviewing guides like how-much-to-wrap-a-car, car-maintenance-tips-for-summer, or unique model guides like peugeot-508-rxh-common-problems can provide valuable overall context during post-body-repair cleaning.
Secure Your Step-by-Step Detailing Plan
Do not let abrasive body shop dust or improper washing techniques ruin your vehicle's fresh collision repair finish. By using touchless snow foam pre-soaks, replacing your cabin air filter, and respecting paint curing windows, you can achieve a flawless showroom finish safely.
To ensure you have access to exact body clip locations, wiring schematics, and sensor safety protocols for your vehicle, make sure to find your vehicle's correct workshop repair manual before starting your post-body-repair cleaning.
Commonly Asked Questions About Post-Body-Repair Cleaning
How Soon After Body Repair Can I Wash My Car?
You can perform a gentle, hand wash during post-body-repair cleaning immediately after picking up your vehicle, provided you use cool water, pH-neutral car shampoo, and soft microfiber towels. However, you must avoid commercial automated car washes, high-pressure spray wands held closer than two feet, or aggressive scrubbing for at least 30 days.
Fresh body shop paint requires time to complete its chemical curing process, and high pressure or stiff brushes can dull or scratch the soft clear coat during early post-body-repair cleaning.
Can I Apply Wax or Ceramic Coating Immediately During Post-Body-Repair Cleaning?
No, you must not apply paste wax, synthetic paint sealants, or ceramic coatings immediately during post-body-repair cleaning on freshly refinished panels. Fresh automotive paint releases volatile solvents through an outgassing process that takes 30 to 90 days depending on environmental temperatures.
Applying a protective wax or ceramic barrier too early traps these solvents beneath the shell, which can cause paint hazing, blistering, or clear coat loss during post-body-repair cleaning.
How Do I Safely Remove Fine Body Filler Dust from My Car's Interior?
To safely remove fine body filler dust from your interior during post-body-repair cleaning, start by using low-pressure compressed air while holding a HEPA-filtered vacuum nozzle nearby to catch airborne particles.
Vacuum all carpeting and upholstery using a soft brush attachment, then wipe down hard plastic and leather surfaces with a damp microfiber towel lightly misted with a pH-neutral interior cleaner. Always replace the cabin air filter during interior post-body-repair cleaning to prevent residual body dust from recirculating through your HVAC vents.
What Is The Safest Way to Clean Clear Coat Overspray During Post-Body-Repair Cleaning?
The safest way to remove clear coat overspray during post-body-repair cleaning is using an ultra-fine detailing clay bar misted with plenty of clay lubricant, but only after the new paint has fully cured for at least 30 days.
For uncured overspray or heavy overspray mist on glass, use a specialized solvent wipe or isopropyl alcohol dilution applied gently with a soft microfiber towel. Never use lacquer thinner, acetone, or razor blades on painted panels during post-body-repair cleaning, as these will permanently ruin the finish.
How Do I Clean Dried Buffing Compound Out of Body Panel Gaps During Post-Body-Repair Cleaning?
To clean dried buffing compound sling out of panel gaps and rubber moldings during post-body-repair cleaning, spray a 70/30 dilution of water and isopropyl alcohol directly onto a soft boar-hair detailing brush.
Gently agitate the compound residue to dissolve the dried wax binders, then wipe the area clean with a damp microfiber towel. Avoid picking at compound in panel seams with metal tools during post-body-repair cleaning, as this will chip fresh paint edges.
Is It Safe to Pressure Wash Around Newly Painted Bumpers During Post-Body-Repair Cleaning?
Yes, it is safe to pressure wash newly painted bumpers during post-body-repair cleaning if you keep the pressure below 1500 PSI, use a wide 40-degree fan nozzle, and maintain a distance of at least 18 to 24 inches from the surface.
Holding a high-pressure nozzle too close can lift uncured clear coat edges or force water past internal O-ring seals into parking sensors and ADAS radar modules. Always consult your factory manual's sensor schematics before high-pressure rinsing around bumper covers during post-body-repair cleaning.