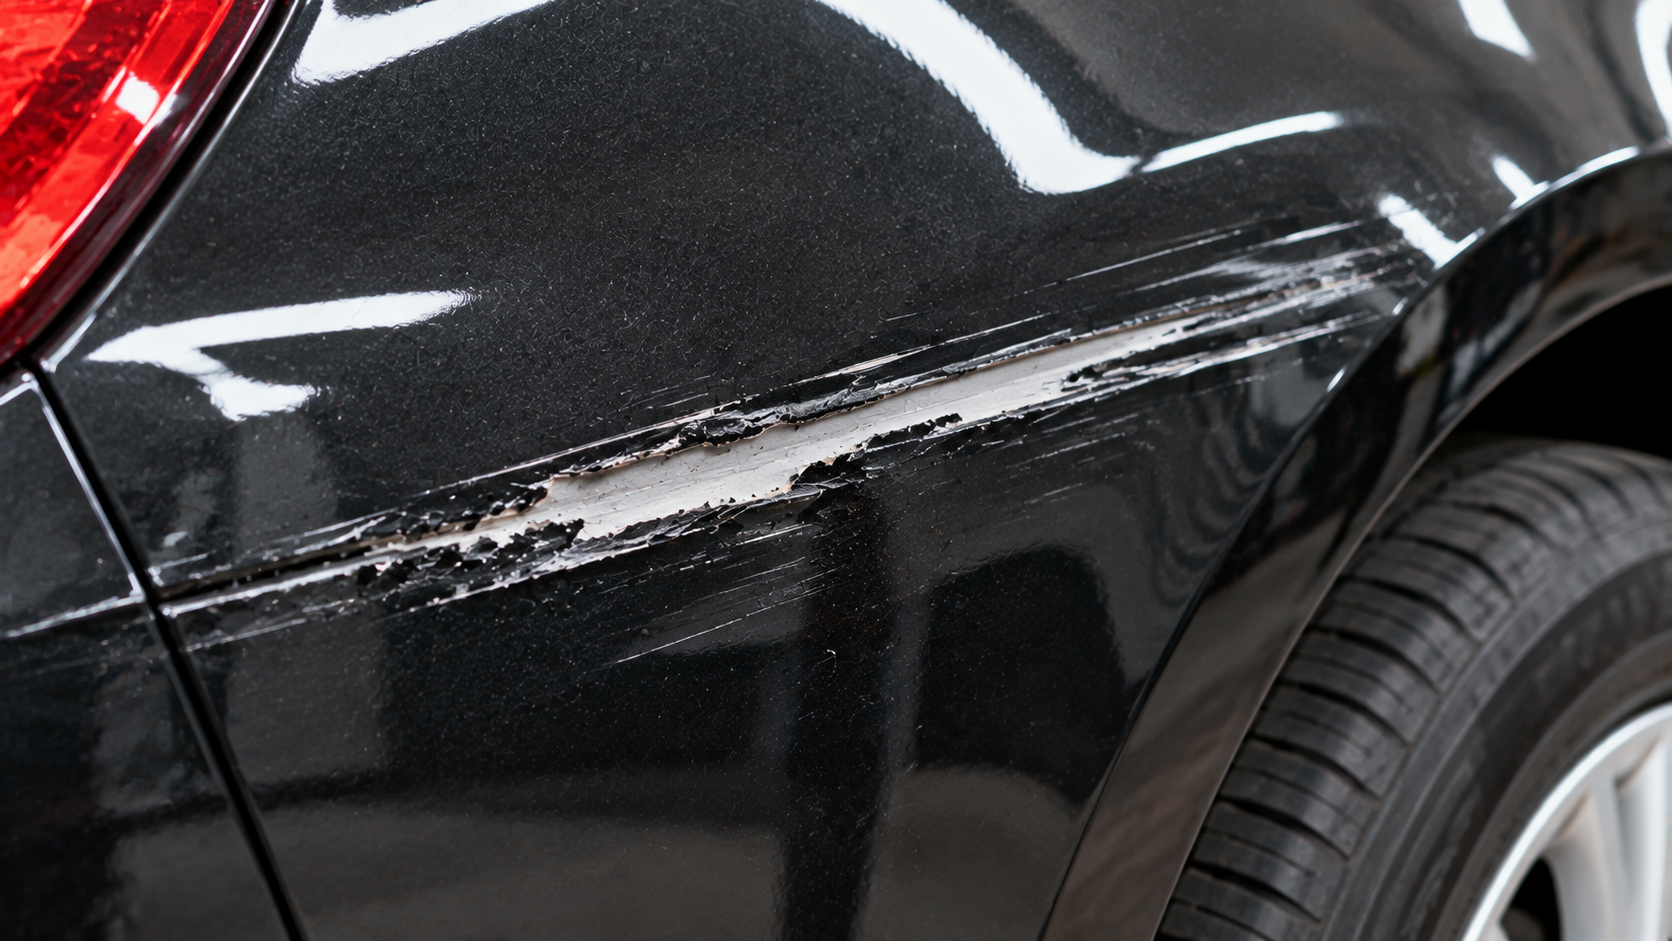
Discovering a deep, unsightly exterior car scrape on your vehicle's doors, bumpers, or fenders can be incredibly frustrating and ruin your vehicle's look.
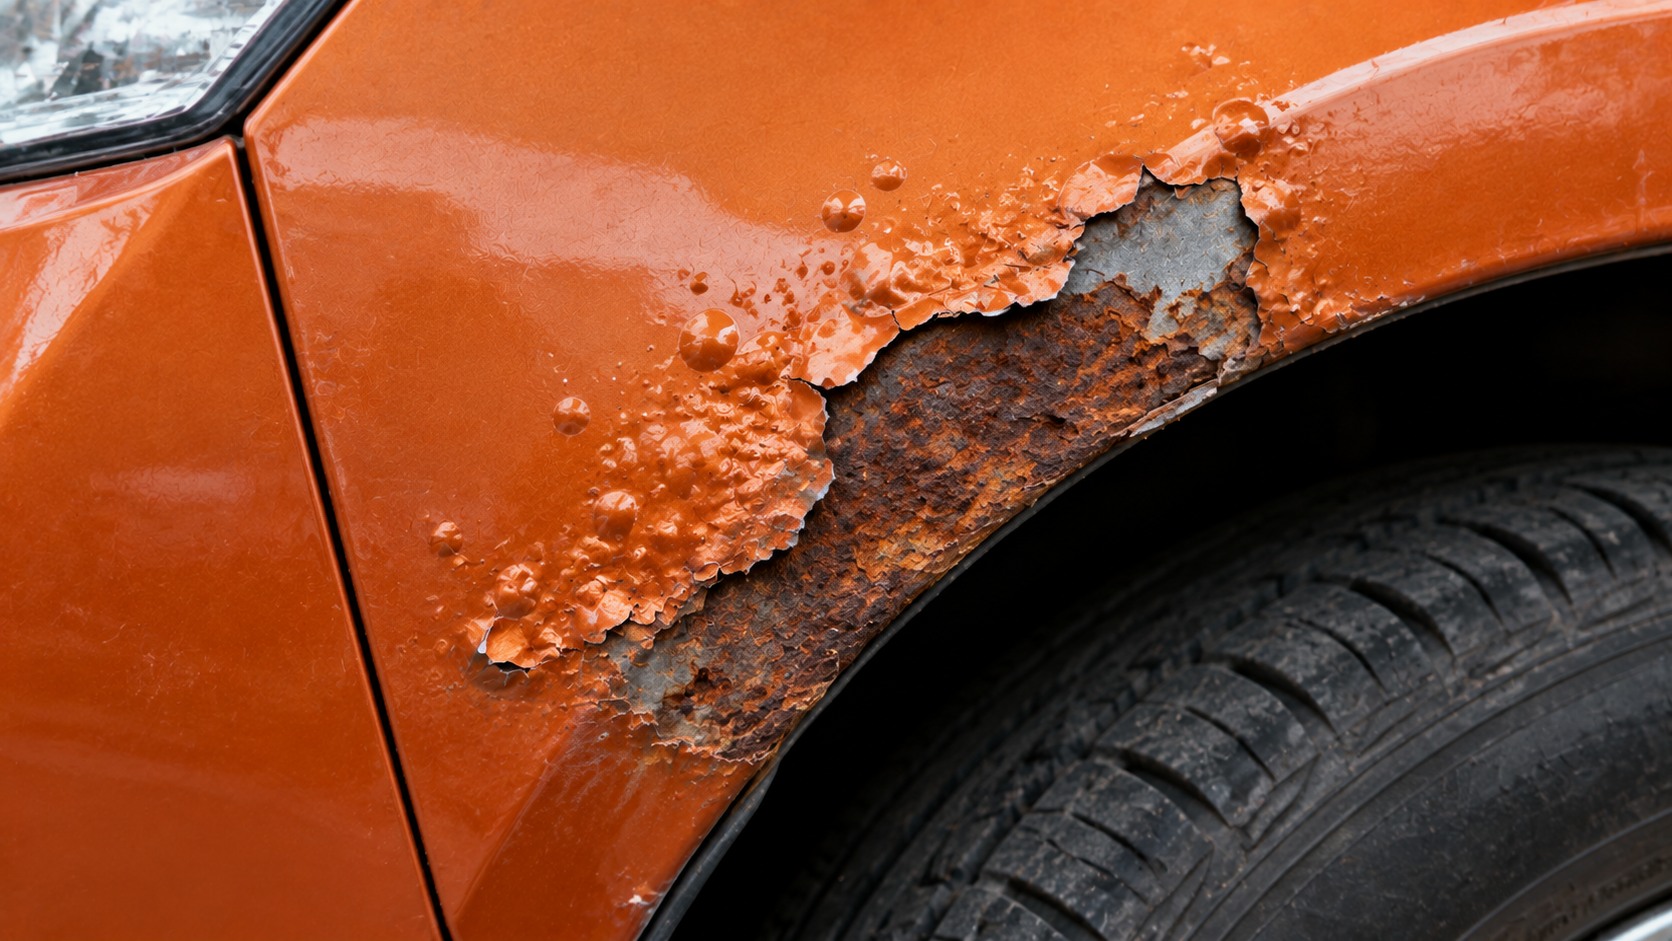
If left raw and exposed to the elements, a severe exterior car scrape can quickly lead to sheet metal corrosion, causing paint flaking and costly structural damage that compromises your car's resale value and aesthetic integrity.
Fortunately, NXT Motors provides a systematic, manual-guided restoration methodology that teaches you how to repair exterior paint scrapes safely, ensuring a flawless finish without paying high professional body shop labor rates.
This comprehensive guide outlines the exact preparation, sanding, paint application, and trim-disassembly procedures needed to eliminate any exterior car scrape and restore your car's original shine.
Before removing trim, sanding, or applying paint to treat an exterior car scrape, find the correct workshop repair manual for your vehicle's panel clip layouts and molding fasteners.
Key Takeaway
- Assess the Damage Depth First: Before starting any repair, determine whether the exterior car scrape is limited to the clear coat, base coat, or primer to choose the right repair materials.
- Prep the Surface Thoroughly: Clean the area around the exterior car scrape with wax and grease remover to prevent debris from being ground into the raw sheet metal.
- Apply Paint in Thin Overlapping Coats: When learning how to repair exterior paint scrapes on a car, always spray primer, color coat, and clear coat in light layers to avoid drips and paint runs.
- Use Factory Paint Codes for Perfect Matching: Find your vehicle's paint code on the door jamb or in the engine bay to ensure your paint correction matches the original color.
- Consult Workshop Manuals for Disassembly: Utilize a factory service manual's diagrams to safely remove adjacent trim, door handles, or moldings when repairing a deep exterior car scrape.
How to Repair Exterior Paint Scrapes on a Car: Assessing Damage Depth
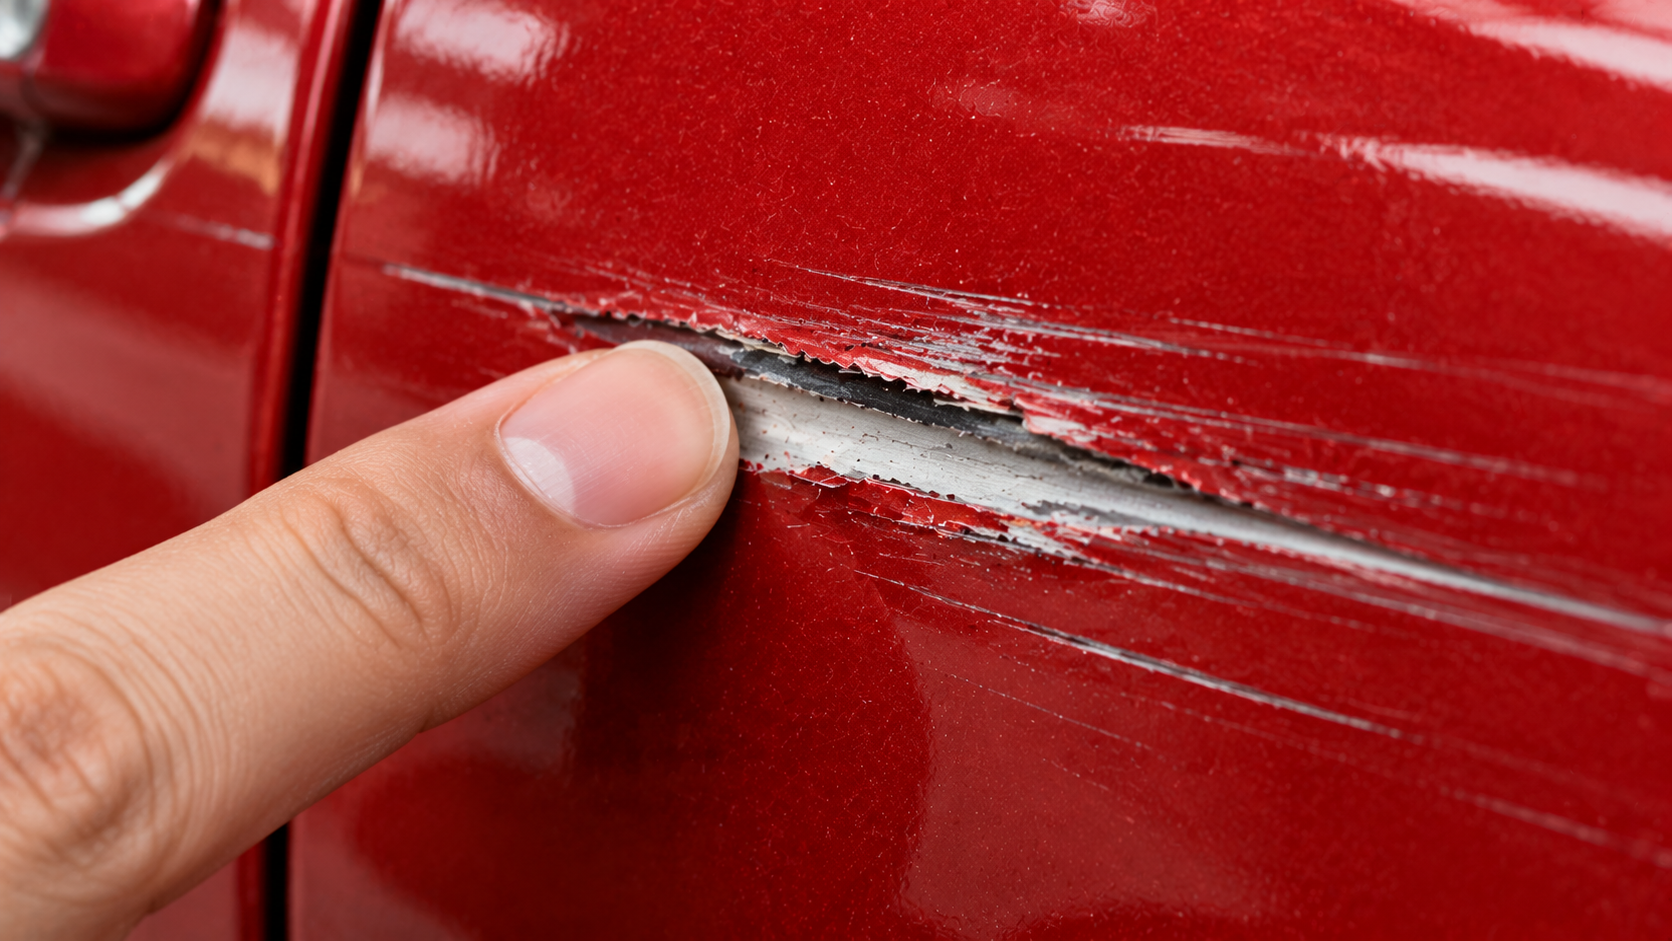
The first step in understanding how to repair exterior paint scrapes on a car is to conduct a thorough visual and physical inspection to identify the scratch's depth. Automotive paint consists of multiple layers sprayed over the raw sheet metal: the primer coat, which protects the steel and provides an adhesive base; the base coat, which provides color; and the clear coat, which provides gloss and UV protection.
If you run your fingernail gently across the exterior car scrape and it does not catch, the scratch is confined to the clear coat and can be resolved through light wet sanding, compounding, and polishing.
However, if your fingernail catches in the groove or you see a different color or raw metal, the scrape has penetrated the base coat or primer and requires a multi-stage refinishing process with touch-up paint.
To help you identify the severity of the damage and determine the best repair method, we compiled a classification matrix below. Each level of an exterior car scrape corresponds to a specific layer of automotive finish and requires a tailored, manual-guided remediation process.
Damage Level Classification for Exterior Car Scrape Repairs
Damage Level | Affected Paint Layers | Visual Indicators | Recommended Repair Method | Manual Reference Needed |
Surface Scratches | Clear coat only | Scratch disappears when wet; no color change; fingernail does not catch | Wet sanding with 3000-grit paper, compounding, and dual-action polishing | Clear coat thickness tolerances and factory buffing guidelines |
Color Scrapes | Clear coat and base coat | Distinct color visible inside scratch; fingernail catches; raw metal not exposed | Clean area, apply color-matched touch-up paint, wet sand flat, and apply clear coat | Factory paint code locations and drying time specifications |
Deep Gouges | Clear coat, base coat, and primer | Raw steel or grey composite panel visible; high risk of localized rust formation | Sand down to bare metal, apply rust inhibitor, spray primer, color coat, and clear coat | Body panel removal sequences and adjacent trim clip layouts |
Chassis / Underbody Scrapes | Undercoat and metal panels | Scratched paint on rocker panels or frame rails; exposed steel flaking | Scraping, rust conversion, heavy-duty underbody sealing, and paint touch-up | Jacking points, lift configurations, and underbody shield fasteners |
If you misclassify the depth of your exterior car scrape, your repair attempts may be ineffective or cosmetically obvious. Buffing out a deep gouge that has penetrated the primer will only thin the surrounding clear coat, leaving the panel vulnerable to weathering and corrosion.
Using vehicle-specific documentation lets you confirm the exact finish thickness and chemical properties of your car's paint, so you can repair safely without sanding through the delicate clear coat around the scrape.
Essential Tools and Materials for Treating an Exterior Car Scrape
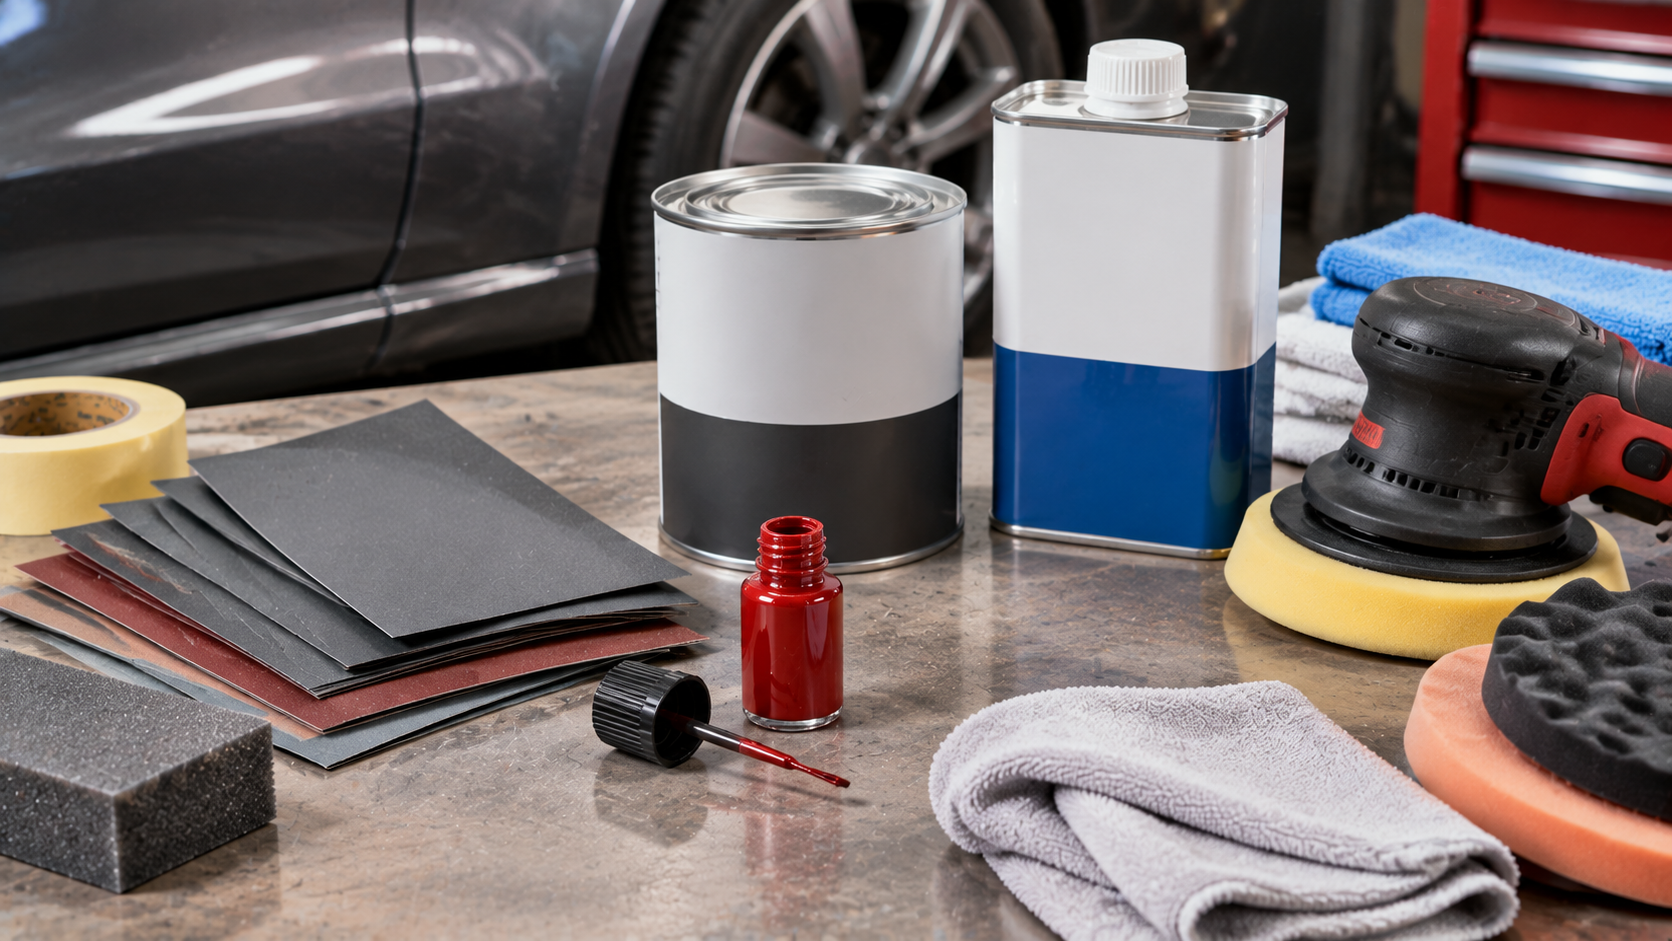
A high-quality repair on an exterior car scrape requires the right tools and refinishing materials before you begin. Cheap materials or the wrong sanding grit will create a mismatched texture and visible paint lines that ruin your car's aesthetics.
Your refinishing kit should include chemical grease removers, localized touch-up paint matching your factory paint code, high-build sandable primer, and a selection of wet-dry sandpaper ranging from 1000 to 3000 grit.
Additionally, using professional detailing equipment like a dual-action buffer and microfiber pads is essential to blend the new clear coat seamlessly into the surrounding panels around the exterior car scrape.
To ensure you do not damage your vehicle's body panels during your exterior car scrape repair, gather the following essential tools before starting:
- Plastic non-marring trim removal wedges to safely detach adjacent door handles, badging, or molding panels without scraping surrounding paint.
- Wet-dry sandpaper (1500, 2000, and 3000 grit) to level touch-up paint and smooth out the edges of the exterior car scrape.
- Dual-action orbital buffer and compound to safely polish out sanding scratches and restore gloss to the repaired clear coat layer.
- Color-matched touch-up paint pen or aerosol matching your vehicle's specific OEM paint code for an invisible finish correction.
Before applying any paint to an exterior car scrape, verify the chemical compatibility of your primer, base coat, and clear coat. Mixing enamel and lacquer-based paints can cause a chemical reaction that makes the finish wrinkle, bubble, or lift away from the panel.
To ensure you apply your body materials in the correct sequence and thickness, consult your factory service manual's body repair section. Experienced DIYers review OEM-vs-aftermarket-manuals-best-for-diy to guarantee they have the exact factory specifications for paint curing times and material layer thickness when treating an exterior car scrape.
Step-by-Step Restoration Process for an Exterior Car Scrape
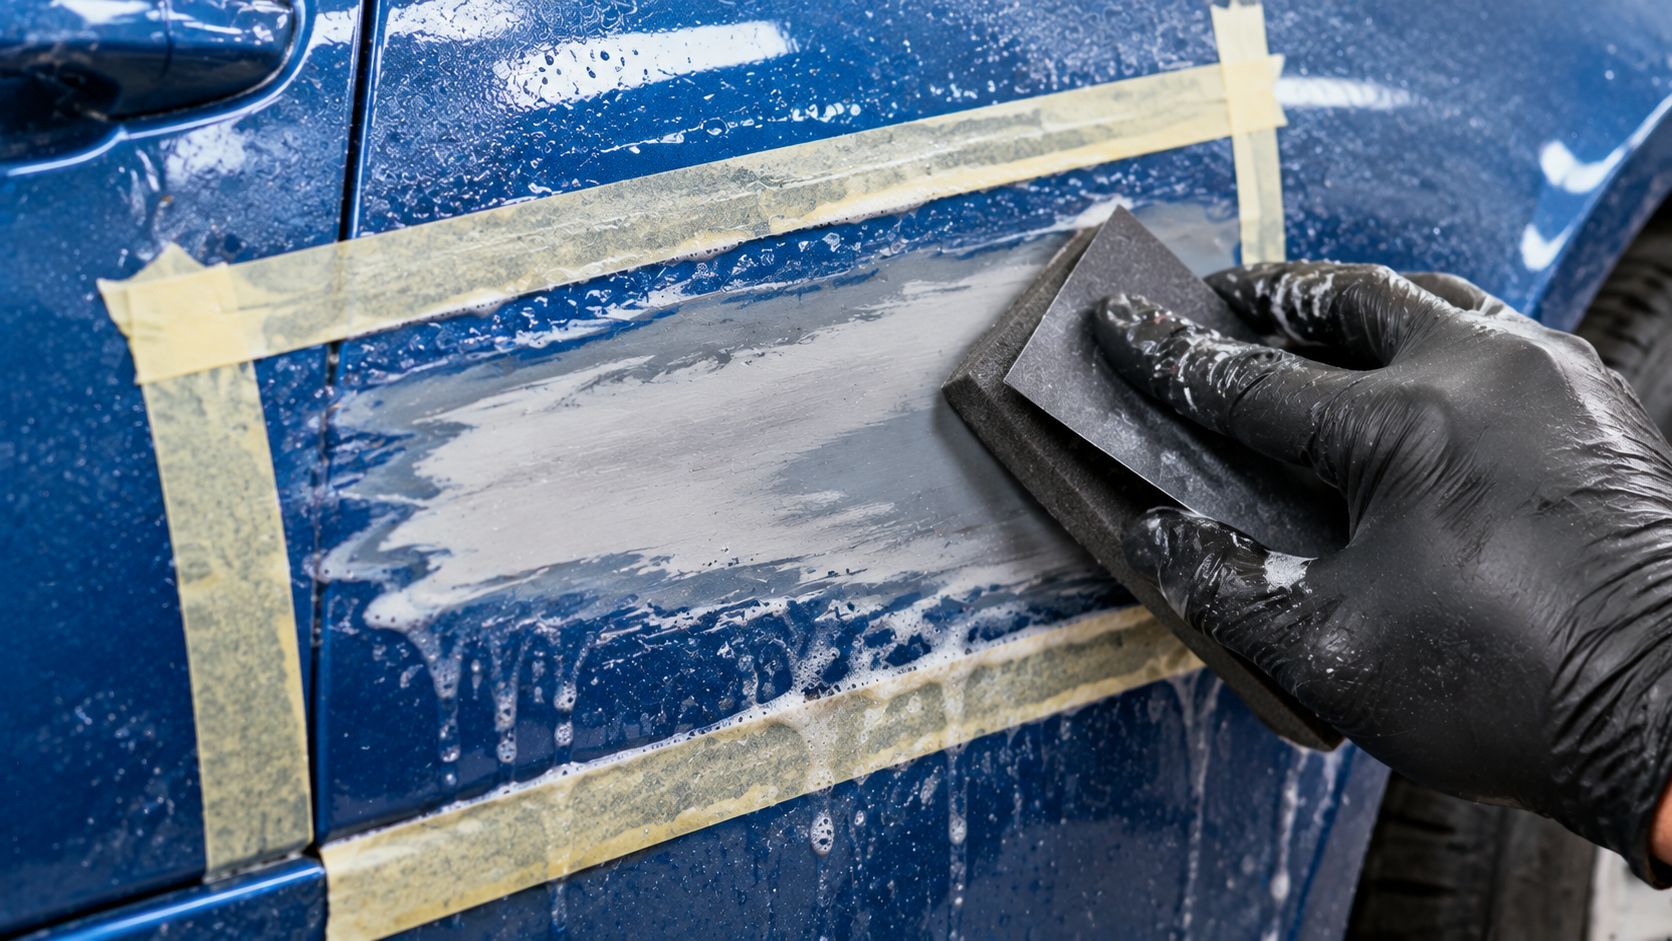
The first physical phase of repairing an exterior car scrape is preparing the surface through thorough washing and chemical decontamination. Begin by washing the entire vehicle using professional touchless car wash methods to remove loose dirt, road grime, and salt that could get caught in your sandpaper and cause deeper scratches.
Once the vehicle is dry, wipe down the area around the exterior car scrape with a wax and grease remover to strip away any silicone-based detailing waxes, as these contaminants will prevent touch-up paint from bonding to the substrate, causing a fish-eye texture in your finished paint.
Once the panel is completely clean, mask off the area around the exterior car scrape using high-quality automotive masking tape and paper. Leave about an inch of exposed paint around the scratch to allow for smooth feathering of the paint layers.
Use 2000-grit wet sandpaper lubricated with soapy water to lightly sand the edges of the scratch, feathering the original paint downward into the gouge. If the damage is deep, apply a thin coat of high-build primer to build up the scratch, then sand the primed area flat.
Understanding proper car-spray-paint processes is essential during this stage to ensure you apply thin, even coats of base paint, building up the color gradually without creating runs or dark spots along the exterior car scrape.
After the base coat has cured for the time specified in your workshop guide, apply two to three light coats of high-gloss clear coat. Ensure you overlap each stroke by fifty percent to establish a uniform clear coat thickness that completely seals the repair.
Let the clear coat dry for at least 24 hours, then use 3000-grit wet sandpaper to gently level any orange peel. Finish the repair by polishing the area with an orbital buffer and fine polishing compound, transforming the repaired exterior car scrape into a smooth, high-gloss finish that blends seamlessly with your car's factory paint.
Reinstalling Trim Panels and Final Polish After Paint Correction
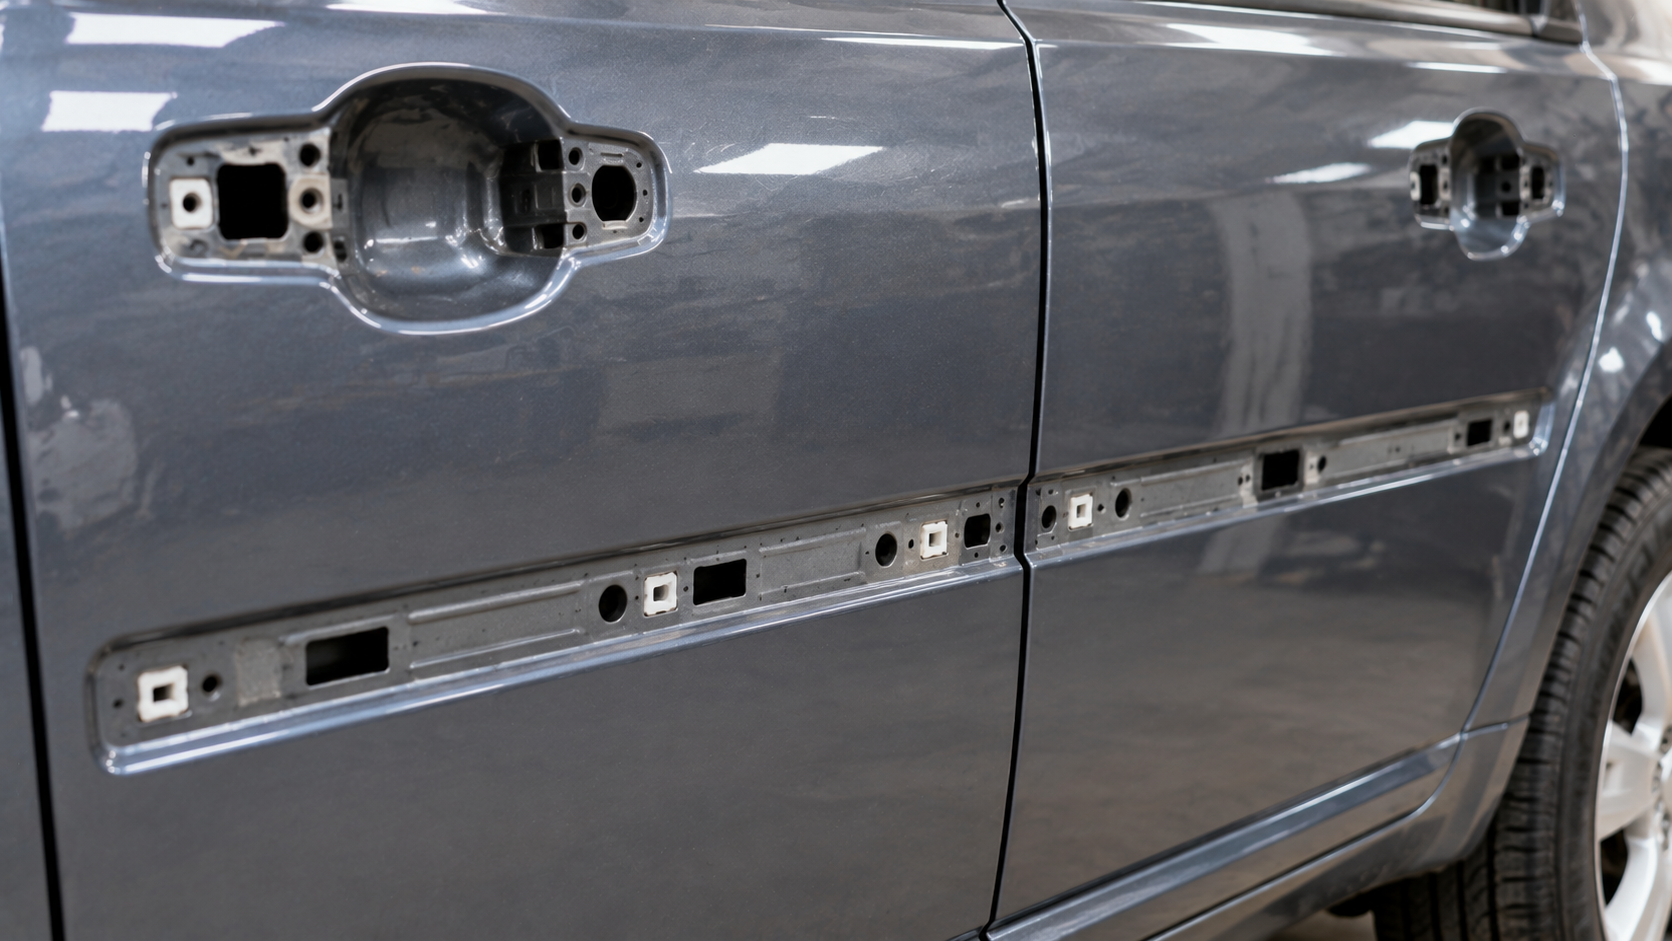
After your clear coat has fully cured and has been polished to a high gloss, you can begin reassembling any adjacent components. Reinstalling door handles, emblems, window moldings, or wheel arch trim adjacent to the exterior car scrape requires extreme caution to avoid scratching your fresh paint.
To ensure you install these pieces in the correct sequence and don't damage your body clips, consult a factory service manual's body assembly diagrams. These factory schematics show the exact clip locations, so you can press panels home without breaking the fragile plastic mounts around your repaired exterior car scrape.
Before hitting the road with your restored vehicle, perform these critical quality and safety checks to verify your exterior car scrape repair:
- Paint color and texture match: Inspect the panel under direct natural sunlight and from multiple angles to ensure the color matches.
- Clear coat edge blend: Run your hand gently over the masking line to verify the transition is completely smooth and polished flat.
- Trim panel clip engagement: Check that all adjacent moldings, badging, and door seals are securely fastened with no loose gaps.
- Electrical component operation: Verify that door lock switches, keyless entry pads, and mirror motors function correctly after reassembly.
As you reassemble the vehicle's exterior trim, pay close attention to any electrical wiring that passes through the doors or mirrors near the repair area. If you had to unplug door lock sensors or mirror motors during the exterior car scrape restoration, verify that no wires are pinched.
By following the exact routing diagrams in a workshop manual, you can ensure your wiring harness is secured along its factory channels, preventing short circuits and keeping your vehicle's convenience electronics functioning flawlessly around your restored exterior car scrape.
DIY Exterior Car Scrape Repair vs. Professional Auto Shop Painting
When deciding whether to tackle an exterior car scrape as a DIY project or to hire a professional auto body shop, you must weigh several important factors. Professional body shops have dust-free spray booths and computerized paint-matching systems, but they will typically charge between $400 and $1,200 for a single panel, depending on the paint type and repair complexity.
Restoring the finish yourself using high-quality materials and a factory manual will cost around $60 to $120. However, if you attempt this repair without proper vehicle-specific guidance, you run a high risk of sanding through the clear coat or breaking fragile plastic interior door trim panels, which can quickly wipe out any DIY savings.
Consulting digital-car-manuals-vs-mechanic-advice can help you understand when to trust your own DIY skills with a manual and when professional body shop intervention is required.
To help you decide, we compared the costs, risks, and requirements of different exterior car scrape repair approaches in the comparison matrix below.
Cost and Quality Matrix for Exterior Car Scrape Remediation
Restoration Factor | DIY Repair (With Workshop Manual) | DIY Repair (Without Manual) | Professional Auto Body Shop |
Average Cost | $60 - $120 (materials only) | $60 - $120 (plus potential replacement trim costs) | $400 - $1,200 (labor and materials) |
Time Required | 3 - 6 hours (plus paint curing times) | 5 - 10 hours (due to struggle with hidden trim fasteners) | 2 - 3 days (vehicle drop-off required) |
Risk of Trim Damage | Low: Exploded diagrams show exact clip locations and leverage points | High: High risk of snapping brittle plastic clips and moldings | None: Shop takes full responsibility for any assembly damage |
Electrical Safety | High: Clear instructions on battery disconnect and wiring harness routing | Medium: Risk of pinching window or mirror wires during reassembly | High: Technicians are certified to handle complex electrical systems |
Final Appearance | Professional-grade, flat finish with seamless clear coat blending | Varied; potential for paint runs, orange peel, or overspray lines | Flawless; includes structural warranty and professional color blending |
As the comparison matrix outlines, using a factory service manual during a DIY exterior car scrape repair dramatically reduces the risk of expensive trim damage.
It lets you approach the project with the same systematic confidence as a professional body technician, ensuring your door panels, wiring connectors, and exterior moldings fit together perfectly on the first try after correcting the paint.
Ford Exterior Car Scrape Repair Guide
Ford vehicles feature advanced exterior finishes and specific body panel designs that require specialized handling during an exterior car scrape repair. Many modern Ford models use lightweight aluminum body panels instead of traditional sheet steel, so you must use compatible sanding techniques and aluminum-safe primers to prevent galvanic corrosion beneath the new paint.
Additionally, Ford trim pieces are secured tightly using tight metal retaining clips that can be easily warped if pried incorrectly, leading to whistling wind noises at highway speeds once the exterior car scrape is fixed.
Ford F-150 Exterior Car Scrape Repair Factors
When restoring an exterior car scrape on a Ford F-150, you must account for the vehicle's military-grade aluminum alloy cab structure and the unique layout of its door moldings. Removing the exterior door handles to paint around a scrape requires disconnecting the lock cylinders internally, which can be challenging without factory schematics.
To navigate these truck-specific procedures safely and avoid damaging the active door sensors, consult the 2007-2013 Ford F-150 workshop manual. This manual provides the exact specifications for removing exterior door trim, ensuring you do not warp the aluminum panels while repairing your exterior car scrape.
Toyota Exterior Car Scrape Repair Guide
Toyota models are engineered with highly durable paint layers and precise panel gaps that require tight tolerances during an exterior car scrape repair. When repairing scratches on these vehicles, removing adjacent plastic molding trims presents a significant challenge because Toyota utilizes specialized two-stage locking clips.
Prying these moldings off without knowing their specific release angles will strip the mounting tabs off the back of the trim, preventing the moldings from sitting flush against the body once the exterior car scrape paint is polished.
Toyota Camry Exterior Car Scrape Repair Factors
The Camry sedan requires a very specific trim disassembly sequence when correcting paint scratches on its rear quarters or doors to prevent trim damage. The window molding trim sits in a recessed metal channel, and prying it incorrectly can warp the delicate chrome strip permanently.
To ensure you do not break these fragile tethers or scratch adjacent panels while treating the exterior car scrape, refer to the 1997-2002 Toyota Camry workshop manual as your primary guide. This factory resource outlines the exact leverage points for the window seals and door trim, helping you achieve a flawless finish on your exterior car scrape.
BMW Exterior Car Scrape Repair Guide
BMW vehicles feature highly complex multi-stage metallic paint finishes and integrated exterior electronics that complicate any exterior car scrape repair. The precise German engineering behind these cabins means that panel gaps are extremely narrow, and any excess paint buildup can cause moldings to bind during reassembly.
Additionally, proximity sensors, blind-spot radars, and comfort access antennas sit directly beneath the bumper covers and door handles, so take a cautious approach before sanding or spraying paint near an exterior car scrape.
BMW 3 Series Exterior Car Scrape Repair Factors
When repairing a deep exterior car scrape on a BMW 3 Series sedan, you must be extremely careful when sanding near the rear bumper cover. This panel houses sensitive ultrasonic park distance sensors, and applying heavy paint or thick filler over these sensor covers can interfere with their sonar signals, triggering dashboard warning lights.
To avoid these issues, consult the 2012-2018 BMW 3 Series F30 workshop manual, which provides step-by-step instructions for safely detaching the bumper trim, disconnecting the sensor wiring harnesses, and masking off the sensor rings to ensure a safe and professional exterior car scrape paint repair.
Volkswagen Exterior Car Scrape Repair Guide
Volkswagen models use heavy-duty galvanized steel panels and rigid trim fasteners, which makes exterior car scrape repairs challenging. The zinc galvanization layer protects the steel from oxidation, but sanding too aggressively with coarse grits can strip this protective barrier, accelerating the formation of rust.
Understanding how to feather the paint without breaching the galvanized layer is essential to preserve your vehicle's structural warranty while repairing any exterior car scrape.
Volkswagen Golf Exterior Car Scrape Repair Factors
The Golf hatchback has unique body lines and tight door-handle recesses, which make paint correction along its quarters quite detailed. Removing the door handle assembly to paint around an exterior car scrape requires releasing an internal locking screw located behind a rubber plug in the door jamb, a procedure that is not intuitive to most owners.
To complete this disassembly without dropping the locking mechanism inside the door panel, refer to the 2008-2013 Volkswagen Golf Mk6 workshop manual. This manual provides clear diagrams of the door handle lock cylinder, ensuring your exterior car scrape repair remains straightforward and damage-free.
Peugeot Exterior Car Scrape Repair Guide
Peugeot vehicles feature distinctive body styling and assembly techniques that vary significantly across different generations. Whether you are working on a modern Peugeot hatchback or restoring a vintage classic, accessing and removing the exterior trim without bending the delicate metal body trim is a critical skill when managing any exterior car scrape repair.
Peugeot 403 Exterior Car Scrape Repair Factors
Restoring an exterior car scrape on a classic Peugeot 403 requires a classic metalworking and painting approach, as these vintage cars do not use modern plastic trim or thin composite bumper covers.
The chrome-plated brass body trim and heavy gauge steel panels require careful sanding and vintage-compatible primers to ensure modern paint bonds securely to the older substrate. To perform this historic paint restoration correctly, consult the 1955-1966 Peugeot 403 workshop manual.
This factory manual provides valuable information on body trim removal and panel alignments, ensuring you preserve the authentic look of your Peugeot 403 while resolving the exterior car scrape.
Choosing the Correct Manual Resources for Exterior Car Scrape Work
Selecting high-quality documentation is the most critical decision you will make when planning an exterior car scrape restoration project. While generic paint touch-up videos can provide a basic overview of wet sanding, they cannot replace the model-specific precision of a factory service manual.
A dedicated workshop manual provides the exact specifications, panel removal steps, and paint codes that are unique to your vehicle's make and model. To help you select the best resources for your paint repair, you can review how-to-choose-the-right-workshop-repair-manual and compare the advantages of factory-level technical data when correcting an exterior car scrape.
For modern vehicles with integrated body electronics, digital manual formats offer unmatched utility during a complex disassembly, allowing you to zoom in on detailed panel schematics.
If you want to optimize your research workflow, consulting how-to-navigate-interactive-pdf-workshop-manuals can show you how to locate exterior trim pages quickly. Understanding when-to-upgrade-to-a-factory-service-manual is especially important when dealing with proximity sensors under bumpers, and knowing where-to-download-genuine-oem-workshop-manuals ensures you are working with verified factory diagrams.
For specialized models, checking references like peugeot-508-rxh-common-problems or safety procedures like safe-jacking-lifting-points-in-your-manual can provide overall context before you raise your vehicle to repair a lower rocker panel exterior car scrape.
To ensure your body panel repairs remain structurally sound, check if subscription services provide deeper access. Reviewing are-digital-factory-manual-subscriptions-worth-it or checking free databases in are-free-online-car-repair-manuals-safe ensures you acquire legal, complete data.
Additionally, comparing pdf-manuals-vs-interactive-repair-software can guide your choice of user interface when looking up paint codes and trim clip procedures for your exterior car scrape.
Secure Your Step-by-Step Exterior Car Scrape Restoration Plan
Do not let an unsightly exterior car scrape ruin your vehicle's look or expose your body panels to aggressive rust and corrosion. By preparing with the correct materials, cleaning your body panels thoroughly, and following a vehicle-specific repair guide, you can restore your car's paint finish to pristine factory condition.
To ensure you have access to the exact clip locations, panel diagrams, and paint codes needed for a flawless repair, make sure to find your vehicle's correct workshop repair manual before starting your exterior car scrape project.
Commonly Asked Questions About Exterior Car Scrape Repair
Can I Repair A Deep Exterior Car Scrape without Sanding Down to Bare Metal?
No, you cannot permanently repair a deep exterior car scrape without sanding the damaged area down to bare metal if the scratch has penetrated the primer layer. Leaving exposed steel beneath the touch-up paint traps moisture and road salts, which will rapidly trigger oxidation beneath the finish.
Sanding down to raw steel ensures you remove microscopic corrosion, allowing the primer to bond directly to the metal substrate and preventing the exterior car scrape repair from bubbling or lifting over time.
How Do I Find the Correct Paint Code to Repair My Exterior Car Scrape?
To find the correct paint code for your exterior car scrape repair, look for the manufacturer's certification label, typically located on the driver's side door jamb, inner door frame, or under the hood.
This plate contains a designated string of letters or numbers labeled as PAINT or PNT, which matches your vehicle's specific OEM color formulation. Consulting your factory workshop manual can help you locate this label and decode the paint code characters to ensure you buy the exact color match for your exterior car scrape.
Will A Temporary Scratch Remover Fix A Deep Exterior Car Scrape?
No, a temporary scratch remover compound will not fix a deep exterior car scrape that has penetrated the base coat or primer layer. These retail compounds use mild abrasives designed only to polish away light surface marks in the clear coat.
If the exterior car scrape has reached the base color or primer, polishing will only thin the surrounding clear coat without filling the gouge, requiring a multi-stage application of primer, base coat, and clear coat to resolve.
How Long Must Touch-Up Paint Cure During An Exterior Car Scrape Repair?
Touch-up paint typically requires 24 to 48 hours to fully cure before you can wet sand or polish the repaired exterior car scrape. Applying clear coat or compounding too quickly can solvent-pop the wet base coat, causing the paint layers to separate or wrinkle.
Consult your vehicle's factory service manual for exact chemical curing times and environmental temperature requirements to ensure your exterior car scrape paint bonds securely and lasts for years.
Is It Safe to Use A Wire Wheel to Clean An Exterior Car Scrape?
No, using a wire wheel on a drill is not recommended to clean an exterior car scrape because it is too aggressive and can easily gouge the delicate sheet metal or aluminum panels. It can also strip the factory zinc galvanization layer, which protects the panel from rust.
Instead, use 1000 to 1500-grit wet-dry sandpaper wrapped around a sanding block to gently level the edges of the exterior car scrape without thinning the surrounding steel.
Can A Clogged Sunroof Drain Cause Paint Flaking Near An Exterior Car Scrape?
Yes, a clogged sunroof drain can allow water to pool within the inner body panels, leading to rust that bubbles outward and causes paint flaking near any adjacent exterior car scrape. When water cannot escape through the factory drain tubes, it seeps into seams and rapidly oxidizes the sheet metal from the inside out.
Check your sunroof drain routing in your workshop manual and clear clogs to stop moisture from ruining your exterior car scrape repair.