Key Takeaway
- Address Foamed Backing Degraded Root Cause: The primary reason a car ceiling headliner sags is that the polyurethane foam backing laminated to the headliner fabric has completely degraded, which destroys the adhesive bond.
- Avoid Temporary Fixes for Long-Term Results: Temporary solutions like twist pins, upholstery tacks, or steam pressing do not restore the car ceiling headliner assembly and may permanently warp or damage the backing board.
- Scrape the Board Spotless Before Regluing: Success in a car ceiling headliner restoration depends entirely on scraping off every trace of decayed foam dust from the headliner board before spraying any new contact adhesive.
- Work Safe Around Side-Curtain Airbags: Always disconnect the battery and wait for the electrical system to discharge before removing pillar trim to protect side-curtain airbag systems near the car ceiling headliner.
- Consult Factory Diagrams to Prevent Damaged Clips: Utilize a factory service manual's exploded-view diagrams to locate hidden plastic fasteners when removing interior grab handles, visors, and trim around the car ceiling headliner board.
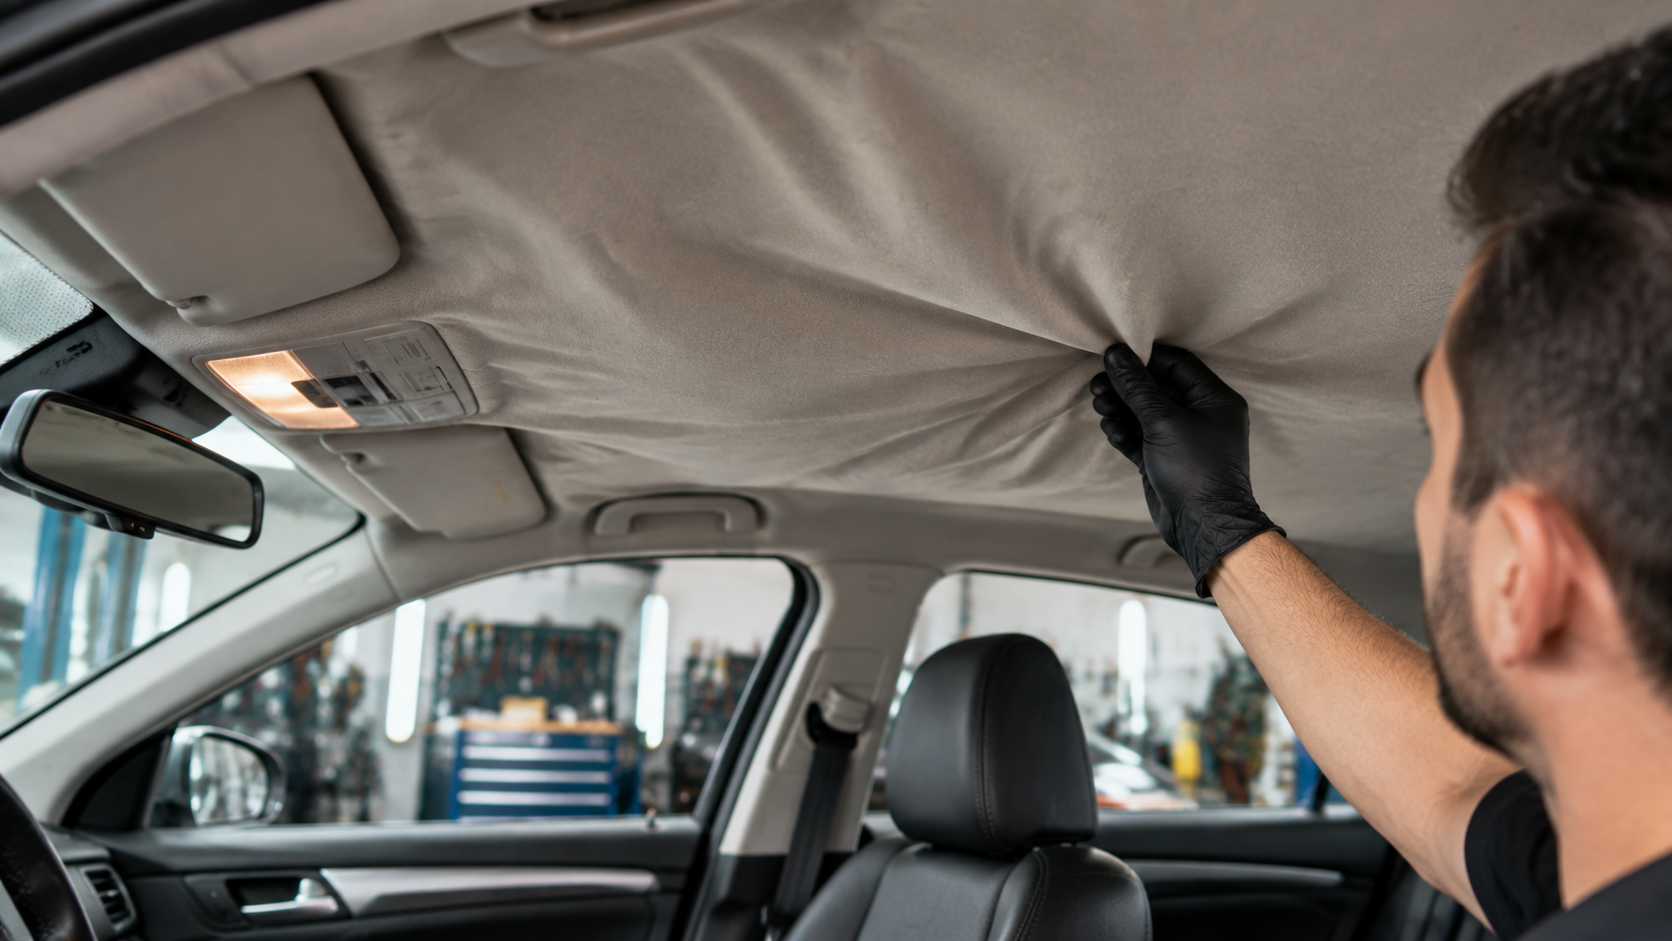
The sight of a sagging car ceiling headliner can turn any comfortable drive into an annoying experience as the loose fabric brushes against your head and obstructs your rear-view visibility.
Many owners delay learning how to repair car ceiling headliner boards because they fear breaking complex plastic interior trim pieces, or they worry about interfering with side-curtain airbags located along the roofline.
However, leaving a damaged car ceiling headliner unattended only leads to crumbling foam dust raining down onto your vehicle's seats, which can ruin your interior upholstery and make cleaning a major chore.
By using a systematic, manual-guided approach, you can successfully execute a professional-grade restoration of your car ceiling headliner and save hundreds of dollars compared to professional upholstery shop rates.
This comprehensive guide outlines the exact tools, safety precautions, and step-by-step procedures required to restore your vehicle's ceiling liner to its original factory condition.
Before attempting any trim disassembly or adhesive application, make sure to find the correct workshop repair manual for your vehicle's specific overhead console clips and wiring harness routing.
How to Repair Car Ceiling Headliner: Diagnosing Sagging Causes and Choosing Your Fix
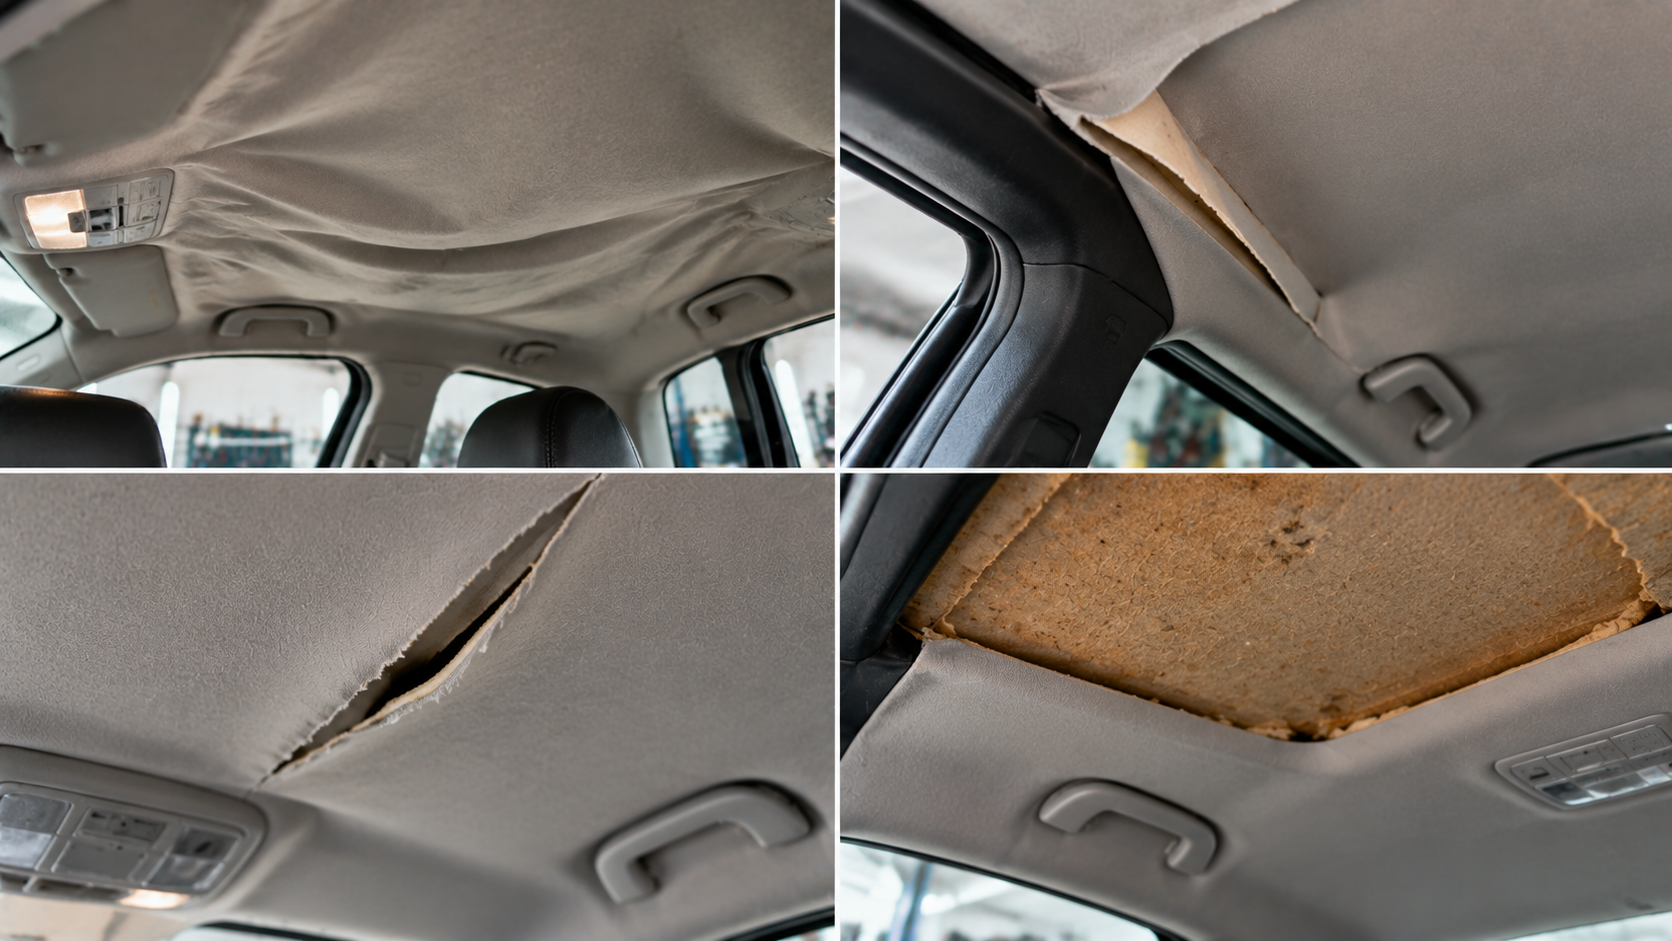
Before grabbing your tools, you must understand why your car ceiling headliner is sagging so you can choose the correct repair method. The structural foundation of any overhead trim is the headliner board, which is a molded substrate made of fiberglass, resin, or pressed cardboard.
Laminated to this board is the headliner fabric, which consists of a decorative polyester cloth bonded to a thin layer of polyurethane foam. Over years of exposure to extreme cabin heat, humidity, and atmospheric moisture, this polyurethane foam backing chemically breaks down and reverts into a sticky, crumbly orange powder.
Once this foam substrate crumbles, the adhesive bond holding the fabric to the headliner board fails completely, causing the headliner fabric to sag under the weight of gravity. In some cases, a clogged sunroof drain or roof seam leak introduces water that accelerates this foam decomposition, creating dark stains on the headliner board that must be repaired.
To help you diagnose your vehicle's overhead upholstery issues and plan your restoration path, we have compiled a diagnostic matrix below. Each sagging symptom points to a specific failure mechanism of the car ceiling headliner assembly and outlines the recommended manual-guided correction.
Car Ceiling Headliner Sagging Diagnostic and Resolution Matrix
Sagging Symptom | Probable Cause | Correct DIY Repair Method | Workshop Manual Reference Needed |
Edge separation near windshield or rear glass | Localized adhesive breakdown due to high heat exposure or windshield replacement seal issues | Peel back the loose fabric edge, scrape off degraded foam residue, and apply high-temperature spray contact adhesive | Pillar trim removal sequence and windshield molding overlap diagrams |
Sagging around dome lights or grab handles | Loose trim clips, broken accessory bezels, or local moisture intrusion from sunroof seals | Replace broken plastic bezels, clean the affected board surface, and re-secure accessories using new OEM fasteners | Exploded-view accessory mounting schematics and interior fastener part numbers |
Complete fabric sag ("ballooning" ceiling) | General polyurethane foam degradation across the entire board surface due to age and cabin heat | Remove the headliner board, scrape the substrate completely clean, and apply new foam-backed headliner fabric | Complete interior trim disassembly flowcharts, wiring routing, and panel clip locations |
Localized water staining with fabric sagging | Clogged sunroof drain tubes, roof-mounted antenna leak, or degraded windshield seal | Clear the sunroof drain lines with compressed air, dry and seal the board, and patch or replace the headliner fabric | Sunroof drain tube routing diagrams and overhead wiring harness layouts |
If you are dealing with minor edge lifting, you may be tempted to try a quick spray of adhesive while the board is still in the car, but this rarely lasts because the old foam backing behind the car ceiling headliner is still disintegrating.
For a true, long-lasting repair that matches original equipment manufacturer standards, you must perform a complete replacement of the car ceiling headliner fabric, which begins with removing the molded backing board.
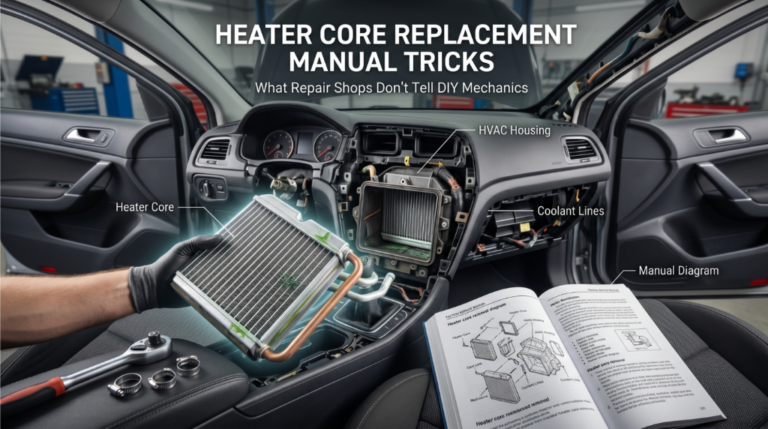
To perform this safely and efficiently without snapping fragile plastic trim, you should refer to a factory service manual to locate every hidden screw and clip.
Essential Preparation for Car Ceiling Headliner Disassembly
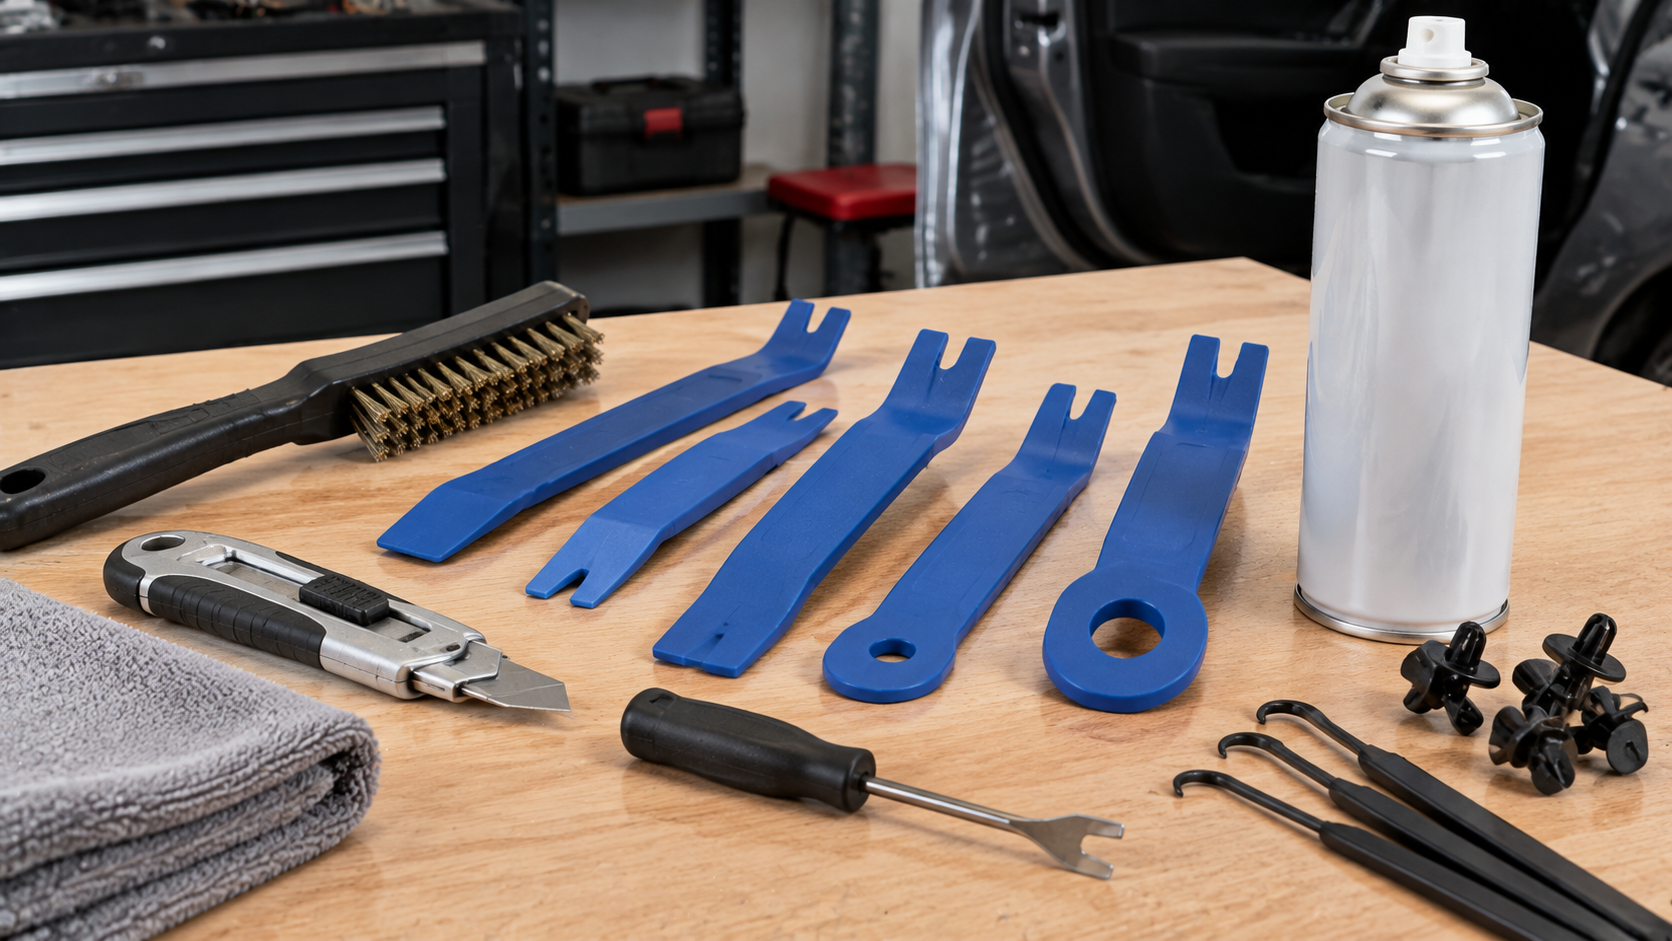
Achieving a professional-grade finish when learning how to repair car ceiling headliner assemblies requires proper workspace preparation and the right set of tools. You cannot complete a successful recovering job with the board still inside the cabin; attempting to scrape foam or spray adhesive overhead will result in an uneven bond, ruined seats, and adhesive overspray on your windows.
Before starting, clear out a large workspace such as a clean garage floor or a pair of sawhorses covered with soft blankets to protect the car ceiling headliner board from cracking.
To ensure you do not damage your vehicle's overhead trim during the restoration of your car ceiling headliner, gather the following essential tools before starting:
- Plastic non-marring trim removal wedges to safely pry console housings and pillar clips without scratching interior plastics.
- A stiff brass or nylon wire brush to scrape away degraded polyurethane foam residue from the headliner board.
- A heavy-duty razor utility knife to cut precise openings for visors, lights, and wire harnesses in the new car ceiling headliner material.
- High-temperature aerosol spray contact adhesive designed specifically to withstand cabin heat levels along the metal roof line.
One of the most overlooked aspects of preparing to restore a car ceiling headliner is verifying the exact assembly steps and clip designs for your specific vehicle. Standard DIY advice often generalizes these steps, but actual clip mechanisms vary wildly between import and domestic models, making it easy to snap costly trim pieces.
Experienced mechanics consult oem-vs-aftermarket-manuals-best-for-diy to ensure they have the exact factory-level disassembly sequence. Having this vehicle-specific knowledge on hand allows you to identify where to apply leverage with your trim tools, preventing structural damage to the car ceiling headliner board itself.
Step-by-Step Car Ceiling Headliner Board Removal
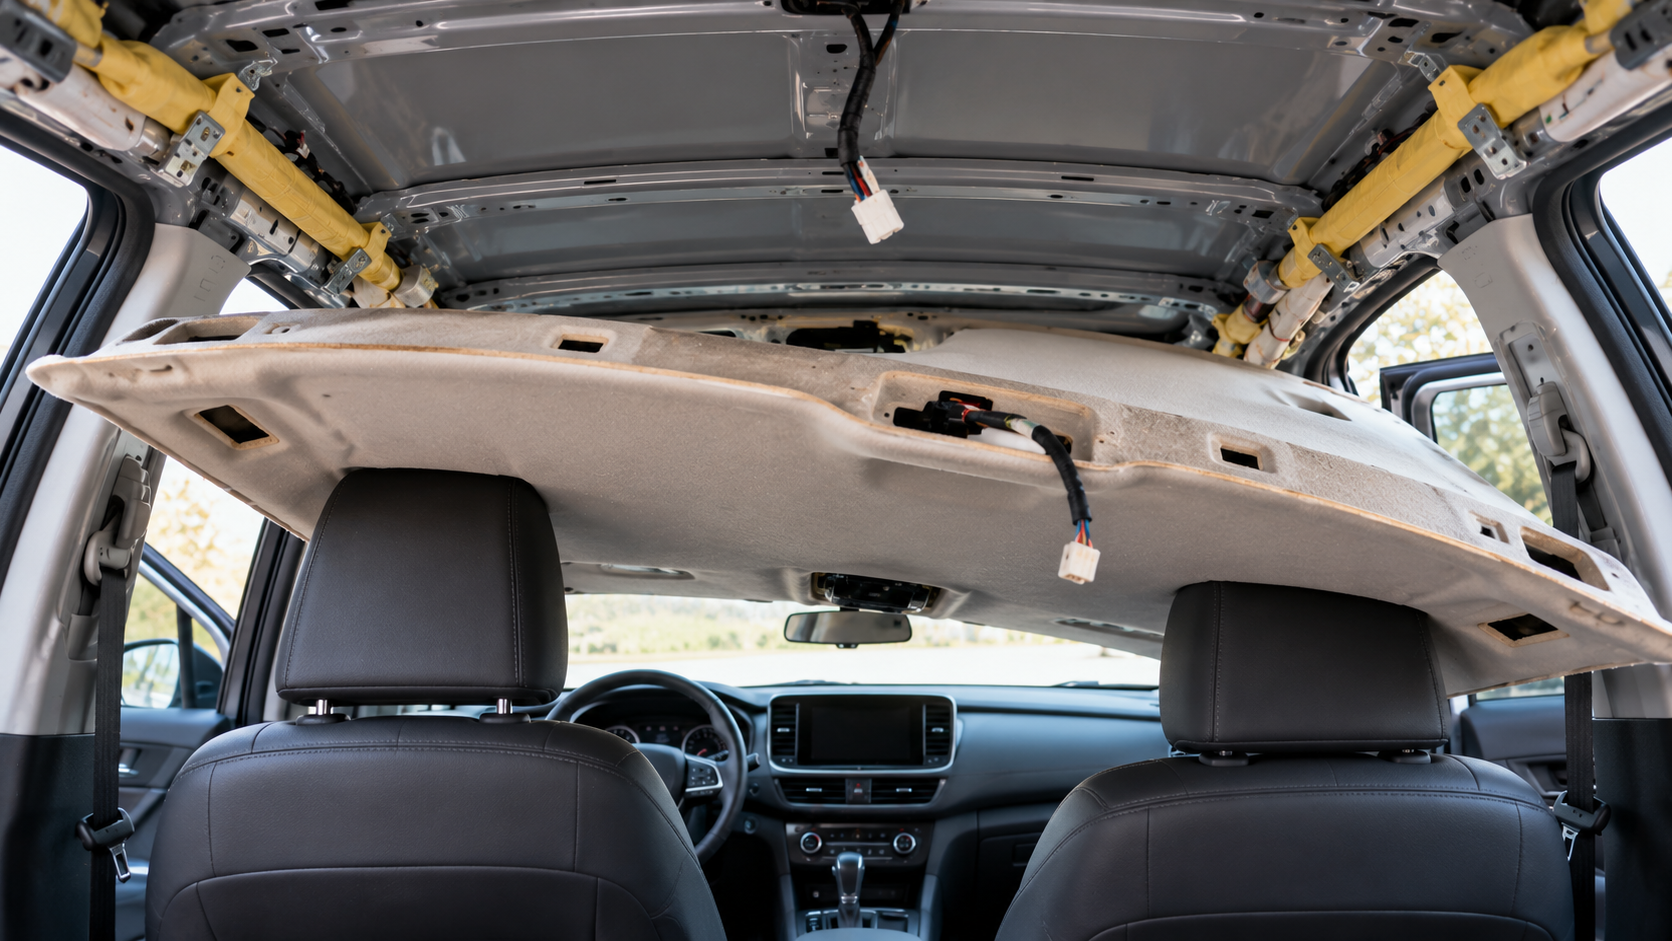
The first physical stage of a complete restoration is the systematic removal of the molded car ceiling headliner board from the vehicle cabin. Begin by disconnecting the negative battery terminal and waiting at least ten minutes. This is a mandatory safety precaution because you will be working directly adjacent to the side-curtain airbag inflators and wiring harnesses housed behind the pillar trim.
Once the electrical system is safely discharged, use your plastic trim tools to pry open the screw covers on your sun visors, grab handles, and the overhead dome light console. Consulting how-to-read-exploded-view-manual-diagrams will show you the exact locations of hidden spring clips and screws, allowing you to remove these components without stripping plastic threads or cracking delicate clear lenses.
After removing the overhead accessories, you must carefully detach the A, B, and C-pillar trim panels that overlap the edges of the car ceiling headliner fabric. Be extremely careful when prying these panels away, as modern vehicles utilize single-use tether clips designed to retain the trim during airbag deployment.
If you accidentally trigger an airbag warning during this process, referring to srs-airbag-light-reset-steps-via-oem-manuals can help you understand the diagnostic codes and reset procedures, though disconnecting the battery beforehand prevents this issue. As you pull the pillar trim back, disconnect the overhead wiring harnesses that power the vanity mirror lights and dome lamps.
These wires are typically glued or clipped directly to the back of the car ceiling headliner board, and understanding decoding-factory-wiring-color-codes alongside diagnose-power-windows-with-wiring-schematics can ensure you trace and unplug every harness connector without ripping wires or damaging pins.
Once all trim panels, wiring harnesses, and overhead accessories are completely detached, the molded car ceiling headliner board will rest freely on the headrests. Recline both front seats as far back as possible, open the front passenger door or rear tailgate, and carefully maneuver the large, flexible board out of the vehicle.
Take care not to crease or fold the board during extraction, as a creased fiberglass or cardboard headliner board will leave a permanent, visible line in your finished ceiling fabric.
Scraping, Gluing, and Applying New Car Ceiling Headliner Fabric
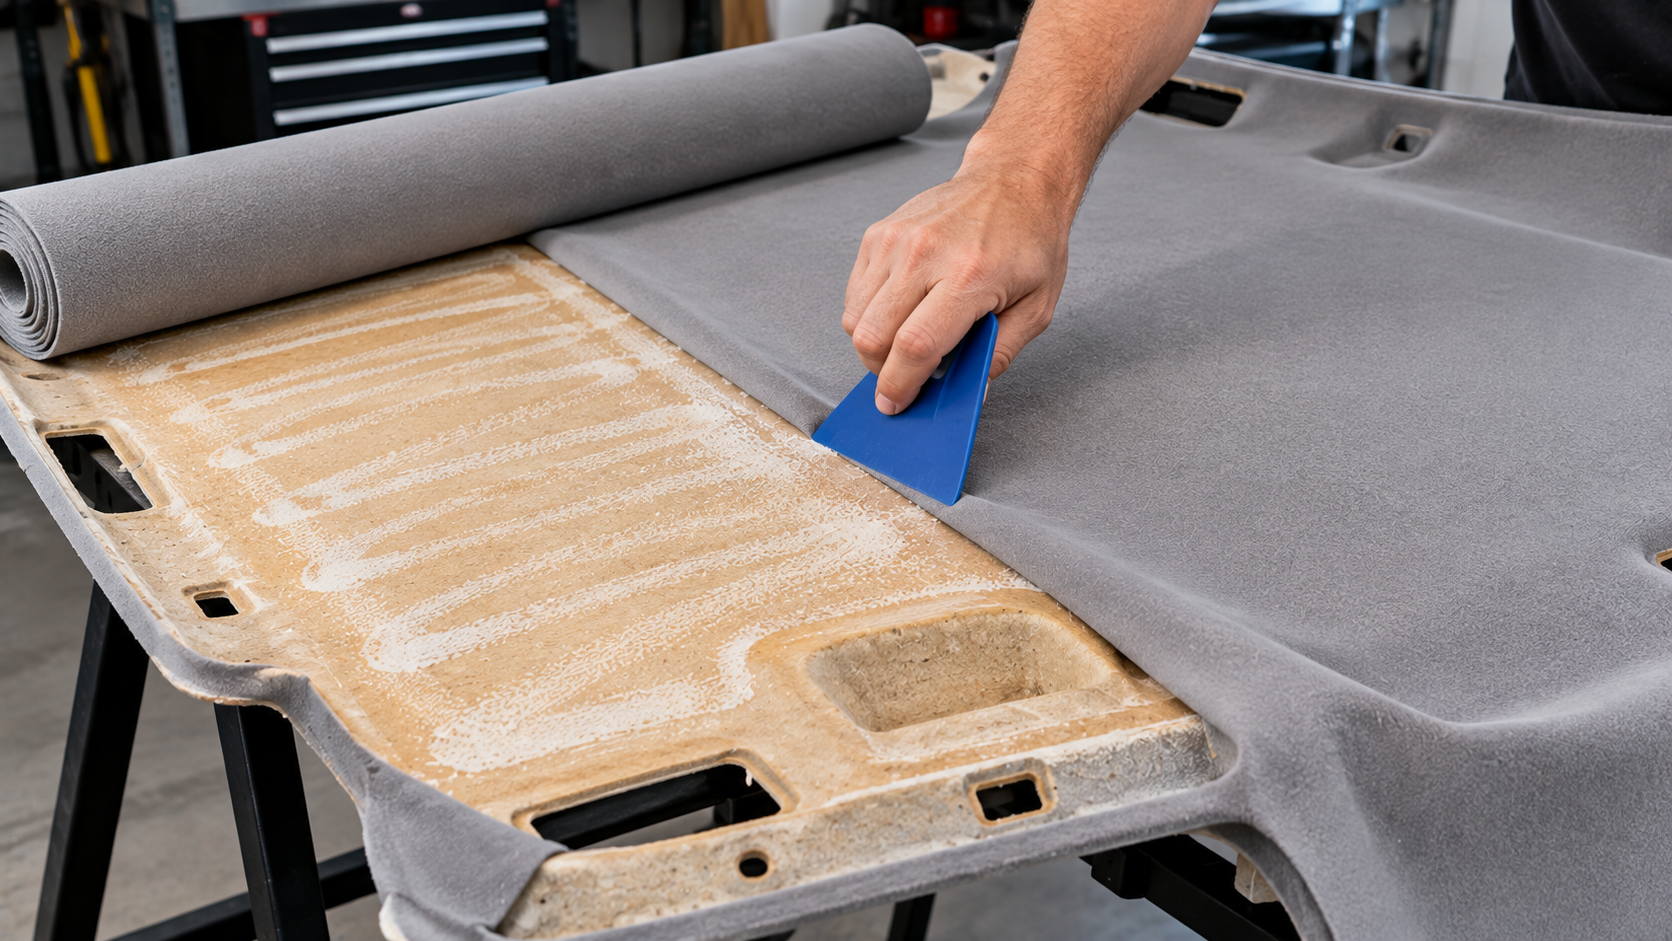
With the molded board safely extracted and placed on your work table, you can begin the physical recovering process of your car ceiling headliner. First, peel away the old saggy headliner fabric from the board; the fabric should pull away easily since the adhesive has failed, leaving behind the sticky, degraded orange polyurethane foam residue. Next, use a stiff wire brush or a plastic putty knife to scrape the board completely clean, removing every trace of the old foamed backing.
It is impossible to overstate the importance of this cleaning step: if any crumbly foam dust or sticky residue remains, the new adhesive will bond to the dust rather than the solid board, causing your new car ceiling headliner to sag within weeks. After brushing the board spotless, vacuum the surface thoroughly and wipe it down with a dry cloth to prepare for adhesive application.
Lay your new foam-backed headliner fabric loosely over the clean board, smoothing it out and leaving a two-inch excess border around the entire perimeter. Fold one half of the fabric back over itself to expose half of the board, preparing to apply the high-temperature spray contact adhesive.
Shake the adhesive can vigorously, then spray an even, heavy coat onto both the exposed headliner board and the foam backing of the fabric using a cross-hatch pattern. If you need tips on maintaining an even spray stroke to prevent adhesive puddling, which can bleed through the fabric, reviewing car-spray-paint can offer valuable insight into spray pattern overlapping and distance control.
Allow the adhesive to tack for approximately two to three minutes until it feels sticky but does not transfer to your finger, then carefully lay the fabric back down and smooth it from the center outwards using your palms. Repeat this process for the other half of the board, working slowly around deep recesses for sun visors and grab handles without stretching the fabric too tightly.
After the fabric is completely laid down, flip the headliner board over to wrap the excess two-inch border of fabric around the edges and glue it securely to the back of the substrate. Use your razor knife to cut precise "X" shapes in the accessory openings, leaving enough excess fabric to wrap inside the holes for a clean, professional edge.
Allow the finished car ceiling headliner assembly to cure in a dry, ventilated area for at least twelve hours before attempting to reinstall it in your car's cabin.
Reinstalling the Car Ceiling Headliner and Interior Trim
Reinstallation of the cured car ceiling headliner board is the reverse of the removal process but requires equal care to avoid creasing the new fabric. Carefully slide the restored headliner board back through the passenger door or tailgate, aligning it with the roofline and holding it temporarily in place by installing the dome light housing or grab handles.
Re-route the overhead wiring harnesses along their factory channels, ensuring that no wires are pinched between the headliner board and the metal roof structure. Using a factory manual's torque specifications for grab handle screws and sun visor mounts will prevent stripping out the threaded roof anchors and keep your new car ceiling headliner assembly from rattling when driving over bumps.
Before hitting the road, perform these critical quality and safety checks to verify your reinstallation of the car ceiling headliner:
- Electrical accessory operation: Confirm that all vanity mirror lights, dome lights, and overhead console buttons function correctly.
- Sunroof clearance: Operate the sunroof through its full tilt and slide range to ensure no fabric or wiring blocks the mechanism.
- Door seal overlap: Inspect the rubber weatherstripping along every door frame to verify it sits cleanly over the outer edges of the new fabric.
- Trim clip engagement: Gently tug on the A, B, and C-pillar covers to verify all internal tension clips have snapped flush into the sheet metal.
Once the headliner board is secured, snap the A, B, and C-pillar trim panels back into place, ensuring that the side-curtain airbag tethers are correctly aligned and not trapped behind the plastic panels. Reconnect the negative battery terminal, start your vehicle, and test all overhead electrical functions, including the sunroof controls, vanity mirror lights, and dome lamps.
DIY Car Ceiling Headliner Repair vs. Professional Auto Shop Repair
When deciding whether to tackle a sagging car ceiling headliner as a DIY project or to hire a professional upholstery shop, you must weigh several factors. A professional shop has specialized tools and experience, but they will typically charge between $300 and $800 depending on the vehicle's size and complexity.
Tackling the repair yourself using high-quality materials and a factory manual will cost around $50 to $100, which includes the new foam-backed fabric and heavy-duty adhesive. However, if you attempt this repair without vehicle-specific guidance, you run a high risk of breaking expensive trim panels or triggering airbag faults, which can quickly wipe out any DIY savings.
To help you decide, we compared the costs, risks, and requirements of different car ceiling headliner restoration approaches in the table below.
Car Ceiling Headliner DIY vs. Professional Shop Repair Comparison
Factor | DIY Repair (With Workshop Manual) | DIY Repair (Without Manual) | Professional Upholstery Shop |
Average Cost | $50 - $100 (materials only) | $50 - $100 (plus potential replacement trim costs) | $300 - $800 (labor and materials) |
Time Required | 4 - 8 hours (including adhesive curing time) | 6 - 12 hours (due to struggle with hidden fasteners) | 1 - 2 days (vehicle drop-off required) |
Risk of Trim Damage | Low: Exploded diagrams show exact clip locations and leverage points | High: High risk of snapping brittle plastic clips and overhead brackets | None: Professional shop takes full responsibility for any interior damage |
Airbag & Electrical Safety | High: Clear instructions on battery discharge and safe wiring routing | Medium: Risk of pinching overhead wiring or damaging airbag tethers | High: Technicians are certified to handle safety-critical electrical systems |
Final Appearance | Professional-grade, tight fit with wrapped edges and no wrinkles | Varied; potential for fabric wrinkles, glue bleed, or loose trim panels | Flawless; includes structural warranty and professional fabric stretching |
As the comparison outlines, using a factory manual during a DIY car ceiling headliner repair dramatically reduces the risk of expensive interior damage. It allows you to approach the project with the same systematic confidence as a professional technician, ensuring that your overhead console, trim panels, and electrical connectors fit together perfectly on the first try.
Ford Car Ceiling Headliner Repair Guide
Ford vehicles often require specific handling when performing overhead trim repairs due to their heavy use of overhead console wiring and plastic retaining brackets. In many popular models, the headliner fabric is secured tightly around a deep overhead sunglasses console that uses non-intuitive spring clips.
Attempting to pry these consoles down without knowing their release points will crack the plastic housing, which is an expensive part to replace.
Ford F-150 Car Ceiling Headliner Repair Factors
When performing a car ceiling headliner restoration on a light truck, you must account for the cabin's massive width and the unique layout of the rear cab glass trim. In these trucks, removing the A-pillar handles requires a deep socket to release the internal retention bolts before the trim can be pulled away.
To navigate these truck-specific procedures and avoid damaging the active side-curtain airbag tethers running along the roofline, consult the 2007-2013 Ford F-150 workshop manual. This manual provides exact torque specifications for reinstalling the structural grab handles and outlines the correct path for routing the overhead cargo light wiring harness to prevent pinching.
Toyota Car Ceiling Headliner Repair Guide
Toyota models are known for tight interior tolerances and robust plastic trim clips around the car ceiling headliner that require a specific pulling angle to release without snapping. When removing the overhead trim on these vehicles, the sun visor clips securing the headliner fabric often present the greatest challenge, as they require a ninety-degree twist and pull motion that is not immediately obvious.
Toyota Camry Car Ceiling Headliner Repair Factors
The Camry sedan requires a very specific trim disassembly sequence because the A-pillar trim panels utilize specialized two-stage impact clips designed to stay attached during side airbag deployment.
You must use needle-nose pliers to reach behind the partially released trim and pinch the metal locking tab to free the panel, which is a critical safety step. To ensure you do not break these fragile tethers or damage the overhead wiring for the sunroof motor, use the 1997-2002 Toyota Camry workshop manual as your primary guide.
This factory resource outlines the exact sequence for lowering the headliner board through the rear door of the sedan, preventing permanent creasing of the board substrate.
BMW Car Ceiling Headliner Repair Guide
BMW vehicles utilize highly integrated overhead electronics, including rain sensors, advanced alarm motion detectors, and complex sunroof cassette mechanisms that overlap with the headliner board. The German engineering behind these cabins means that trim panels fit together with absolute precision, leaving zero margin for error during disassembly.
BMW 3 Series Car Ceiling Headliner Repair Factors
When tackling a car ceiling headliner repair on a modern 3 Series sedan, you must be extremely careful with the integrated electronic modules housed in the front overhead console. These modules communicate directly with the vehicle's central CAN-bus system, and unplugging them while the battery is connected can trigger communication faults that require dealer-level software to clear.
The 2012-2018 BMW 3 Series F30 workshop manual is an essential resource for this project, offering full wiring diagrams and connector pinout charts for the overhead console. This manual also details the routing of the four sunroof drain tubes, allowing you to check for clogs and verify that the drains are clear before gluing your new car ceiling headliner fabric in place.
Volkswagen Car Ceiling Headliner Repair Guide
Volkswagen interior design relies heavily on hidden spring steel tension clips and extremely tight tolerances that make car ceiling headliner trim removal challenging for the unprepared DIYer. Attempting to force these panels off without knowing the location of these metal clips securing the headliner board will result in the plastic mounts tearing clean off the back of your trim panels.
Volkswagen Golf Car Ceiling Headliner Repair Factors
The Golf hatchback presents a unique headliner layout, as the rear of the board is secured by a series of high-tension spring clips immediately adjacent to the tailgate opening. Removing the sun visors requires a specialized release tool or a very specific pick technique to release the internal retaining tabs, which is a known hurdle for VW owners.
To execute this repair without destroying your interior, refer to the 2008-2013 Volkswagen Golf Mk6 workshop manual. This manual provides step-by-step instructions for releasing the visor clips and safely lowering the board through the hatch, ensuring your new car ceiling headliner fabric remains clean and uncreased during reinstallation.
Peugeot Car Ceiling Headliner Repair Guide
European vehicles like Peugeot often feature distinctive interior assembly styling, with vintage and modern models using vastly different headliner installation methods. Whether you are dealing with a modern hatchback or a classic sedan, understanding the specific design is essential to avoid tearing your interior fabrics.
Peugeot 403 Car Ceiling Headliner Repair Factors
If you are restoring a classic Peugeot 403, you will find that it does not use a modern molded fiberglass board, but rather a traditional suspended fabric system. This classic car ceiling headliner relies on a series of metal tension rods, or "listing bows," that slide through fabric sleeves sewn into the headliner material and snap into mounting holes along the roof rails.
Installing this suspended style requires meticulous tensioning and wrapping around wooden tack strips, a process that is fully detailed in the historic 1955-1966 Peugeot 403 workshop manual. Using this manual ensures you achieve the correct bow alignment and uniform tension, preventing wrinkles and preserving the authentic vintage appearance of your Peugeot 403 interior.
Choosing the Right Manual Resources for Car Ceiling Headliner Repair
Selecting high-quality documentation is the most important decision you will make when planning a car ceiling headliner restoration project. While generic online forums and video tutorials can provide a broad overview of the gluing process, they cannot replace the technical precision of a factory service manual.
A dedicated manual provides the exact specifications, fastener torque values, and airbag safety protocols that are unique to your vehicle's make, model, and trim level. To help you select the best resources for your overhead trim repair, you can review how-to-choose-the-right-workshop-repair-manual and compare the advantages of factory documentation.
For modern import vehicles, interactive digital formats offer unmatched utility during a complex teardown, allowing you to zoom in on high-resolution wiring schematics and trim clip locations. If you want to optimize your research workflow, consulting how-to-navigate-interactive-pdf-workshop-manuals can show you how to quickly locate trim disassembly pages.
Understanding when-to-upgrade-to-a-factory-service-manual is especially critical when dealing with integrated roof electronics, and knowing where-to-download-genuine-oem-workshop-manuals ensures you are working with verified factory data.
For those owning unique models, checking resources like peugeot-508-rxh-common-problems or safety guides like safe-jacking-lifting-points-in-your-manual can provide valuable overall context before you begin working on your vehicle's car ceiling headliner.
Secure Your Step-by-Step Restoration Plan
Do not let a sagging car ceiling headliner ruin your driving comfort or jeopardize your vehicle's safety curtain airbags. By preparing with the correct tools, cleaning your backing board thoroughly, and following a vehicle-specific repair guide, you can restore your vehicle's interior trim to pristine factory condition.
To ensure you have access to the exact clip locations, wiring schematics, and disassembly sequences needed for a flawless overhead restoration, make sure to find your vehicle's correct workshop repair manual before prying off your first trim panel.
Commonly Asked Questions About Car Ceiling Headliner Repair
Can I Repair A Sagging Car Ceiling Headliner without Removing the Backing Board?
No, you cannot permanently repair a sagging car ceiling headliner without removing the molded backing board from the vehicle cabin. Temporary fixes like headliner twist pins, upholstery tacks, or spray adhesive applied in-car do not address the degraded polyurethane foam backing, which will continue to crumble and fail.
To achieve a long-lasting, wrinkle-free finish, the board must be removed, scraped completely free of foam dust, and recovered with new fabric using high-temperature contact cement.
What Is the Best Adhesive to Use for A Car Ceiling Headliner Restoration?
The best adhesive for a car ceiling headliner restoration is a specialty, high-temperature aerosol contact adhesive, such as 3M Headliner Adhesive or Weldwood Contact Cement. Standard multi-purpose spray glues cannot withstand the extreme heat that accumulates near a vehicle's roof, which can exceed 200 degrees Fahrenheit in the summer.
Using a non-high-temp spray glue will cause the new car ceiling headliner fabric to fail and sag again within a few weeks of exposure to direct sunlight.
How Much Fabric Do I Need to Replace A Standard Car Ceiling Headliner?
To replace a standard car ceiling headliner, you typically need about two to three linear yards of foam-backed headliner fabric, which is usually 54 to 60 inches wide. You should measure the length of your vehicle's roof from the windshield to the rear glass, then add at least six inches of excess material to allow for wrapping the edges of the headliner board.
For larger SUVs, station wagons, or minivans, always consult your workshop manual's interior specifications to confirm the exact dimensions of the headliner board.
Will A Steam Cleaner Fix A Sagging Car Ceiling Headliner?
No, using a steam cleaner will not permanently fix a sagging car ceiling headliner and will likely make the problem much worse. While steam can temporarily reactivate dry adhesive, the heat and moisture will shrink the headliner fabric and accelerate the decomposition of the fragile polyurethane foam backing.
This shrinkage pulls the fabric tighter, causing it to tear away from deep recesses and sag even lower, requiring a full replacement of the car ceiling headliner assembly.
Is It Safe to Remove A Car Ceiling Headliner with Side Curtain Airbags?
Yes, it is safe to remove a car ceiling headliner board in a vehicle equipped with side curtain airbags, provided you follow strict safety protocols. You must disconnect the negative battery terminal and wait at least ten to fifteen minutes to allow the airbag system's backup capacitor to discharge before removing any pillar trim panels.
Consulting your factory workshop manual ensures you identify the exact location of airbag inflators and tethers, allowing you to work safely around the car ceiling headliner board without damaging these safety-critical systems.
How Do I Clean A Stained Car Ceiling Headliner without Causing It to Sag?
To clean a stained car ceiling headliner without causing it to sag, you must use a dry foam cleaner or upholstery solvent and avoid saturating the fabric. Liquid cleaners can easily soak through the thin decorative cloth and dissolve the delicate adhesive bond holding the fabric to the polyurethane foam backing.
Spray a light layer of foam cleaner onto a microfiber cloth, gently dab the stain on the car ceiling headliner fabric, and blot it dry with a clean towel to prevent localized sagging.