Hearing a hollow click or complete silence when turning your ignition key is one of the most frustrating experiences a driver can face, leaving you stranded without warning. Many vehicle owners dread repairing car starter assemblies because they assume the fix requires expensive towing fees and complex auto electrical shop labor.
Ignoring early warning signs like intermittent cranking or grinding noises can leave your car starter completely dead at the worst possible moment. By utilizing a systematic multimeter diagnostic procedure and following factory manual schematics, you can confidently isolate starter solenoid faults, replace worn starter motor units, and restore reliable ignition performance at a fraction of shop costs.
This comprehensive guide details the exact electrical tests, removal sequences, and safety precautions required to repair your car starter efficiently.
Before attempting any electrical testing or unbolting heavy starter leads during your car starter repair, find the correct workshop repair manual for your vehicle's specific starter relay locations and flywheel bellhousing torque specs.
Key Takeaway (Car Starter Repair)
- Diagnose the Click vs No-Crank Condition First: The primary step in learning how to repair car starter systems is distinguishing a rapid click caused by low battery voltage from a complete single click caused by a failed starter solenoid contact.
- Perform Voltage Drop Testing Before Removal: Measuring voltage drops across the starter motor power cable and ground connections prevents replacing a functional car starter motor when the true fault is high resistance in the wiring.
- Inspect the Ignition Switch and Neutral Safety Circuit: Verify that current reaches the car starter solenoid S-terminal during key crank position to rule out faulty neutral safety switches or immobilizer relay cutoffs.
- Tap the Starter Casing as a Temporary Diagnostic Check: Gently tap the starter motor housing with a mallet while an assistant turns the key to temporarily free stuck carbon brushes and confirm internal motor wear.
- Disconnect Battery Terminals to Prevent Severe Shorts: Always disconnect the negative battery cable before unbolting heavy B+ car starter leads to avoid accidental electrical arcs and damage to vehicle electronics.
How to Repair Car Starter: Diagnosing No-Crank Symptoms and Electrical Failures
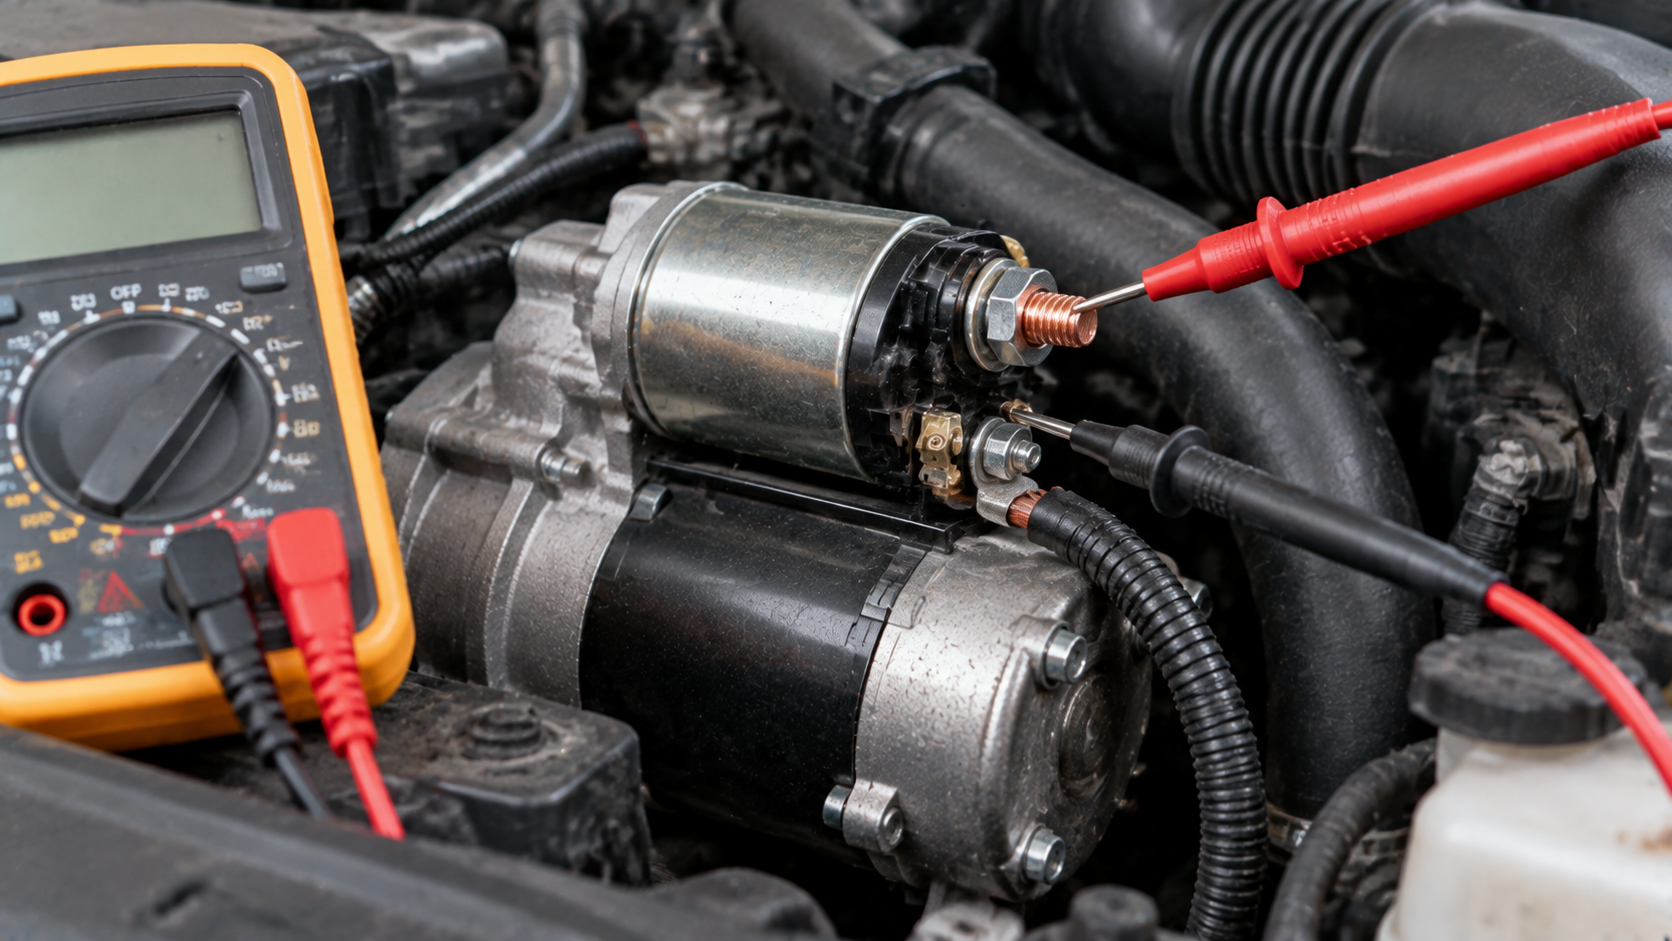
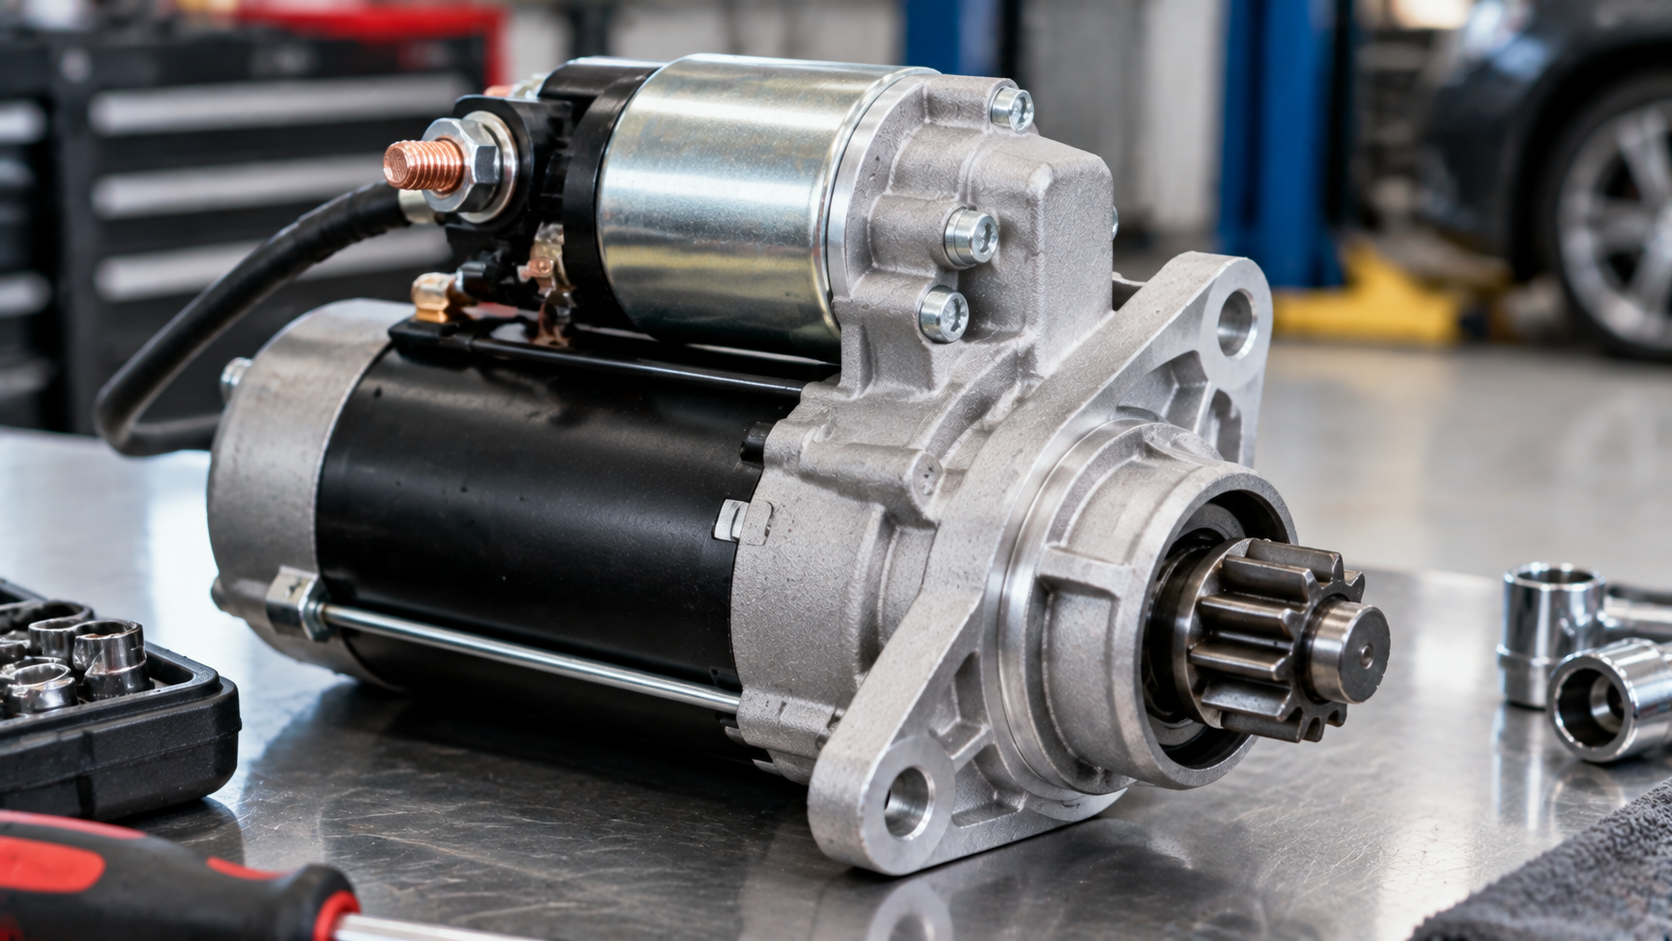
When troubleshooting why an engine fails to crank, you must systematically test every component in the car starter circuit before unbolting parts. The car starter system includes a heavy-duty direct-current motor, an electromagnetic starter solenoid, a starter relay, and heavy-gauge battery cables.
When you turn the ignition key to the start position, a low-current signal energizes the starter relay, which then sends power to the solenoid mounted on top of the starter motor. The solenoid performs a dual function: it pulls an internal plunger that engages the starter drive pinion gear into the engine flywheel ring gear while simultaneously closing heavy internal copper contacts to supply full battery amperage directly to the car starter motor armature.
To help you diagnose your vehicle's starting issues and choose the right repair path, we compiled a diagnostic matrix below. Each symptom isolates a specific failure mode in the car starter circuit and outlines the required manual-guided correction.
Car Starter Diagnostic and Resolution Matrix
Starting Symptom | Probable Circuit Fault | Recommended DIY Repair Method | Workshop Manual Reference Needed |
Single sharp click, no engine crank | Worn solenoid internal copper contacts or burnt motor brushes | Perform voltage drop testing at the B+ terminal; replace solenoid or complete car starter motor | Exploded starter assembly views, terminal pinouts, and starter mounting bolt torque specs |
Rapid chatter or buzzing sound on key turn | Low battery voltage or high resistance across battery terminals | Clean battery posts, charge battery, and test voltage under load before replacing car starter | Battery terminal torque specs and factory electrical load testing specifications |
Grinding noise during cranking attempts | Damaged starter pinion gear teeth or worn flywheel ring gear | Inspect drive gear teeth for wear; shim or align replacement car starter mounting flange | Flywheel ring gear tooth inspection criteria and starter ring gear backlash tolerances |
Starter motor spins continuously without engaging | Failed solenoid shift lever, broken return spring, or bad starter drive clutch | Remove starter assembly and bench-test solenoid engagement mechanism; replace drive unit | Starter drive clutch inspection procedures and internal solenoid plunger alignment diagrams |
Understanding these diagnostic indicators prevents misdiagnosing a simple dead battery or loose ground strap as a catastrophic car starter failure. If your multimeter tests confirm that full battery voltage reaches the solenoid S-terminal but the starter motor fails to rotate, you need a complete starter unit replacement or a solenoid overhaul.
Essential Preparation and Tools for Car Starter Repair
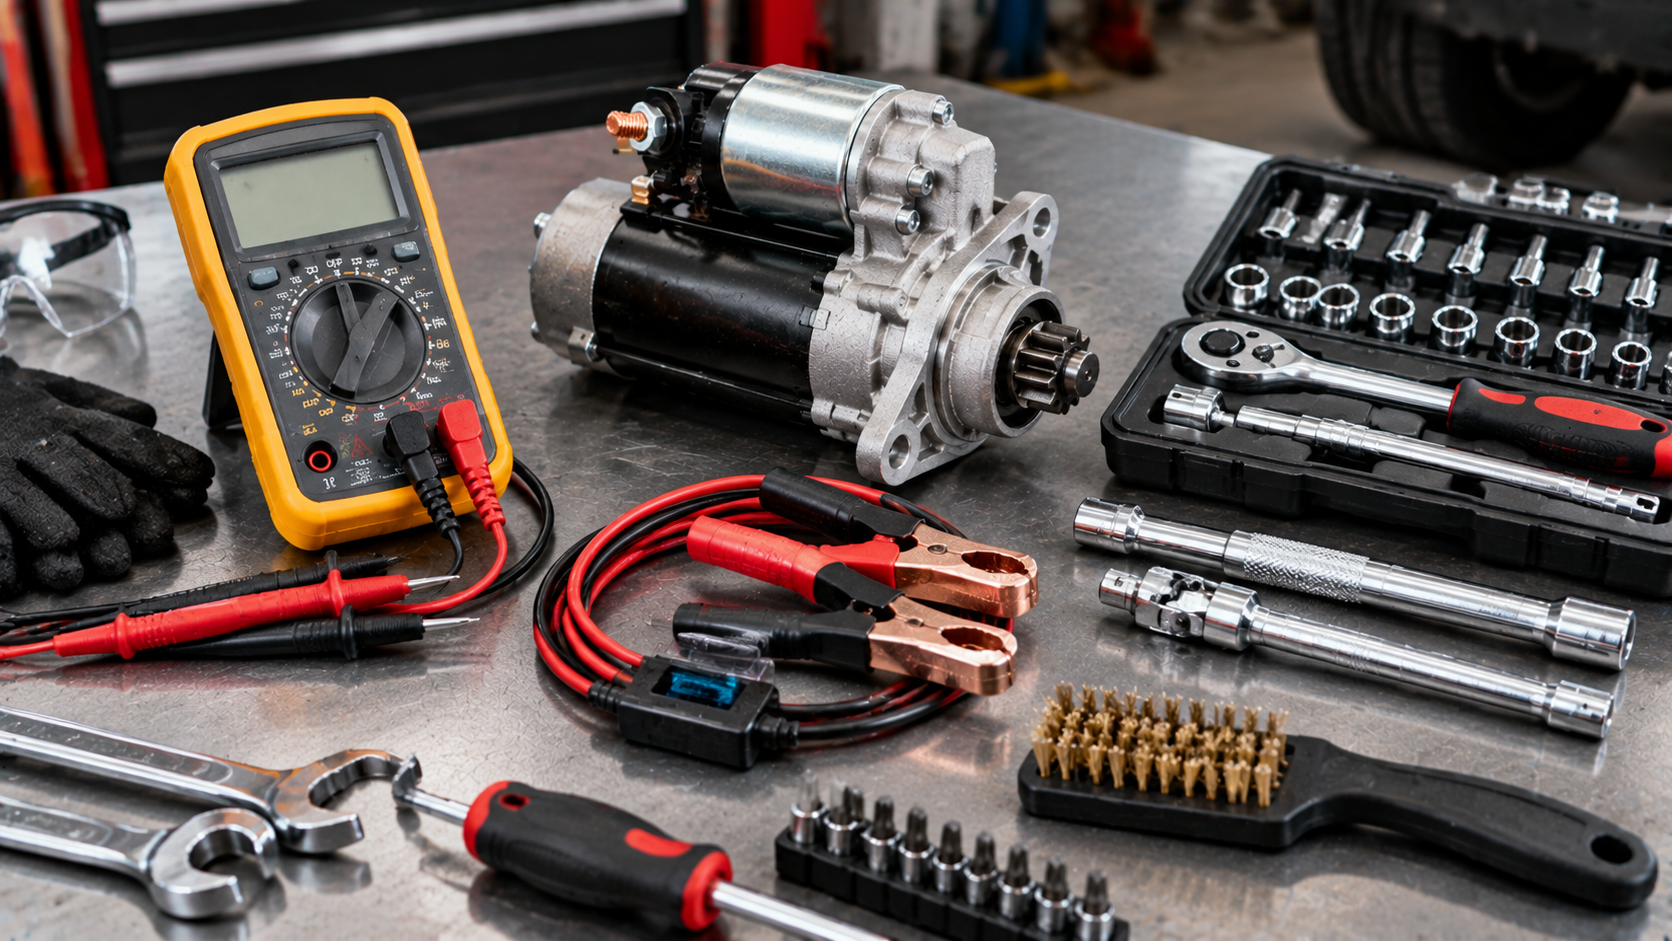
A safe, effective car starter repair requires proper workspace preparation and specialized automotive testing tools. Because the starter motor draws between 100 and 300 amperes of direct current from the battery, improper handling can cause severe electrical short circuits, melted wire insulation, or personal injury.
Before you begin, park on a flat, level surface, engage the parking brake firmly, and let the engine bay cool completely to prevent burns from hot exhaust manifolds. To ensure you can accurately test and replace your car starter without electrical or mechanical mishaps, gather the following essential tools before starting:
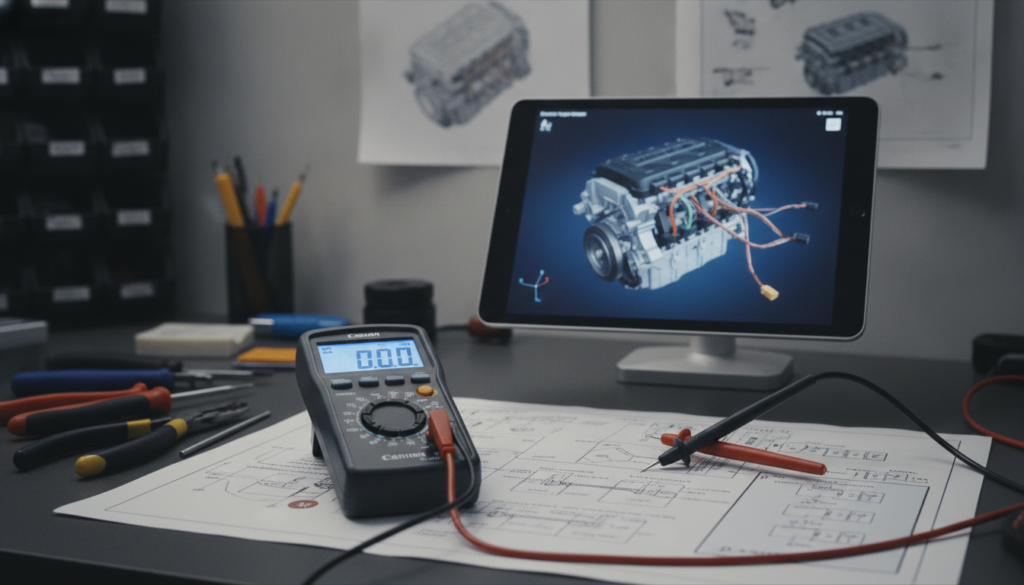
- Digital multimeter with 10-megaohm impedance to measure exact battery voltage, solenoid signal current, and circuit voltage drops across the car starter cables.
- Heavy-duty safety jack stands and wheel chocks to safely support the vehicle when unbolting underbody car starter mounting bolts.
- Assorted socket extensions and swivel flex-joints to reach tight, recessed car starter mounting bolts hidden behind exhaust heat shields.
- Wire brush and electrical contact cleaner to scrub corrosion from battery terminals and ground straps during car starter servicing.
Having vehicle-specific service documentation on hand is crucial when preparing to work on a car starter assembly. Experienced mechanics consult oem-vs-aftermarket-manuals-best-for-diy to verify whether a remanufactured or OEM replacement car starter offers the best fitment and long-term reliability.
Reviewing factory manuals ensures you follow proper electrical safety protocols and bolt-tightening sequences.
Step-by-Step Car Starter Testing and Replacement Procedure
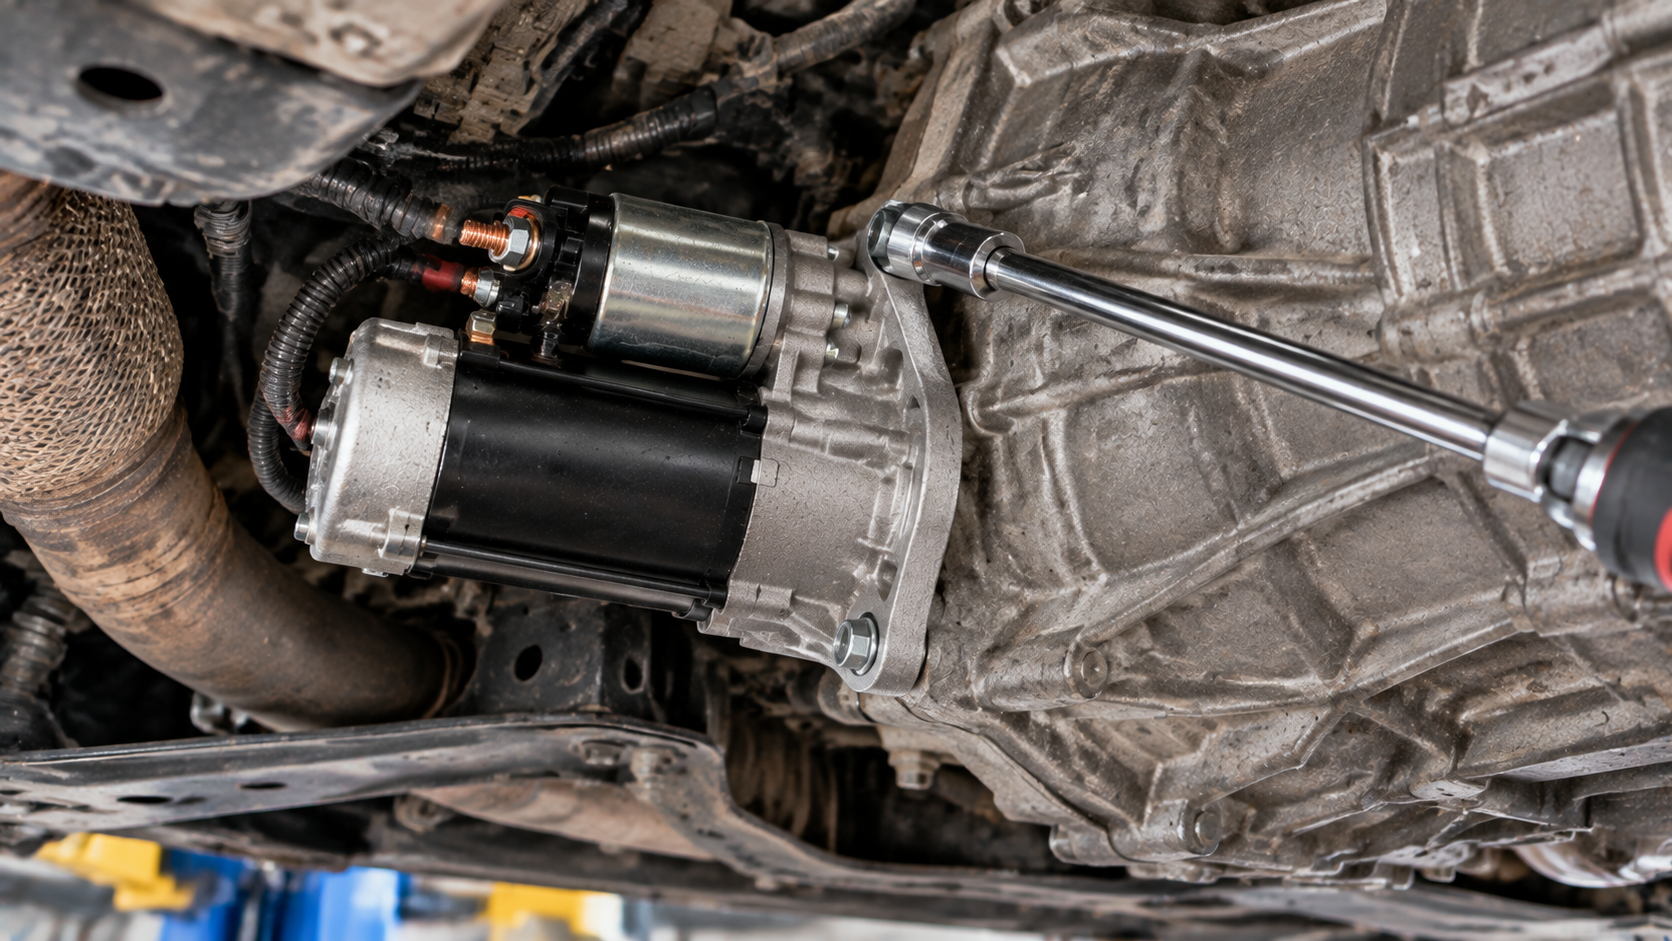
Beginning the physical repair of a car starter requires a methodical electrical test sequence followed by mechanical unbolting. First, disconnect the negative battery cable using an insulated wrench and tuck it safely away from the battery post.
Locate the car starter, which is typically bolted to the lower engine block where the transmission bellhousing meets the flywheel. Inspect the heavy B+ cable leading from the battery to the main starter stud, as well as the small ignition signal wire connected to the solenoid S-terminal.
Follow these step-by-step diagnostic and replacement instructions to restore your car starter:
- Step 1: Test voltage at the solenoid S-terminal. Reconnect the battery temporarily, and have an assistant hold the key in the start position while you check for 12 volts at the small solenoid wire with a multimeter during your car starter test. If voltage is present but the car starter does not rotate, the starter unit is defective.
- Step 2: Disconnect electrical connections and battery cables. Disconnect the negative battery cable again. Remove the terminal nut holding the main positive battery cable to the car starter B+ stud, then unplug the solenoid control wire connector.
- Step 3: Remove heat shields and support brackets. Unbolt any metal exhaust heat shields, transmission oil cooler line brackets, or dipstick tube supports blocking physical access to the car starter body.
- Step 4: Unbolt the car starter mounting fasteners. Support the weight of the heavy starter motor with one hand while using a long socket extension to loosen and remove the two or three primary mounting bolts securing the flange to the transmission housing.
- Step 5: Maneuver the starter out and compare replacement units. Carefully slide the old car starter out from under the vehicle. Place it next to your new replacement starter to verify that the drive pinion gear tooth count, nose cone offset, and electrical stud orientations match perfectly.
- Step 6: Install the new starter unit and torque bolts to spec. Position the new car starter into the bellhousing opening, hand-thread all mounting bolts to prevent cross-threading, and tighten them evenly to factory torque specifications using a calibrated torque wrench.
When tracing complex electrical faults during a car starter diagnostic routine, utilizing read-auto-wiring-diagrams-to-trace-shorts helps you trace ignition switch power feeds through relay boxes. Additionally, cross-referencing decoding-factory-wiring-color-codes alongside find-hidden-chassis-ground-points-via-manual ensures you clean the specific body ground points that complete the high-amperage car starter return circuit.
Reinstallation Checks and Ignition Testing for Car Starter Servicing
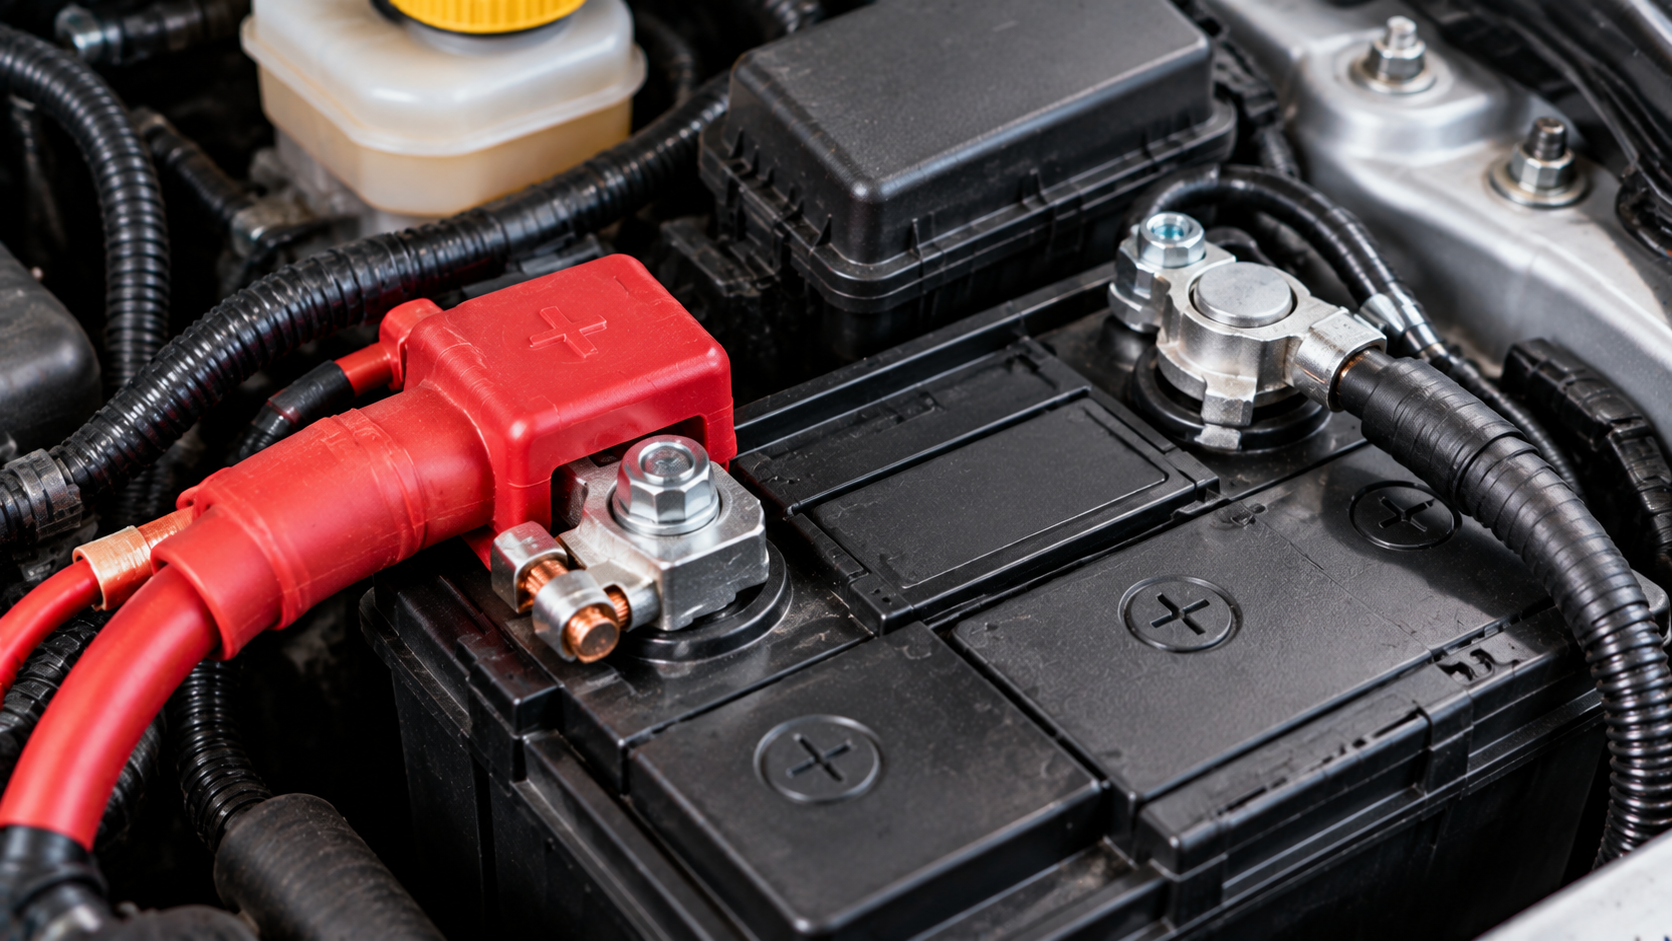
After bolting the new car starter securely to the bellhousing and reconnecting all electrical leads, you must perform a series of pre-start verification steps before lowering the vehicle. Double-check that the main B+ terminal nut is snug and protected by its rubber insulating boot to prevent accidental grounding against nearby chassis metal.
Ensure the small solenoid control wire is firmly clipped or screwed onto its terminal and verify that no wiring harnesses hang close to hot exhaust pipes or moving steering shafts.
Before turning the ignition key to test your new car starter installation, complete these scannable quality assurance checks:
- Battery terminal cleanliness: Ensure positive and negative battery posts are clean, free of oxidation, and torqued tightly to eliminate high resistance in the car starter supply line.
- Starter bolt torque verification: Check that all car starter mounting bolts are torqued to factory specifications to maintain precise drive gear meshing with the flywheel.
- Clearance from moving components: Verify that the car starter wiring harness maintains at least two inches of clearance from steering linkages and exhaust manifolds.
- Neutral safety switch check: Confirm that automatic vehicles crank only in Park or Neutral, and manual vehicles crank only with the clutch pedal fully depressed before activating the car starter.
Once all safety checks are complete, lower the vehicle, reconnect the negative battery cable, and turn the key to test your car starter. The engine should crank smoothly and briskly without high-pitched whining or metallic clatter.
If you encounter unexpected electrical faults during initial testing, reviewing relay-testing-procedures-manual-pinouts or checking battery-warning-light-alternator-testing-procedures-explained will help you isolate charging system or relay issues impacting your car starter.
DIY Car Starter Repair vs. Professional Shop Replacement
When deciding whether to replace a faulty car starter yourself or hire an automotive repair shop, compare costs, labor requirements, and technical complexity. A professional dealership or independent repair facility typically charges between $350 and $700 for a starter replacement, with labor accounting for a large portion of the bill on vehicles with tightly packaged engine bays.
Doing the job yourself with a high-quality aftermarket or remanufactured starter costs roughly $100 to $200 in parts, offering substantial savings for DIY mechanics. To help you choose the best repair option for your vehicle and skill level, we have compared DIY and professional car starter replacement factors in the table below.
DIY Car Starter Replacement vs. Professional Shop Repair Comparison
Evaluation Factor | DIY Repair (With Workshop Manual) | DIY Repair (Without Manual) | Professional Auto Repair Shop |
Average Project Cost | $100 - $220 (parts & consumable supplies) | $100 - $220 (plus potential tow & broken part costs) | $350 - $700 (parts, labor, and shop supply fees) |
Required Time | 2 - 4 hours (including diagnostic voltage drop testing) | 4 - 8 hours (due to struggle with hidden bolts) | 1 - 2 days (vehicle scheduling and shop turnaround) |
Electrical Safety | High: Clear manual instructions on battery disconnect & pinouts | Low: High risk of shorting B+ leads or damaging ECU | High: Professional mechanics follow certified electrical safety protocols |
Fitment Accuracy | High: Factory torque specs and shim guidelines prevent gear binding | Medium: Risk of cross-threading bolts or improper gear meshing | High: Includes shop warranty and certified part alignment guarantee |
Diagnostic Certainty | High: Systematic multimeter tests confirm starter failure before unbolting | Low: Risk of replacing functional starter due to misdiagnosed battery | High: Professional shop utilizes computerized diagnostic equipment |
As the comparison matrix shows, a detailed factory service manual turns an intimidating electrical job into a straightforward DIY project. Exact bolt locations and wiring schematics let you diagnose and replace your car starter with total technical confidence.
Ford Car Starter Repair Guide
Ford trucks and passenger vehicles feature heavy-duty starter motors designed for high-cranking torque, but accessing their mounting bolts often requires working through tight wheel well openings. On many models, the starter solenoid mounts directly on the motor casing, while older applications use a fender-mounted starter relay that controls high current to the car starter.
Ford F-350 Car Starter Repair Factors
When servicing the car starter on a heavy-duty truck, you must handle large high-amperage battery leads and heavy steel mounting brackets. The elevated ground clearance makes underbody access easier, but the starter unit itself is significantly heavier than standard passenger car starters. To verify the exact wiring pinout for the starter solenoid and obtain correct mounting bolt torque values, consult the 1982-1991 Ford F-350 workshop manual.
Toyota Car Starter Repair Guide
Toyota vehicles are renowned for starter motor longevity, utilizing durable reduction-gear car starter designs that deliver high cranking speed in a compact package. When a Toyota starter fails, the issue often traces to worn internal copper plunger contacts inside the solenoid assembly, which you can service or replace as a complete unit.
Toyota Tercel Car Starter Repair Factors
On compact Toyota models, the car starter is mounted on the rear side of the engine block beneath the intake manifold, making socket extension length critical during removal. Take care when disconnecting the small solenoid connector to avoid snapping aged plastic locking tabs. To follow the step-by-step intake bracket removal procedure and view bellhousing alignment diagrams, refer to the 1987-1990 Toyota Tercel workshop manual.
BMW Car Starter Repair Guide
BMW vehicles feature precisely engineered starting systems that integrate tightly with the vehicle's engine management and electronic immobilizer modules. On many classic and modern BMW engines, the car starter sits deep under the intake manifold, requiring systematic removal of air plenum ducting to access the top-side bolts.
BMW 3 Series Car Starter Repair Factors
Replacing the car starter on an E30 chassis requires reaching aluminum Torx-head bellhousing bolts from behind the transmission crossmember using long flex-head extensions. Disconnect the battery before touching the starter leads to protect sensitive onboard ECU circuits. To access detailed intake manifold removal steps and exact bolt torque sequences, consult the 1984-1991 BMW 318i E30 workshop manual.
Volkswagen Car Starter Repair Guide
Volkswagen vehicles utilize compact car starter units that often share mounting bolts with the front transmission mount or engine support brackets. On these European applications, removing the starter requires supporting the engine block with a jack to prevent motor sag when you remove the long bellhousing bolts.
Volkswagen Golf Car Starter Repair Factors
When replacing the car starter on a Golf, the front engine mount support bolts pass directly through the starter flange into the transmission housing. Mechanics must carefully align the starter nose bush and support bracket during reinstallation to prevent starter drive gear binding against the flywheel. To review complete engine support precautions and starter bolt torque specs, refer to the 1985-1992 Volkswagen Golf GTI workshop manual.
Peugeot Car Starter Repair Guide
Peugeot vehicles use distinctive French electrical routing, placing the starter motor near the rear engine firewall, adjacent to the steering column linkages. Accessing terminal nuts on these starter units requires working in confined quarters with specialized metric ring spanners.
Peugeot 505 Car Starter Repair Factors
On rear-wheel-drive Peugeot models, the car starter sits close to the exhaust manifold, so heat shield reinstallation is vital to prevent thermal damage to new solenoid windings. Clean chassis ground connections are essential to achieve full starter cranking rpm. To view exact wiring schematics and firewall harness routing for the starting system, consult the 1979-1992 Peugeot 505 workshop manual.
Honda Car Starter Repair Guide
Honda engines feature compact, high-speed car starter assemblies mounted on the front or top of the transmission housing, offering relatively straightforward access for DIY maintenance. However, proper wire routing and bracket alignment remain essential to prevent harness chafing against hot engine components.
Honda Civic Car Starter Repair Factors
Servicing the car starter on a Civic requires removing the air intake ducting and upper radiator hose brackets to gain clear tool access to the mounting bolts. Ensuring the starter ground cable is wire-brushed clean during reinstallation prevents intermittent slow-crank issues. To locate all harness retention clips and obtain exact torque values for starter mounting bolts, refer to the 1986-1991 Honda Civic workshop manual.
Hyundai Car Starter Repair Guide
Hyundai vehicles utilize conventional direct-drive or planetary gear reduction car starter motors positioned along the lower bellhousing flange. Diagnosing starter faults on these models involves checking the starter relay inside the main engine compartment fuse box before unbolting physical hardware.
Hyundai Stellar Car Starter Repair Factors
When replacing the car starter on classic Hyundai models, mechanics must verify that the solenoid S-terminal connector is securely fastened to prevent road vibration from disconnecting the ignition signal. Inspecting the flywheel teeth through the starter port ensures smooth drive gear engagement. To review factory electrical testing flowcharts and starter torque guidelines, consult the 1983-1991 Hyundai Stellar workshop manual.
Chevrolet Car Starter Repair Guide
Chevrolet V8 and V6 engines traditionally utilize heavy-duty, direct-drive car starter units bolted vertically into the bottom of the engine block. Achieving proper starter pinion gear to flywheel ring gear clearance on these classic American engine designs requires using metal alignment shims when necessary.
Chevrolet Caprice Car Starter Repair Factors
On full-size Chevrolet sedans, installing a replacement car starter requires checking ring gear clearance using a wire gauge to determine if mounting shims are needed to eliminate gear noise. Heavy battery cables must be routed away from exhaust manifolds to prevent insulation breakdown. To view factory shimming procedures and starter electrical schematics, refer to the 1982-1990 Chevrolet Caprice workshop manual.
Nissan Car Starter Repair Guide
Nissan starting systems employ compact gear-reduction car starter units that deliver high torque output while drawing lower current during cold weather starts. Accessing starter mounting bolts on Nissan front-wheel-drive platforms often requires removing lower splash shields or oil filter brackets.
Nissan Sentra Car Starter Repair Factors
Replacing the car starter on a Sentra involves working around lower radiator hoses and transaxle shift cables. Ensuring the starter solenoid terminal nut is properly torqued prevents high-resistance hot spots that cause intermittent no-start conditions. To review step-by-step component removal views and bellhousing bolt torque values, consult the 1982-1990 Nissan Sentra workshop manual.
Mercedes-Benz Car Starter Repair Guide
Mercedes-Benz vehicles utilize robust, heavy-duty car starter assemblies engineered to handle high-compression engines. The starting circuit is closely tied to neutral safety switches and steering lock security modules, making thorough electrical diagnosis essential before starter removal.
Mercedes-Benz 420SEL Car Starter Repair Factors
Replacing the car starter on a V8 Mercedes sedan requires working underneath the vehicle near steering drag links and exhaust downpipes. Disconnecting the negative battery terminal is mandatory to protect sensitive electronic modules from voltage spikes during starter cable removal. To view exact wiring schematics and bellhousing bolt tightening sequences, refer to the 1986-1991 Mercedes-Benz 420SEL workshop manual.
Subaru Car Starter Repair Guide
Subaru boxer engines feature top-mounted car starter units positioned conveniently on the upper bellhousing flange behind the pitch-stopper mount. This accessible layout makes starter testing and replacement exceptionally straightforward for DIY enthusiasts compared to transverse engine designs.
Subaru XT-6 Car Starter Repair Factors
On classic Subaru models, replacing the car starter requires unbolting top-side intake brackets and disconnecting the main engine harness connectors to swing wires clear. Cleaning the aluminum bellhousing mating surface ensures a solid ground return for the starter motor. To check wiring pinouts and obtain exact torque values for starter flange bolts, consult the 1988-1991 Subaru XT-6 workshop manual.
Jeep Car Starter Repair Guide
Jeep 4x4 vehicles utilize rugged car starter motors designed to withstand off-road mud, water exposure, and heavy engine cranking demands. However, exposed underbody locations make starter solenoid terminals particularly susceptible to road salt corrosion and mud buildup that disrupts electrical contact.
Jeep Wagoneer Car Starter Repair Factors
Servicing the car starter on a 4x4 Jeep requires inspecting the solenoid terminals for heavy corrosion and ensuring protective rubber boots are intact. Verifying that the starter motor flange seats flush against the transfer case adapter prevents ring gear misalignment. To locate all wiring harness retainers and obtain factory starter bolt torque specs, refer to the 1984-1990 Jeep Wagoneer workshop manual.
Choosing the Right Workshop Manual Resources for Car Starter Repair
Selecting accurate technical documentation is the single most critical factor when preparing for a car starter diagnostic or replacement project. While generic video tutorials can provide a brief visual overview of starter unbolting, they lack the model-specific wiring schematics, fuse panel locations, and exact torque values needed for a safe, durable repair.
A dedicated factory service manual provides precise terminal pinouts and diagnostic flowcharts tailored to your vehicle's exact engine and transmission configuration. To help you choose the best repair manual for your starting system troubleshooting, you can review how-to-choose-the-right-workshop-repair-manual and compare professional service documentation options.
For modern vehicles with complex electronic immobilizers and computerized relay modules, digital interactive service software offers distinct advantages for electrical tracing. Consulting how-to-navigate-interactive-pdf-workshop-manuals can teach you how to quickly locate starter relay schematics and terminal voltage specs.
Knowing when-to-upgrade-to-a-factory-service-manual is vital when dealing with intermittent no-crank conditions, and finding verified factory documentation through where-to-download-genuine-oem-workshop-manuals ensures your diagnostic measurements match original manufacturer standards.
Also, guides like digital-car-manuals-vs-mechanic-advice or multimeter-sensor-testing-via-workshop-manuals can build your electrical testing skills before you work on your car starter.
Restore Reliable Ignition Performance Today
Do not let an intermittent or dead car starter leave you stranded or force you into paying excessive auto shop repair bills. By utilizing a digital multimeter, performing methodical voltage drop tests, and following factory manual schematics, you can accurately diagnose and replace your starter motor with complete confidence.
To ensure you have the exact terminal pinouts, bellhousing torque specs, and wiring diagrams for your vehicle, find the correct workshop repair manual before picking up your tools.
Commonly Asked Questions About to Repair Car Horn
How Can I Tell If My Car Starter or Battery Is Bad?
To determine whether your car starter or battery is bad, turn on your headlights and attempt to crank the engine. If the headlights dim significantly or go completely dark when turning the key, the battery is discharged or failing under load.
If the headlights stay bright while you turn the key and you hear a single click or complete silence, the issue is typically a failed starter solenoid, worn motor brushes, or a bad starter relay circuit.
Can You Jump-Start A Car With A Bad Car Starter?
No, jump-starting a vehicle will not start an engine if the car starter motor or solenoid has suffered a complete mechanical or internal electrical failure. Jump-starting only resolves issues caused by a discharged battery by supplying external voltage.
However, if low voltage at the solenoid is caused by a weak battery, jump-starting provides the current needed to engage the starter.
What Causes A Car Starter to Fail Unexpectedly?
Car starter assemblies fail for several mechanical and electrical reasons, including worn carbon brushes, burnt copper solenoid contacts, open motor armature windings, or failed internal planetary reduction gears.
Additionally, oil leaks from valve covers that drip directly onto the starter casing accelerate brush degradation, while extreme underhood heat can cause solenoid thermal breakdown.
Can I Replace A Car Starter Myself At Home?
Yes, replacing a car starter is a manageable DIY project for mechanics equipped with basic hand tools, a floor jack, safety jack stands, and a digital multimeter. By disconnecting the battery, following factory workshop manual removal sequences, and torquing bellhousing bolts to spec, you can safely replace a defective car starter in two to four hours and save hundreds of dollars in shop labor.
Is It Necessary to Shim A New Car Starter During Installation?
Shimming a new car starter is only necessary on specific engine configurations, such as classic Chevrolet V8 and V6 engines that utilize vertical block-mounted starters. On these designs, shims adjust the clearance between the starter pinion gear and the engine flywheel ring gear to prevent whining or grinding noises.
Most modern Japanese and European vehicles use precise flange mounts that don't require starter shims.
How Much Does It Cost to Replace A Car Starter at An Auto Shop?
The total cost to replace a car starter at a professional repair shop ranges from $350 to $700, depending on vehicle make, engine bay accessibility, and labor rates. The starter replacement part itself typically costs $100 to $250, while professional labor adds $200 to $450. If you do the repair yourself using a factory manual, it costs only the price of the replacement starter.