Key Takeaway
- Start a leather car seat tear repair by identifying the type and severity of damage before choosing a repair method.
- Small cuts, surface cracks, punctures, and deep tears require different approaches because leather structure and seat materials vary.
- Proper preparation is one of the most important parts of leather car seat repair, including cleaning, checking damaged edges, and selecting suitable repair materials.
- DIY repair may work for minor leather damage, but larger tears, damaged stitching, airbag-related seat areas, or complex upholstery repairs may require professional service.
- Accurate vehicle information helps you identify seat construction, interior components, and access considerations before attempting repairs.
A torn leather car seat can affect both the appearance and comfort of a vehicle interior. While small cracks and minor cuts may seem easy to repair, the right method depends on the leather type, the tear size, the location on the seat, and whether the damage affects only the surface or the underlying upholstery structure.
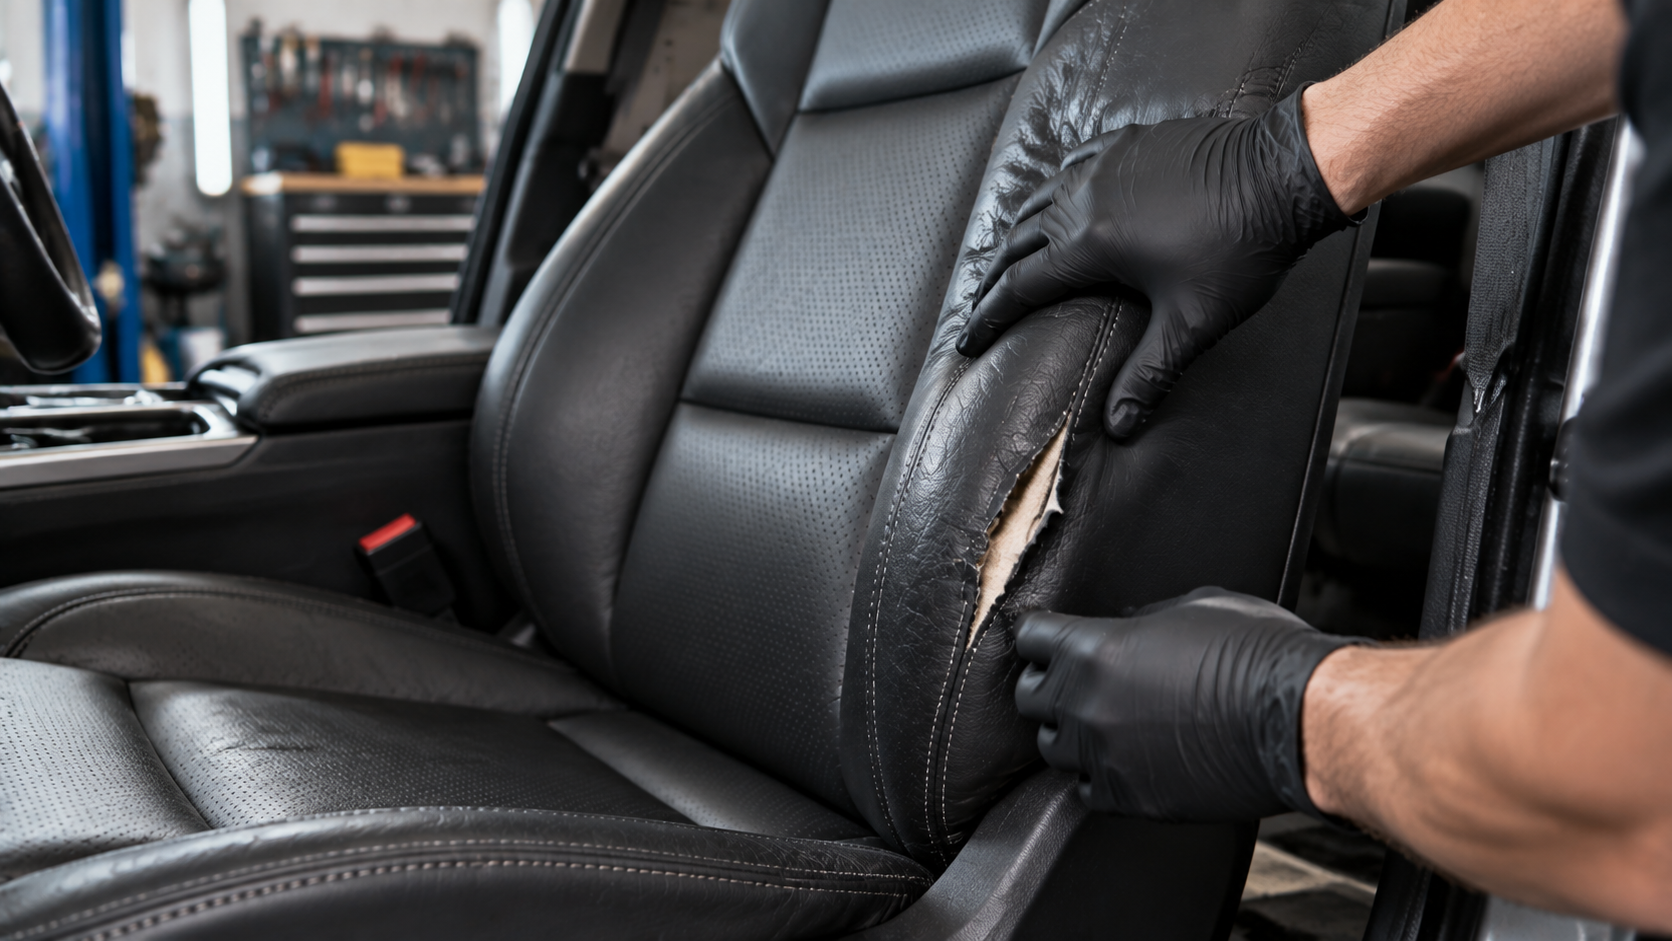
When learning how to repair a tear in a leather car seat, the first step is not applying a repair kit. It is understanding what has actually failed. A small surface split on a seat bolster requires a different approach from a deep tear through the leather layer, foam support, or stitching.
NXTmotors approaches interior repair topics by focusing on correct identification first. Understanding the vehicle configuration, seat design, and repair limitations helps you avoid making the damage worse and decide whether you can handle the repair with careful DIY methods or need professional upholstery work.
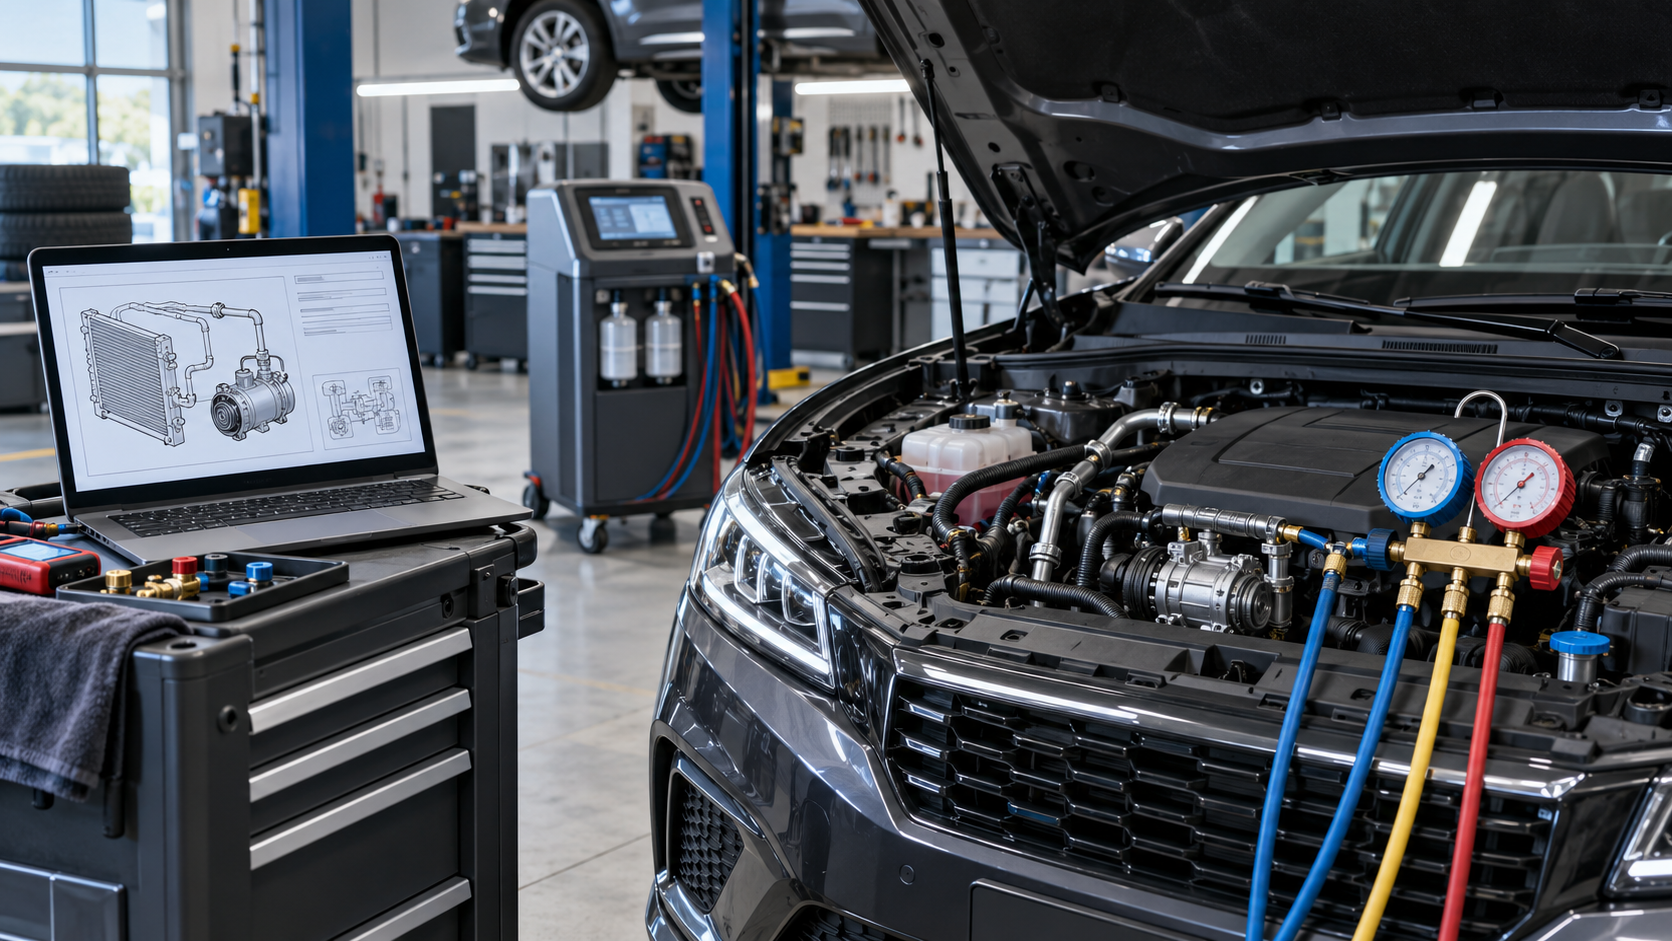
Before removing interior components or attempting complex seat repairs, find the correct workshop repair manual for your vehicle to understand seat components, interior systems, and vehicle-specific repair information.
How to Repair Tear in Leather Car Seat: Identify the Damage Type
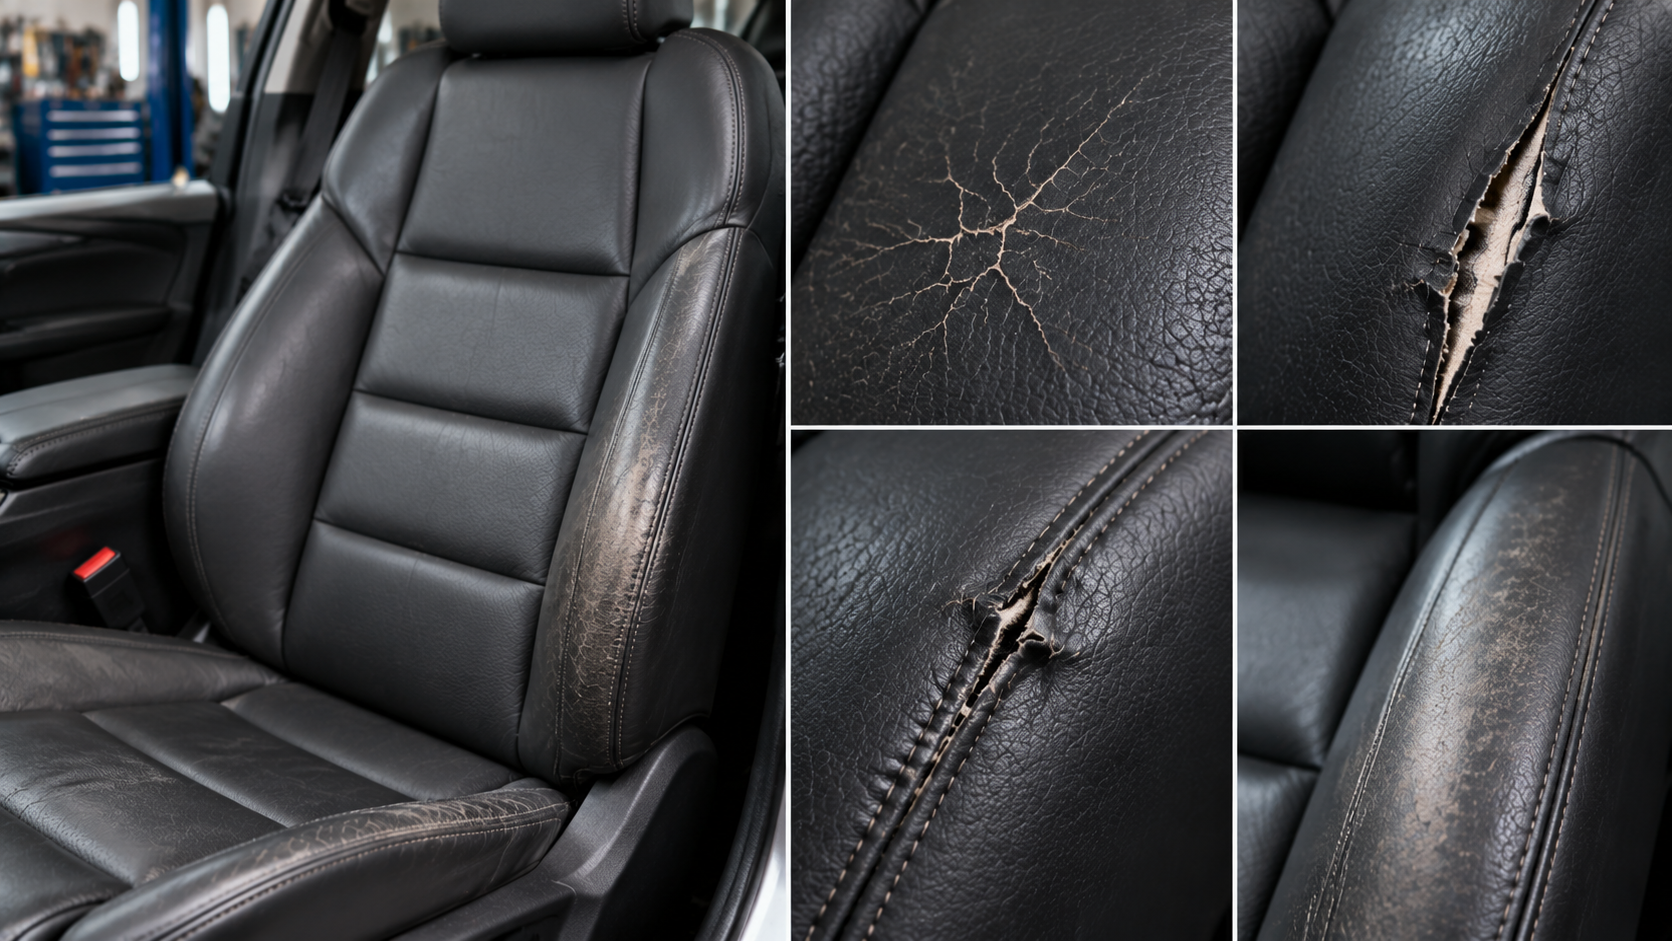
The first step in leather car seat tear repair is identifying the damage type. Not every damaged leather surface requires the same repair method.
A repair kit designed for a small surface cut may not suit a large tear where the leather has separated from the seat structure.
Leather Car Seat Damage Assessment Table
Leather Seat Damage Type | Common Appearance | Repair Consideration |
Surface crack | Thin lines or worn finish | May require cleaning, conditioning, or surface repair |
Small cut | Short split in leather surface | May be repairable with leather repair materials |
Small puncture | Hole through leather layer | Requires filling or patch support depending on size |
Large tear | Separated leather sections | May require reinforcement or upholstery repair |
Torn stitching | Open seam or separated panels | May require stitching repair |
Damaged seat bolster | Wear on raised side support area | Often requires more detailed repair planning |
The tear's location also matters.
A tear in the center seating area may experience different stress than a tear on the side bolster, where passengers slide across the seat when entering and exiting.
Common high-wear areas include:
- Driver seat side bolsters.
- Seat entry edges.
- Armrest leather surfaces.
- Steering wheel leather.
- Frequently touched interior areas.
A leather car seat tear repair should consider why the damage happened, not only how to cover the visible mark.
For example:
A repaired tear caused by repeated friction may return if you don't address the underlying wear pattern.
Leather Car Seat Tear Causes and Prevention
Understanding why leather seats tear helps prevent the same issue after repair.
Common causes include:
Normal Wear and Friction
Driver seats often experience repeated movement during entry and exit. The side bolster area can receive significant friction as passengers slide across the leather surface.
Over time, this can lead to:
- Surface cracking.
- Loss of flexibility.
- Color wear.
- Small splits becoming larger tears.
Dry or Neglected Leather
Leather needs proper care to stay flexible. When leather becomes dry, it can become less resistant to bending and stretching.
A dry leather surface may be more likely to develop:
- Cracks.
- Surface separation.
- Premature wear.
However, conditioning products cannot repair every type of damage. Once leather has physically torn, the damaged area requires repair, not just surface treatment.
Sharp Objects and Accidental Damage
Leather seats can be damaged by:
- Keys.
- Tools.
- Clothing accessories.
- Pet claws.
- Objects placed on seats.
These damages may appear small initially but can expand with regular seat movement.
Excessive Heat and Sun Exposure
Interior heat and UV exposure can contribute to leather deterioration over time.
Repeated exposure may affect:
- Leather flexibility.
- Surface finish.
- Color consistency.
A good maintenance routine can help preserve leather condition, but it cannot reverse existing structural damage.
Preparing a Leather Car Seat Before Repair
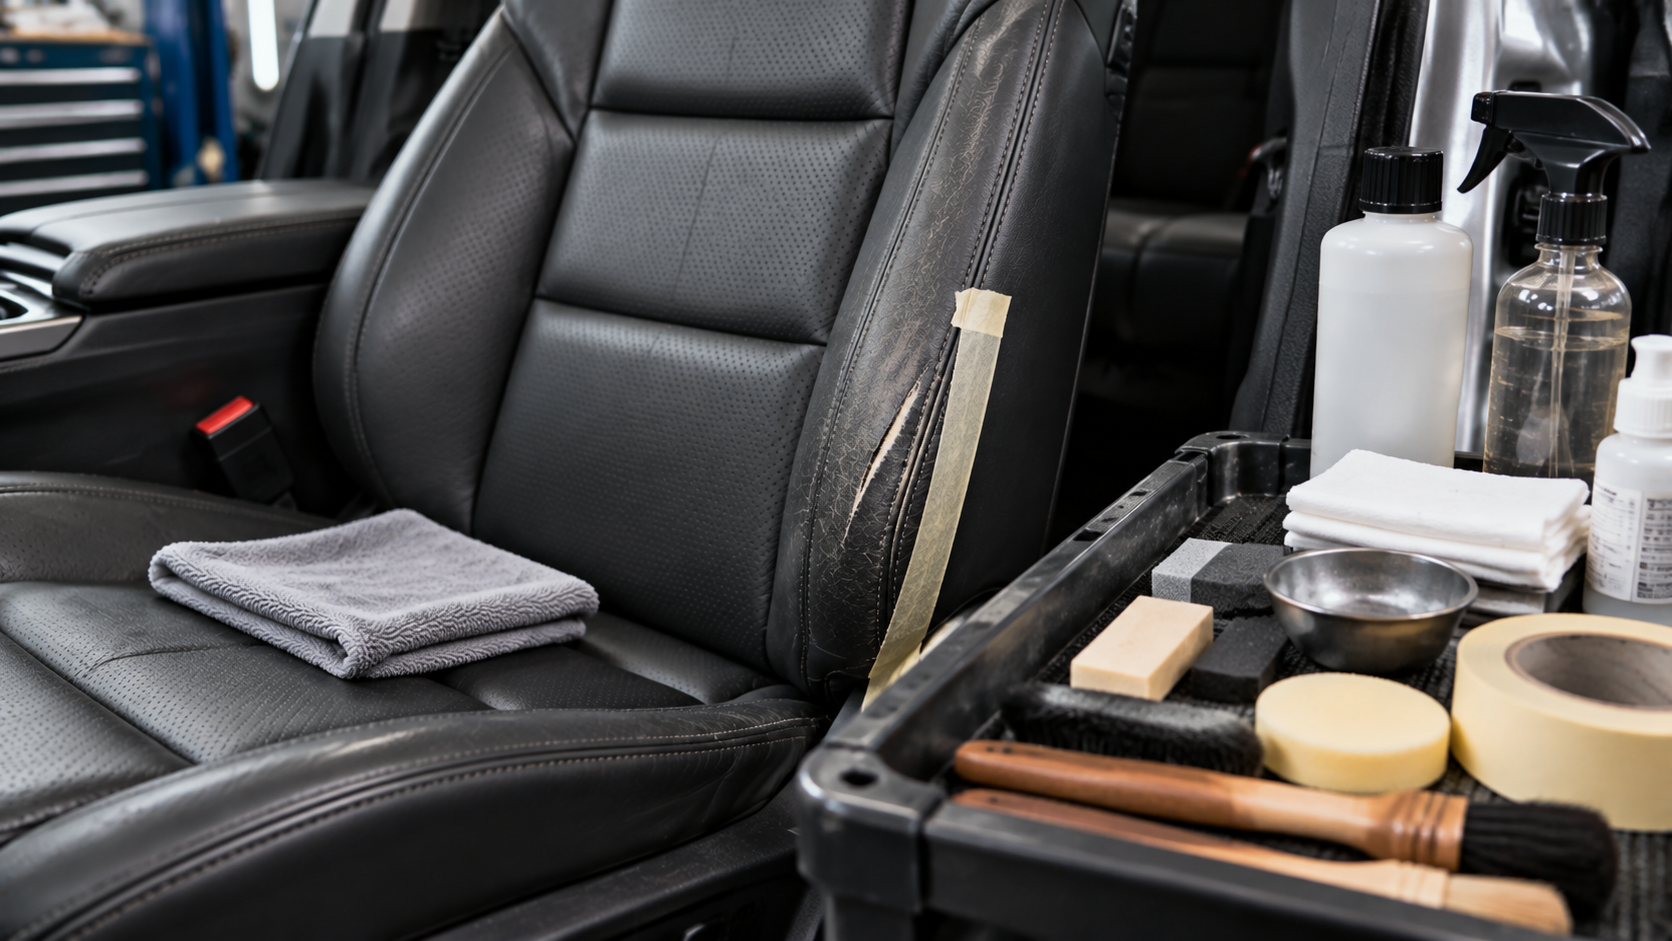
Proper preparation is one of the most important steps in repairing a tear in a leather car seat.
Applying repair materials over dirt, oils, or damaged loose leather can reduce repair quality.
Before starting, inspect:
- Tear size.
- Tear depth.
- Surrounding leather condition.
- Seat stitching.
- Underlying foam or support.
- Nearby electronic components.
Leather Seat Preparation Steps
Clean the Damaged Area
The repair area should be cleaned carefully to remove:
- Dirt.
- Body oils.
- Cleaning product residue.
- Surface contamination.
The goal is to create a clean surface without causing additional damage.
Inspect the Tear Edges
Evaluate loose leather edges before repair.
Important questions:
- Are the edges still connected?
- Is the leather stretched?
- Is the tear expanding?
- Is the backing material visible?
- Is stitching affected?
A clean-looking tear is not always a simple repair.
Check Seat Components Before Disassembly
Modern vehicle seats may contain:
- Airbags.
- Heating elements.
- Ventilation systems.
- Electrical sensors.
- Occupancy detection systems.
Because of this, removing seat covers or upholstery components requires additional caution.
A workshop manual can help identify seat-related systems and component locations before interior work begins.
NXTmotors emphasizes vehicle-specific information because interior layouts can vary significantly by model and trim level.
Leather Repair Kit vs Professional Leather Repair
Whether you choose DIY repair or professional upholstery service depends on the seat's condition.
DIY Leather Car Seat Repair May Suit:
- Small surface tears.
- Minor cuts.
- Small damaged areas.
- Cosmetic imperfections.
A DIY repair approach usually involves:
- Cleaning the area.
- Preparing the damaged leather.
- Applying repair material.
- Matching texture and color.
- Allowing proper curing time.
Professional Leather Seat Repair May Be Better For:
- Large tears.
- Damaged seams.
- Torn seat cushions.
- Airbag seat areas.
- Heated or ventilated seats.
- Extensive leather replacement.
Professional upholstery repair may involve:
- Removing seat covers.
- Replacing leather sections.
- Repairing stitching.
- Matching original material.
- Restoring factory appearance.
A leather car seat tear repair should be judged by the damage, not only by the size of the visible tear.
How to Repair a Tear in a Leather Car Seat: Step-by-Step Process
A leather car seat tear repair requires patience and preparation. The quality of the repair depends not only on the materials used but also on how well the damaged area is prepared before applying any repair product.
A rushed repair may temporarily cover the tear but can fail when the seat experiences normal movement and pressure.
A general leather seat repair process involves:
- Cleaning the damaged area.
- Preparing the torn edges.
- Supporting the damaged section if needed.
- Applying suitable repair material.
- Matching texture and color.
- Allowing proper curing time.
- Protecting the repaired surface.
The exact method depends on whether the damage is cosmetic or structural.
Cleaning the Leather Seat Before Repair
Before starting a leather car seat repair, the damaged area should be cleaned carefully.
Contaminants such as:
- Dust.
- Body oils.
- Food residue.
- Previous cleaning products.
- Moisture.
can prevent repair materials from bonding properly.
Leather Cleaning Preparation
A proper preparation process includes:
Remove Surface Dirt
Use a suitable leather-safe cleaning method to remove contamination around the damaged area.
Avoid:
- Harsh household cleaners.
- Strong solvents.
- Abrasive brushes.
These can affect the leather surface and create additional damage.
Dry the Area Completely
The leather surface should be completely dry before applying repair materials.
Moisture trapped underneath repair materials can affect:
- Adhesion.
- Curing.
- Final appearance.
Inspect Surrounding Leather
Also check the area around the tear.
A small tear may indicate a larger wear problem if the surrounding leather has:
- Deep cracking.
- Weak areas.
- Loss of flexibility.
- Discoloration.
Repairing only the visible opening may not address the larger issue.
Repairing a Small Tear in a Leather Car Seat
A small leather car seat tear may be manageable when the leather remains mostly intact, and the damage is limited to the surface.
Typical small tear situations include:
- Small cuts.
- Minor splits.
- Surface separation.
- Small punctures.
A basic repair process may include:
Step 1: Prepare the Damaged Area
Clean the leather around the tear and remove loose material.
The goal is to create a stable area for repair.
Step 2: Support the Tear
Some small tears may require backing material behind the leather surface.
The backing helps provide support so the repair material has a stable foundation.
Step 3: Apply Leather Repair Material
Leather repair compounds can help fill small damaged areas.
The product should be selected based on:
- Leather type.
- Damage size.
- Surface texture.
- Color requirements.
Step 4: Match the Texture and Color
A repair can remain visible if the texture or color does not match.
The repaired area should blend as closely as possible with the surrounding leather.
Repairing a Large Tear in a Leather Car Seat
A large leather car seat tear repair requires a different approach because the leather structure may no longer support a simple surface repair.
Large tears may involve:
- Separated leather sections.
- Missing material.
- Damaged foam.
- Broken stitching.
- Stretched upholstery.
In these situations, covering the tear with filler alone may not provide a durable repair.
Possible repair approaches include:
- Leather patch reinforcement.
- Section replacement.
- Upholstery stitching repair.
- Partial seat-cover replacement.
A professional upholstery specialist may be required when the repair affects the original seat structure.
Repairing Torn Leather Seat Stitching
Leather seat damage is not always a tear in the leather itself. Sometimes the stitching fails while the leather remains usable.
A leather car seat repair involving stitching requires attention because the seam holds multiple upholstery sections together.
Possible causes include:
- Normal wear.
- Excessive stretching.
- Weak thread.
- Previous repair failure.
A stitching repair may require:
- Matching thread type.
- Correct stitching pattern.
- Proper tension.
- Upholstery experience.
Incorrect stitching can create additional stress points and cause the tear to return.
Leather Car Seat Patch Repair
A patch repair can be useful when the damaged area requires additional support.
However, the repair method depends on:
- Tear location.
- Leather thickness.
- Seat movement.
- Visibility of the repair area.
A patch on a hidden side area may be acceptable, while a visible center seat area may require more detailed restoration.
A successful leather car seat tear repair should balance:
- Strength.
- Appearance.
- Comfort.
- Long-term durability.
Protecting a Repaired Leather Car Seat
After completing a leather seat repair, maintaining the repaired area helps reduce future damage.
Important maintenance steps include:
Regular Cleaning
Remove dirt and oils that can contribute to surface deterioration.
Leather Conditioning
Leather conditioning can help maintain flexibility when appropriate for the material.
However, conditioning cannot repair:
- Open tears.
- Missing leather.
- Broken stitching.
- Structural damage.
Reduce Excessive Friction
High-friction areas, such as seat bolsters, wear out faster.
Helpful habits include:
- Avoid sliding heavily across the seat edge.
- Keep sharp objects away.
- Clean spills quickly.
Leather Car Seat Repair: DIY vs Professional Repair
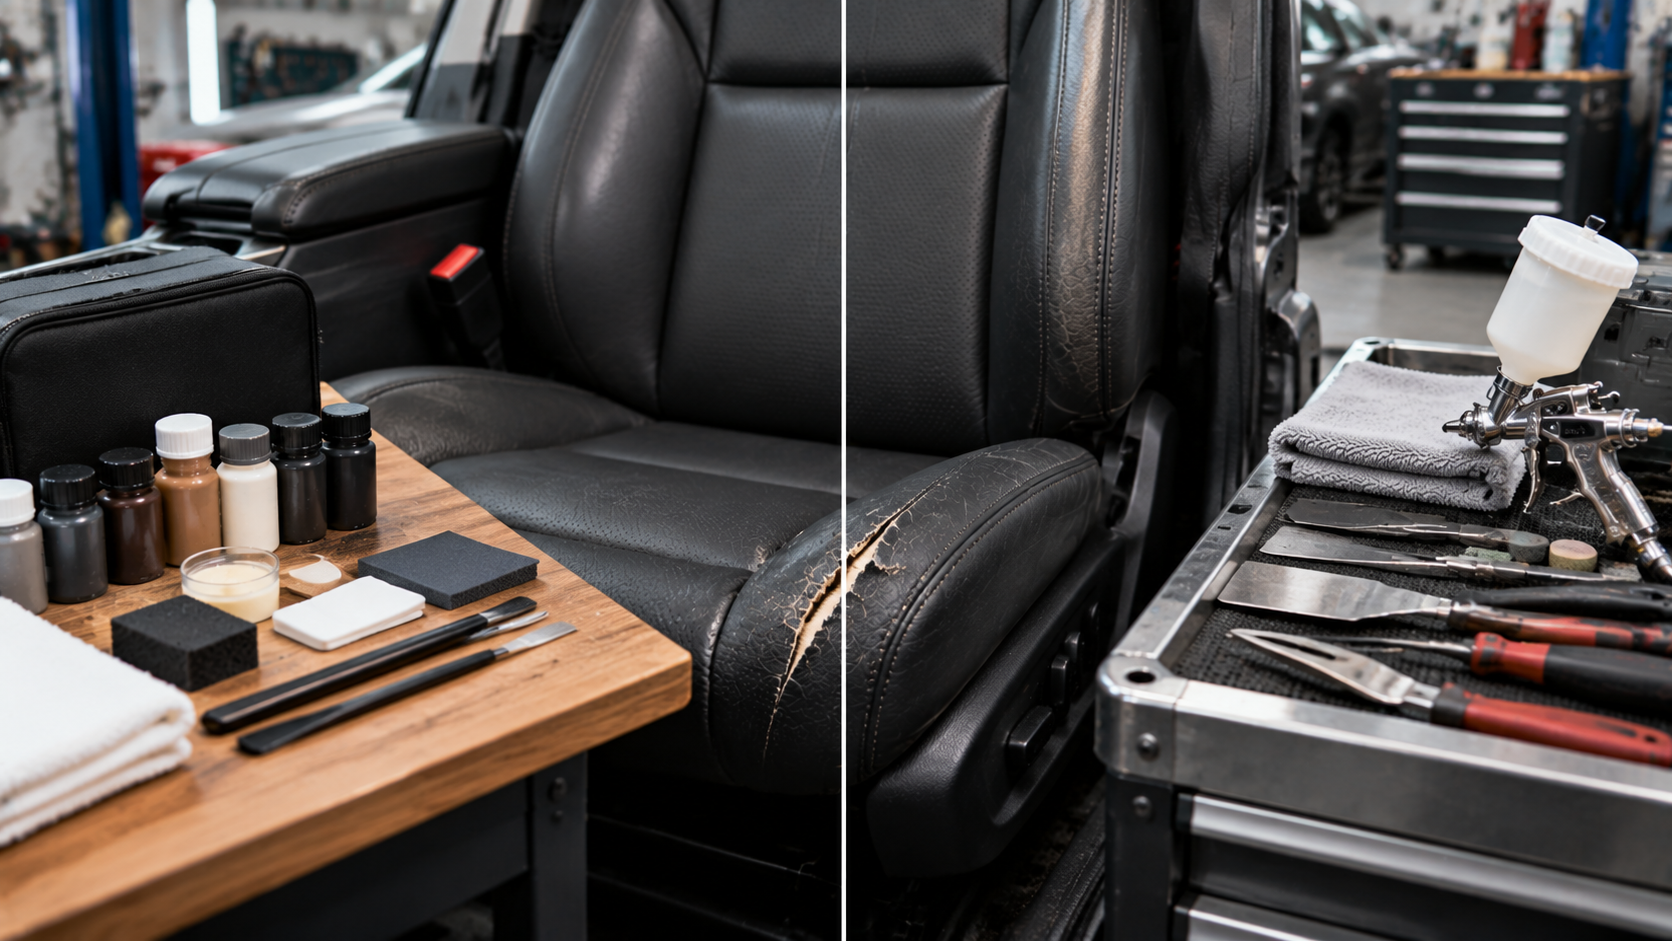
The decision between DIY and professional repair depends on the damage level.
DIY Leather Seat Repair
Suitable for:
- Small cosmetic tears.
- Minor surface damage.
- Small cracks.
Advantages:
- Lower cost.
- Convenient.
- Suitable for minor repairs.
Limitations:
- Color matching can be difficult.
- Texture matching requires skill.
- Large repairs may remain visible.
Professional Leather Seat Repair
Recommended for:
- Large tears.
- Visible major damage.
- Damaged stitching.
- Heated or ventilated seats.
- Airbag-related seat areas.
Professional repair may include:
- Material replacement.
- Upholstery removal.
- Factory-style stitching.
- Complete seat-cover restoration.
Leather Car Seat Repair Manual vs Repair Shop
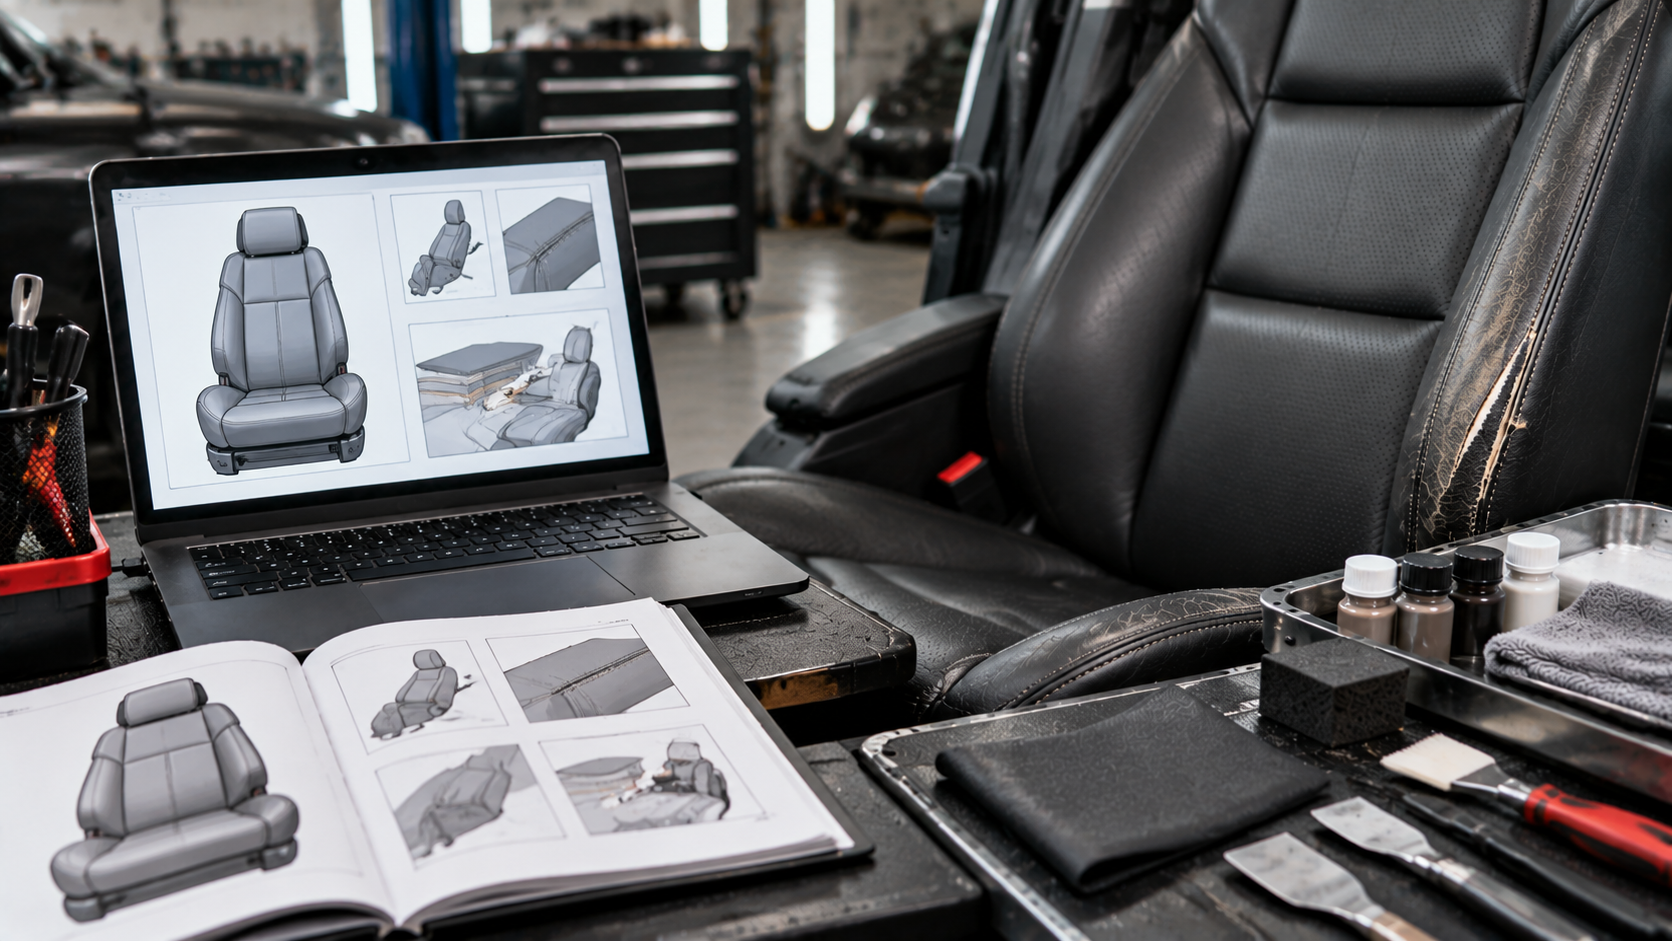
A workshop manual and a professional upholstery specialist offer different value.
Leather Car Seat Repair Comparison
Repair Need | Workshop Manual Value | Professional Repair Value |
Identify seat components | Helps understand vehicle structure | Confirms physical condition |
Understand seat systems | Shows vehicle-specific information | Handles upholstery repair |
Check electrical seat features | Helps identify related components | Performs physical testing |
Remove seat components | Provides technical reference | Performs safe removal |
Restore leather appearance | Limited guidance | Provides material matching |
Modern vehicles may include:
- Seat airbags.
- Heating systems.
- Ventilation systems.
- Occupancy sensors.
Because of this, approach seat removal and upholstery work carefully.
NXTmotors provides vehicle-specific workshop information to help you understand the vehicle structure before making repair decisions.
Ford Leather Car Seat Repair
A Ford leather car seat repair should consider the specific vehicle configuration, seat design, and interior features.
Different Ford models may use different seat structures, electrical features, and upholstery designs.
NXTmotors Ford resources help connect general interior repair questions with vehicle-specific information.
Ford F-150 Leather Car Seat Repair Factors
For applicable vehicles: The 2007-2013 Ford F-150 2WD workshop manual provides technical information for the matching vehicle configuration.
The manual can help identify seat-related components and vehicle systems but does not indicate a common leather seat tear issue for the model.
Toyota Leather Car Seat Repair
A Toyota leather car seat repair approach depends on the model, trim level, and seat configuration.
Vehicle-specific information is useful when seats include electrical features or additional systems.
Toyota Camry Leather Car Seat Repair Factors
For applicable vehicles: 1997-2002 Toyota Camry LE workshop manual provides vehicle-specific reference information.
The manual helps you understand seat-related components and vehicle configuration.
BMW Leather Car Seat Repair
A BMW leather car seat repair may involve additional interior systems depending on the vehicle configuration.
BMW seats may include features such as:
- Power adjustments.
- Heating.
- Sensors.
- Additional electrical connections.
BMW 3 Series F30 Leather Car Seat Repair Factors
For applicable vehicles: 2012-2018 BMW 3 Series F30 workshop manual provides technical reference information.
The manual helps identify vehicle systems but does not replace professional upholstery restoration.
Volkswagen Leather Car Seat Repair
A Volkswagen leather car seat repair should consider the specific interior configuration and seat features.
Volkswagen Golf Mk6 Leather Car Seat Repair Factors
For applicable vehicles: 2008-2013 Volkswagen Golf Mk6 workshop manual provides vehicle-specific technical information.
The manual helps you understand seat-related components and interior systems.
Leather Car Seat Tear Repair: Confirm the Right Repair Approach
A leather car seat tear repair should always begin with understanding the damage, the seat construction, and the repair limitations.
A small surface tear may only require cosmetic repair, while a large tear may require professional upholstery work. Choosing the wrong method can make the damage more noticeable or reduce the repair's durability.
Before starting any repair, confirm:
- The size and depth of the tear.
- Whether the leather is only damaged on the surface.
- Whether stitching or seat structure is affected.
- Whether the seat contains airbags, heating, ventilation, or electrical components.
- Whether professional repair is required.
The correct process for how to repair a tear in leather car seat is:
- Inspect the damage.
- Prepare the leather surface.
- Choose the correct repair method.
- Apply suitable materials carefully.
- Protect the repaired area afterward.
NXTmotors focuses on helping vehicle owners understand their vehicle systems before performing repairs. For complex interior work, vehicle-specific information can help identify seat components and related systems.
Before removing interior components or performing detailed repairs, find the correct workshop repair manual for your vehicle.
Commonly Asked Questions About Leather Car Seat Tear Repair
Can I Repair a Tear in a Leather Car Seat Myself?
A small leather car seat tear can sometimes be repaired using a suitable leather repair kit, especially when the damage is limited to the surface. Small cuts, minor cracks, and cosmetic damage may be manageable with careful preparation and correct materials.
However, larger tears, damaged stitching, missing leather sections, or damage near seat airbags and electrical components may require professional repair. The success of a DIY repair depends on the tear size, leather condition, repair location, and the expected final appearance.
Before starting a repair, assess whether the damage is cosmetic or structural. A repair that only covers the visible tear may not solve the underlying problem if the surrounding leather has already weakened.
How Much Does It Cost to Repair a Torn Leather Car Seat?
The cost of a leather car seat repair depends on the tear size, the leather type, the repair method, and whether professional upholstery work is required.
Small cosmetic repairs may require only repair materials and basic tools. Larger repairs may involve replacing leather sections, repairing stitching, matching materials, or removing seat components.
The repair location also affects cost. A visible center seat area may require more detailed restoration than a hidden side section. Seats with heating systems, ventilation, airbags, or electronic controls may require additional care during repair.
The best approach is to identify the damage type before deciding whether a DIY repair or professional restoration is appropriate.
How Do You Fix a Small Tear in a Leather Car Seat?
A small leather car seat tear repair usually begins with cleaning and preparing the damaged area. Remove dirt, oils, and residue before applying repair materials.
Next, inspect the damaged edges to see whether the leather is still stable. Depending on the damage, repair may involve backing support, leather filler, texture matching, and color restoration.
The final appearance depends heavily on preparation and material matching. A poorly prepared repair may remain visible or fail under normal movement.
Small repairs can be successful when the damage is limited, but larger or high-stress areas may require additional reinforcement.
Can a Leather Car Seat Tear Be Repaired Without Replacing the Leather?
Some leather seat tears can be repaired without replacing the entire leather section. This depends on the size, location, and condition of the damaged area.
Small tears may be repaired using leather repair materials and reinforcement methods. However, large tears, stretched leather, damaged seams, or missing material may require partial leather replacement.
The goal is not only closing the visible opening but restoring strength and appearance. A repair that looks acceptable initially may fail if the damaged area continues experiencing stress.
The correct repair method depends on the condition of the surrounding leather and the expected durability requirement.
Why Did My Leather Car Seat Tear Again After Repair?
A repaired leather car seat may tear again if the original cause of damage was not addressed.
Common reasons include:
- Continued friction from entering and exiting the vehicle.
- Weak surrounding leather.
- Incorrect repair method.
- Insufficient reinforcement.
- Poor material matching.
For example, a side bolster that receives constant pressure may require more than a simple surface repair.
A successful leather car seat tear repair should consider both the damaged area and the conditions that caused the damage.
Can I Use Glue to Repair a Torn Leather Car Seat?
Glue alone is usually not a complete leather seat repair solution. While adhesive may temporarily hold damaged areas together, it may not provide the flexibility and durability required for a frequently used vehicle seat.
Leather seats experience repeated movement, stretching, and pressure. A proper repair may require reinforcement, filler, stitching repair, or replacement material depending on the damage.
Before applying any repair product, identify the tear type and select a method designed for automotive leather surfaces.
Should I Replace or Repair a Torn Leather Car Seat?
The decision between repair and replacement depends on the severity of the damage.
Repair may be suitable for:
- Small tears.
- Minor cracks.
- Limited cosmetic damage.
Replacement or professional restoration may be better for:
- Large damaged sections.
- Torn seams.
- Missing leather.
- Damaged seat structure.
- Airbag-related areas.
When deciding on a repair, consider appearance, durability, safety, and cost, not just the size of the visible tear.
Img p
V2
SEO Title: How to Repair Tear in Leather Car Seat: DIY Guide | NXT Motors
Meta Description: How to repair tear in leather car seat bolsters step-by-step. Insert sub-patches, apply liquid filler, and match grain safely. Find your manual now!
How to Repair Tear in Leather Car Seat: DIY Upholstery Restoration Guide
Key Takeaway
- Assess the Damage Scope Early: Before applying any adhesive, determine if the leather seat tear is a clean slit, a wide puncture, or a perforated seam rupture to select the proper sub-patch backing material.
- Always Insert a Sub-Patch: Never apply liquid leather filler directly over an open gap without inserting a fabric or canvas sub-patch underneath, as unbacked repairs will stretch and re-split under passenger weight.
- Scrape and De-Gloss the Surface: Success in a leather seat tear repair depends on degreasing the surrounding bolster with isopropyl alcohol and lightly sanding the grain edges so the repair compound bonds tightly.
- Disconnect Power Seat Wiring Safely: Always disconnect the battery and wait for electrical discharge before removing seat tracks or disconnecting side-impact airbag harnesses built into the leather seat assembly.
- Consult Factory Service Diagrams: Utilize a manufacturer workshop manual to safely locate seat heater element wiring, occupancy sensors, and side airbag harnesses when unbolting leather seat frames.
Discovering a jagged split or puncture across your leather seat tear can quickly ruin the luxurious feel of your cabin and reduce your vehicle's resale value. If left unaddressed, an open leather seat tear allows foam padding to degrade, traps dirt, and expands rapidly as passengers slide in and out of the vehicle. Many owners delay learning how to repair tear in leather car seat bolsters because they fear creating an unsightly, hardened patch or accidentally damaging integrated seat heaters and side-impact airbag wiring harnesses. Fortunately, NXT Motors provides a systematic, manual-guided restoration methodology that shows you how to insert structural sub-patches, apply flexible liquid leather filler, and match factory grain textures seamlessly. This comprehensive guide outlines the exact tools, chemical precautions, and step-by-step procedures required to repair your leather seat tear and restore your interior upholstery to pristine condition.
Before attempting any seat removal, trim disassembly, or heating element wiring disconnection to fix a leather seat tear, make sure to find the correct workshop repair manual for your vehicle's specific seat frame mounting bolts and occupant classification sensor wiring.
How to Repair Tear in Leather Car Seat: Diagnosing Damage Severity and Material Types
Before beginning any repair work, you must classify the type of leather seat tear affecting your cabin and identify the underlying upholstery material. Modern automotive interiors utilize either top-grain aniline leather, vinyl-coated pigmented leather, or synthetic leatherette blends. A clean slice caused by a pocket knife or key typically leaves sharp edges that are easily pulled together over a flexible sub-patch. In contrast, a stress tear along a bolster seam or a wide puncture where material is missing requires building up structural sub-layers with liquid leather compound before graining.
To help you diagnose your vehicle's upholstery damage and select the proper restoration path, we have compiled a diagnostic matrix below. Each leather seat tear symptom points to a specific material failure and outlines the recommended manual-guided correction.
Leather Seat Tear Severity and Restoration Matrix
Tear Symptom | Probable Cause | Correct DIY Repair Method | Workshop Manual Reference Needed |
Clean straight slit (no missing material) | Accidental puncture from keys, belt buckles, or sharp cargo edges | Insert canvas sub-patch beneath the leather seat tear, apply flexible leather adhesive, and clamp edges flat | Seat trim removal sequence and cushion cover disassembly flowcharts |
Wide jagged gap (frayed edges) | Material fatigue from long-term bolster entry wear and dried leather fibers | Insert heavy-duty sub-patch, fill gap with heat-cured or air-dry liquid leather filler, and sand flush | Side airbag harness routing and seat bolster disassembly diagrams |
Seam separation along stitching | Thread rot from UV exposure or excessive tension on French seams | Unbolt seat frame, peel cover back, and re-stitch using heavy-duty bonded nylon thread and curved needle | Occupant classification sensor location and seat frame torque specs |
Perforated leather tear (heated/cooled seat) | Stress cracking across ventilation hole matrix on seating surface | Apply sub-patch carefully to avoid clogging heat ducting, fill surface, and clear perforated holes with micro-punch tool | Seat heater element wiring schematics and ventilation ducting layouts |
Attempting to smear glue over an unbacked leather seat tear will result in a stiff, brittle repair that cracks as soon as someone sits on the cushion. Achieving a seamless, factory-grade finish requires removing seat trim panels and utilizing a multi-layer sub-patching process supported by manufacturer service documentation.
Essential Preparation for Leather Seat Tear Disassembly and Patching
Executing a durable repair on a leather seat tear requires thorough surface preparation, chemical degreased cleaning, and the proper collection of specialized upholstery tools. Attempting to apply fillers or adhesives over oily leather coated in body oils, silicone conditioners, or dust will prevent chemical bonding, causing the patch to peel away within days. Before starting, park your vehicle in a well-ventilated garage with adequate lighting and gather all required restoration supplies.
To ensure you do not damage your vehicle's interior upholstery or electrical systems during a leather seat tear repair, gather the following essential tools before starting:
- Flexible canvas or sub-patch fabric cut one inch larger than the leather seat tear to create an internal structural anchor.
- Non-marring plastic upholstery spatula or tweezer kit to slide the sub-patch smoothly beneath the leather cushion edges.
- Isopropyl alcohol and leather degreaser to strip oils, silicone conditioners, and waxes from the leather seat tear boundary.
- Flexible air-dry or heat-cured liquid leather compound to fill gaps, level depressions, and match surrounding grain patterns.
One of the most critical preparation steps when addressing a leather seat tear on modern vehicles is verifying seat-mounted airbag and heating element locations. Experienced DIYers consult oem-vs-aftermarket-manuals-best-for-diy to ensure they have the exact factory disassembly sequence before unbolting seat tracks. Having this technical data available prevents accidental damage to expensive occupancy sensor mats located directly beneath the leather cushion.
Step-by-Step Seat Disassembly and Airbag Wire Protection
When a leather seat tear is located near side bolsters or lower seat cushion seams, removing the seat assembly from the vehicle cabin provides far superior access and control. Begin by disconnecting the negative battery terminal and waiting at least fifteen minutes; this allows the backup capacitors for the side-impact airbag deployment system to discharge fully. Consulting srs-airbag-light-reset-steps-via-oem-manuals highlights why this battery disconnect protocol is mandatory, as unplugging a live airbag harness will trigger persistent instrument cluster warning lights that require factory diagnostic tools to clear.
Once the electrical system is safely powered down, unbolt the four seat track floor anchors using a socket wrench to access the frame affected by the leather seat tear. Before lifting the heavy seat frame out of the cabin, tilt it back to access the yellow side airbag connector, seat heater harness, and power seat motor plugs located underneath. Understanding decoding-factory-wiring-color-codes alongside diagnose-power-windows-with-wiring-schematics ensures you trace and disconnect every locking plastic connector terminal without pulling on delicate harness wires or bending sensor pins.
Carefully lift the seat assembly out of the cabin and place it on a clean, padded workbench to protect plastic trim panels from scratching. If you need to partially peel back the leather cushion cover to access the backside of a leather seat tear, reviewing how-to-read-exploded-view-manual-diagrams will show you how to release plastic hog rings and channel retainers without tearing the foam pad underneath.
Inserting Sub-Patches, Applying Fillers, and Matching Leather Grain
With the seat secured on your workbench, you can execute the core structural repair of your leather seat tear. Begin by trimming any loose, frayed leather fibers from the edges of the split using a pair of sharp curved embroidery scissors. Next, cut your canvas sub-patch so that it extends at least one inch beyond the boundaries of the leather seat tear in all directions. Using your plastic spatula or tweezers, carefully insert the sub-patch through the opening, flattening it out against the underside of the leather so that it bridges the gap completely without bunching or folding.
Once the sub-patch is centered beneath the leather seat tear, apply a thin coat of flexible leather contact adhesive between the top of the canvas patch and the underside of the leather. Press the leather edges firmly down against the sub-patch, ensuring the edges meet neatly without overlapping or creating an uneven ridge. Allow the adhesive to cure for twenty minutes to lock the structural sub-patch in place. Next, apply thin layers of flexible liquid leather compound into the remaining surface gap using your plastic spatula. If you need to match surrounding panel colors or spray flexible topcoats over the repair, reviewing car-spray-paint offers valuable guidance on feathering techniques, flash-off times, and spray distance control.
While the final thin layer of liquid leather compound is still tacky over the leather seat tear, press a silicone grain paper or texture pad firmly against the surface for ten seconds to replicate the factory leather grain pattern. Allow the compound to dry completely according to manufacturer instructions, then lightly feather the edges using 2000-grit wet-dry sandpaper to blend the patch flush with the surrounding bolster surface.
Reinstalling the Leather Seat Frame and Preventive Maintenance
Reinstallation of the seat frame following a leather seat tear repair follows the reverse of the removal sequence but requires meticulous attention to wiring routing and fastener torque. Carefully maneuver the seat frame back into the cabin, taking care not to drag metal track brackets across door sills or center console plastics. Reconnect all yellow airbag harnesses, heater plugs, and power seat control modules under the seat before bolting the tracks down. Utilizing a factory manual's exact torque specifications for seat frame bolts ensures the seat remains securely anchored to the floor pan during sudden stops or collisions.
Before placing your repaired seat back into daily service, perform these critical quality and safety checks on your leather seat tear restoration:
- Airbag system indicator check: Reconnect the battery, turn the ignition on, and verify that the SRS airbag light illuminates briefly and turns off without fault codes.
- Heating and cooling element operation: Activate power seat controls and seat heaters to confirm electrical harnesses are fully seated and functional.
- Patch flexibility and seam alignment: Apply moderate pressure by hand next to the leather seat tear to verify the patch flexes naturally without creasing or popping loose.
- Track latching and power travel: Slide the seat along its full forward and rearward travel range to ensure wiring harnesses are not pinched or stretched.
To keep your newly repaired leather seat tear flexible and prevent future cracking, apply a dedicated pH-balanced leather conditioner across the entire seating surface once the repair compound has cured for 24 hours. Regular conditioning restores natural oils to aging leather hides, protecting them against UV degradation and friction wear.
DIY Leather Seat Tear Repair vs. Professional Shop Upholstery
When deciding whether to repair a leather seat tear as a DIY project or to hire a professional upholstery shop, you must evaluate cost, time, and structural complexity. A professional automotive upholstery shop will typically charge between $250 and $700 to repair a severe tear or replace an individual leather cushion panel. Tackling the repair yourself using a high-quality sub-patch kit and a factory manual will cost around $40 to $90 for materials, saving substantial labor expense. However, working without factory documentation increases the risk of breaking delicate seat trim clips or damaging airbag sensor mats.
To help you make an informed decision, we have compared the costs, risks, and requirements of different leather seat tear repair approaches in the table below.
DIY vs. Professional Upholstery Shop Repair Comparison
Factor | DIY Repair (With Workshop Manual) | DIY Repair (Without Manual) | Professional Upholstery Shop |
Average Cost | $40 - $90 (materials & sub-patch kit) | $40 - $90 (plus potential replacement sensor/trim costs) | $250 - $700 (panel replacement & professional labor) |
Time Required | 3 - 5 hours (including adhesive curing time) | 5 - 8 hours (due to struggle with hidden wire harness connectors) | 1 - 2 days (vehicle drop-off required) |
Risk of Wiring/Airbag Faults | Low: Detailed manual diagrams show exact battery disconnect and harness release steps | High: High risk of triggering SRS airbag warning lights or damaging heater wires | None: Professional shop assumes full liability for interior electrical systems |
Patch Durability & Flexibility | High: Structural canvas sub-patch prevents stress splitting along the leather seat tear | Variable: Patch may crack or pull apart if sub-patching is omitted | Flawless: Panel replacement or professional heat-cured compound restores OEM strength |
Cosmetic Grain & Color Match | Excellent when color-matched dye and silicone grain pads are applied correctly | Visible seam edges or mismatched sheen if improper graining tools are used | Seamless color-matched finish with factory-matched leather panels |
As the comparison outlines, utilizing a factory workshop manual during a DIY leather seat tear restoration eliminates guesswork around electrical harnesses and cushion retainers. It enables you to achieve a durable, cosmetically pleasing finish while preserving your vehicle's safety systems.
Ford Leather Car Seat Tear Repair Guide
Ford vehicles, particularly light trucks and SUVs, utilize thick leather seating surfaces on King Ranch, Lariat, and Platinum trim levels that require heavy-duty repair materials. The outer bolsters on these large seats absorb substantial friction during vehicle entry, making sub-patch reinforcement essential when addressing a leather seat tear.
Ford F-150 Leather Car Seat Tear Repair Factors
Performing a leather seat tear repair on a Ford truck requires extra care around the integrated climate-controlled seat ducting and occupant classification sensor mats in the passenger cushion. To safely unbolt seat tracks and disconnect complex multi-plug harness connectors beneath the seat without triggering airbag diagnostic codes, consult the 2007-2013 Ford F-150 workshop manual. This manual provides exact torque specifications for floor track anchors and details the removal of plastic side-shield trim covering power seat switches.
Toyota Leather Car Seat Tear Repair Guide
Toyota models utilize refined leather and synthetic SofTex upholstery designed for long-term durability, but aging bolsters can develop splits along heavy stress points. When repairing a leather seat tear on these cabins, achieving proper surface degreasing is essential to ensure liquid compounds bond to the synthetic coating.
Toyota Camry Leather Car Seat Tear Repair Factors
The Camry sedan features side-impact airbags integrated directly into the outer backrest bolsters, requiring precise handling during a leather seat tear repair. When working near these seat seams, use the 1997-2002 Toyota Camry workshop manual to verify the location of airbag modules and harness retainers. Following this factory resource ensures you do not place sub-patches or heavy adhesives over airbag deployment seams, preserving the vehicle's passive safety performance.
BMW Leather Car Seat Tear Repair Guide
BMW vehicles utilize premium Dakota, Nappa, or Vernasca leather hides that feature distinctive grain patterns and tight bolster contouring. German interior assembly standards demand exact color matching and thin compound application when repairing a leather seat tear to maintain a factory appearance.
BMW 3 Series Leather Car Seat Tear Repair Factors
When tackling a leather seat tear on a 3 Series sports seat, you must account for adjustable thigh supports and active seat occupancy mat sensors connected to the vehicle's CAN-bus network. The 2012-2018 BMW 3 Series F30 workshop manual provides essential schematics for unplugging power seat memory modules and side airbag connectors safely. Utilizing this manual ensures you avoid electrical communication faults while working around intricate leather seat tear contours.
Volkswagen Leather Car Seat Tear Repair Guide
Volkswagen cabins utilize durable V-Tex leatherette or genuine leather upholstery fitted tightly over high-density foam bolsters. The tight tension across these sports seat frames means that any leather seat tear must be reinforced with a strong canvas sub-patch before surface levelling.
Volkswagen Golf Leather Car Seat Tear Repair Factors
The Golf hatchback features aggressive side bolsters that experience significant wear as drivers enter and exit the cabin. To repair a leather seat tear on these seats without tearing plastic trim clips, refer to the 2008-2013 Volkswagen Golf Mk6 workshop manual. This manual provides clear diagrams for releasing seat cushion retainers and routing seat heater wiring safely away from sharp track brackets.
Peugeot Leather Car Seat Tear Repair Guide
European vehicles like Peugeot offer unique interior styling, ranging from classic plush leather armchairs to modern contoured sport seats. Understanding the specific upholstery construction is vital when restoring a vintage or modern leather seat tear.
Peugeot 403 Leather Car Seat Tear Repair Factors
Restoring a leather seat tear on a classic Peugeot 403 requires working with traditional unbacked leather hides and wire coil spring assemblies. The historic 1955-1966 Peugeot 403 workshop manual offers detailed guidance on classic seat frame construction, hog ring clip placement, and interior trim tensioning. Utilizing this factory documentation ensures you preserve authentic vintage aesthetics while executing a strong leather seat tear repair.
Choosing the Right Manual Resources for Leather Seat Tear Repair
Selecting verified technical documentation is the most important decision you can make when planning an interior upholstery restoration. While general video tutorials offer a broad overview of liquid leather application, they cannot replace the vehicle-specific accuracy of a factory workshop manual. A dedicated manual provides exact electrical wiring schematics, SRS airbag safety procedures, and seat frame torque specs tailored to your vehicle. To help you select the best documentation for your leather seat tear project, you can review how-to-choose-the-right-workshop-repair-manual and compare manual formats.
For modern vehicles with complex power seat electronics, digital workshop manuals allow you to zoom in on harness connectors and track mounting diagrams. To optimize your research before starting a leather seat tear repair, consult how-to-navigate-interactive-pdf-workshop-manuals to locate interior disassembly sections quickly. Understanding when-to-upgrade-to-a-factory-service-manual is especially crucial when dealing with side-impact airbags, and knowing where-to-download-genuine-oem-workshop-manuals ensures you use verified factory data. For additional model-specific context or overall maintenance planning, checking guides like peugeot-508-rxh-common-problems or lifting guides like safe-jacking-lifting-points-in-your-manual can help you prepare your garage workspace safely.
Secure Your Step-by-Step Restoration Plan
Do not let an unsightly leather seat tear diminish your cabin comfort or lead to costly upholstery replacements. By preparing with proper degreasing supplies, inserting a flexible sub-patch, and following a vehicle-specific repair guide, you can restore your leather interior to pristine condition. To ensure you have access to exact wiring schematics, airbag disconnect protocols, and seat track torque specs, make sure to find your vehicle's correct workshop repair manual before unbolting your seat frame.
Leather Car Seat Tear Repair Frequently Asked Questions
Can I fix a leather seat tear without removing the seat from the car?
Yes, you can fix a minor leather seat tear while the seat remains in the vehicle cabin, provided you have clear access to the damaged area. However, for tears located along lower side bolsters or rear cushion seams, removing the seat frame provides far better visibility, lighting, and leverage to insert structural sub-patches cleanly. Always ensure the battery is disconnected if you need to unplug seat wiring harnesses during the repair.
What is the best material to use for a leather seat tear sub-patch?
The best material for a leather seat tear sub-patch is a high-strength woven canvas, denim, or thin fiberglass mesh fabric. The sub-patch must be flexible enough to conform to seat contours while being strong enough to prevent the tear from stretching open when passengers sit on the cushion. Avoid using stiff plastics or thick cardboard as sub-patches, as they will create uncomfortable hard spots under the leather.
How do I match the color of my leather car seat tear repair?
To match the color of a leather seat tear repair, use a dedicated water-based leather dye kit that includes primary color toners and a clear satin or matte finish coat. Test your custom dye mix on a small hidden area on the underside of the seat cushion before applying it to the patch. Applying thin coats with a foam sponge or airbrush allows you to blend the color seamlessly into the surrounding leather bolster.
Will liquid leather filler work on a perforated leather seat tear?
Yes, liquid leather filler works on a perforated leather seat tear, but you must take extra precautions to prevent clogging the ventilation holes. Insert a thin sub-patch beneath the perforated area, apply minimal filler into the tear line, and use a needle or micro-punch tool to clear any blocked ventilation holes before the compound cures completely. This preserves both the appearance and airflow of heated or cooled seats.
Is it safe to repair a leather seat tear near a side-impact airbag seam?
Yes, it is safe to repair a leather seat tear near a side airbag bolster, provided you do not coat or glue across the factory breakaway seam. Side-impact airbags deploy through specifically engineered thread seams in the seat cover. Never apply heavy sub-patches or liquid leather compounds over an airbag deployment seam; instead, follow your factory workshop manual's guidelines for re-stitching airbag seams with approved thread.
How long does a DIY leather seat tear repair typically last?
A properly executed DIY leather seat tear repair that utilizes a canvas sub-patch, flexible compound, and color-matched topcoat can last for several years of daily driving. The key to long-term durability is inserting a sub-patch that absorbs passenger weight stress and regularly conditioning the leather with a pH-balanced product to maintain material flexibility around the patch.