Posted on

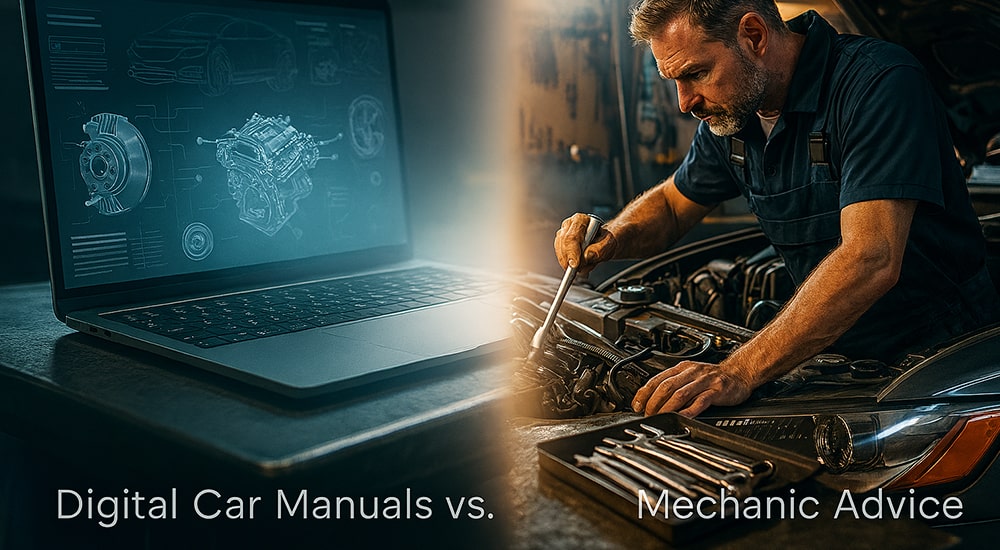
Digital Car Manuals vs. Mechanic Advice: Which Helps More?

Realistic split image showing laptop with digital car manual and mechanic repairing car engine side by side

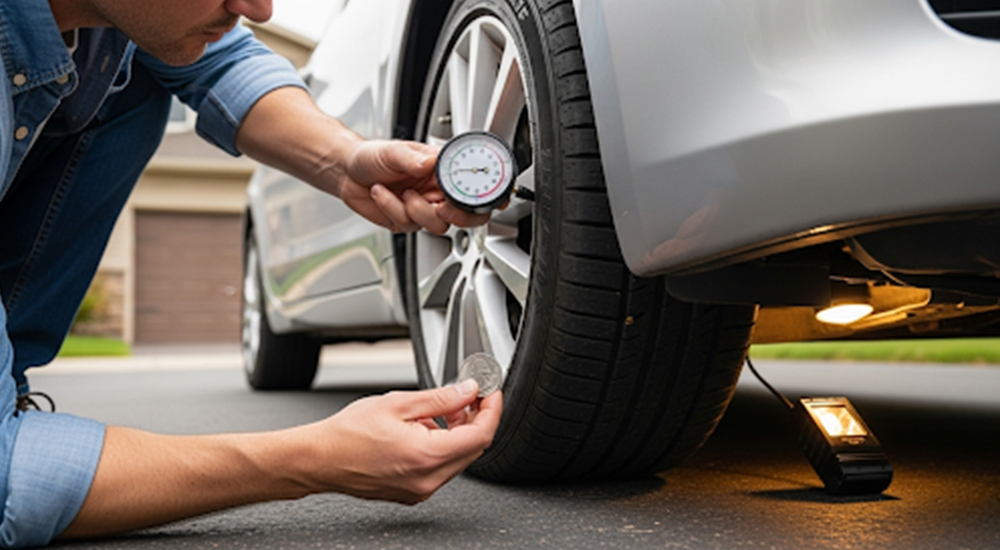
You open your digital workshop guide, scroll through online service manuals, and read a few mechanic tips before deciding if this is a safe DIY repair decision. The clock is ticking, and the car’s sitting lifeless in your driveway. One wrong turn of a wrench could mean hours lost or a repair bill that triples. It’s a choice many car owners face today, with both options promising answers yet leaving plenty of uncertainty behind.

The truth is, both digital manuals and mechanic insight hold value, but success depends on how you use them together. The most brilliant move is not to pick sides but to understand which tool helps most in specific repair situations. This balance can save time, money, and frustration while giving you absolute control over your car’s condition.

In this article, you’ll find out how a digital workshop guide compares with a seasoned mechanic’s advice, which tasks are safe for DIY work, and how to judge when professional help is worth the call. You’ll also see why understanding both sides makes your next DIY repair decision far more confident and cost-effective.

Digital Car Manuals vs. Mechanic Advice: A Practical Showdown for Car Owners

Car owner comparing digital manual and mechanic guidance

In today’s fast-paced DIY era, many drivers are torn between relying on a digital workshop guide or seeking seasoned mechanic advice to solve car problems. That tug of war becomes especially real at 10 pm with your engine stalled and no idea what’s wrong.

Do you trust online service manuals or lean on mechanic tips you picked up over time when making your DIY repair decision? That split-second choice can make the difference between a minor fix and a big disaster.

This article argues that the most effective approach combines the precision of digital manuals with the intuition behind mechanic advice rather than relying on just one over the other. You’ll see when each mode shines, when each can mislead, and how to blend them smartly for better repair outcomes.

Below you’ll find a breakdown of how digital workshop guide systems compare to real-world mechanic tips, guidance on applying online service manuals wisely, and a decision map to help shape your next DIY repair decision with less risk and more confidence.

Digital Car Manuals vs. Mechanic Advice: The Heart of the Debate

In the tug of war between digital workshop guide systems and hands-on mechanic advice, the question isn’t which is always better, but in which scenarios each one truly helps more

This section addresses their comparative strengths and limitations, aligning with real problems car owners encounter when flipping through online service manuals or listening to repair shop whispers. 

You’ll see how to use digital and human insight hand in hand, rather than choosing one at the exclusion of the other.

Why Digital Workshop Guides and Online Service Manuals Appeal

Car owner using detailed online service manual

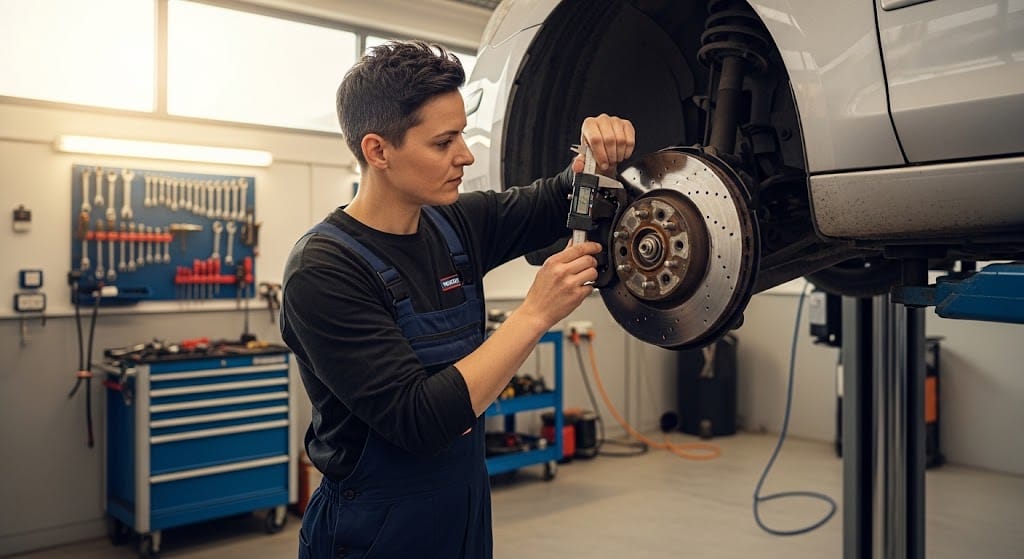
Digital guides offer a breadth of structured technical data that few human advisors can match on demand. Among their advantages:

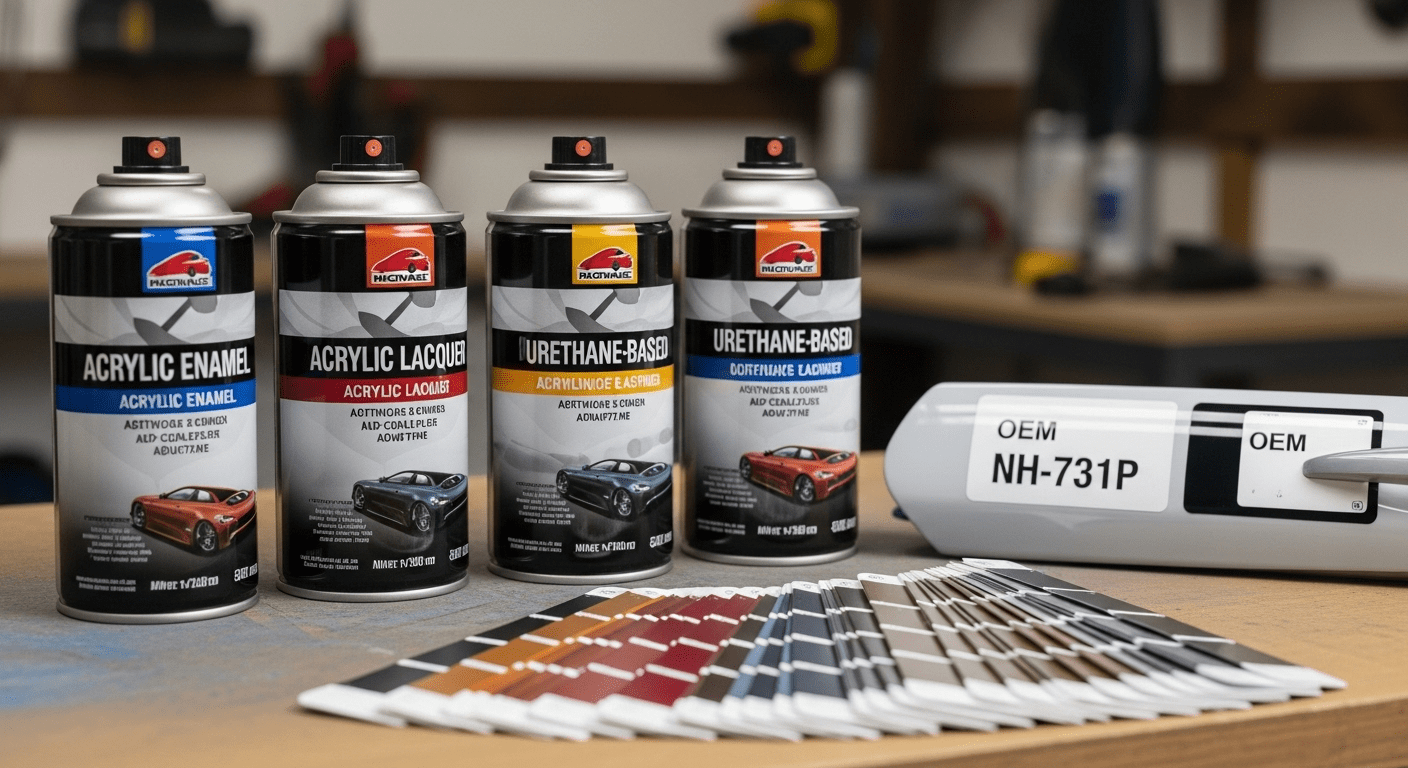
  • Instant access and searchability: You can look up torque specs, wiring diagrams, and step sequences instantly in an online service manuals database.
  • Up-to-date revisions: Many guides offer real-time updates or errata sheets, meaning you’re less likely to follow outdated instructions.
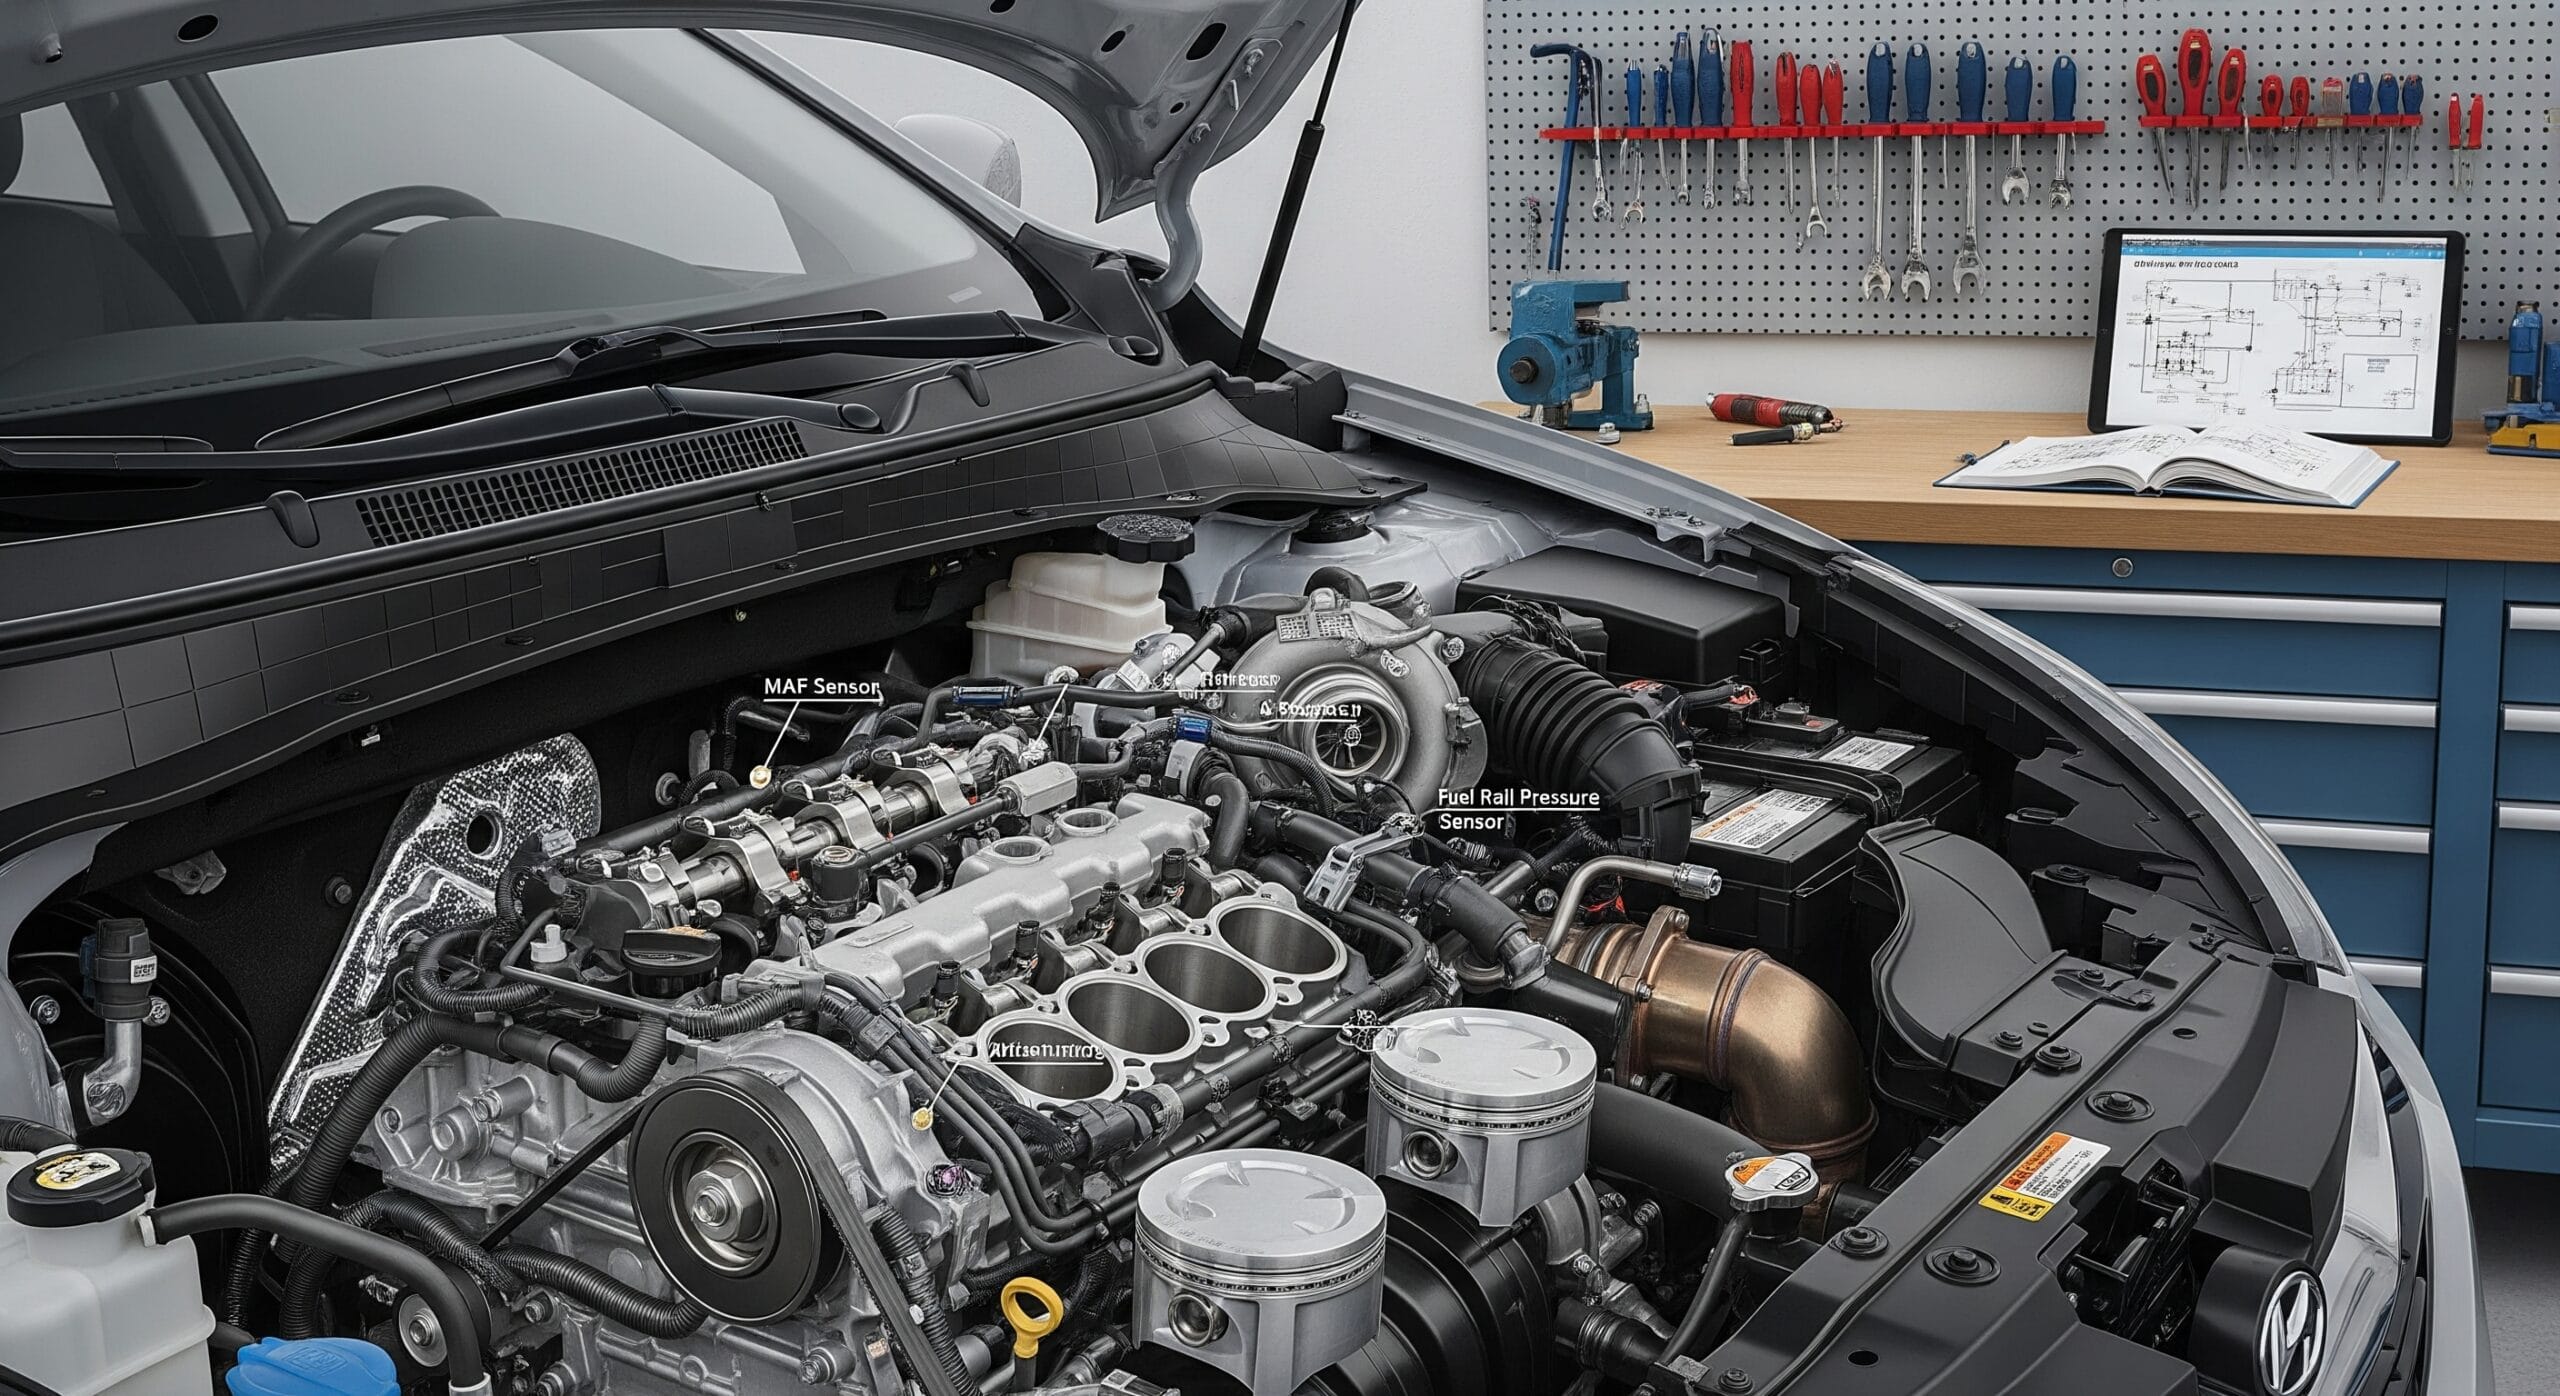
  • Multimedia support: Animations, exploded diagrams, and interactive modules help you visualize complex assemblies that mechanic tips alone can’t fully convey.
  • Consistency: Unlike memory-based tips, manuals can help avoid variation or misremembered steps.

However, manuals have blind spots:

  • They often assume ideal conditions or ignore unique wear patterns.
  • They can’t foresee the improvisation you’ll need when a part is seized, corroded, or previously misaligned.

Even the best digital workshop guide may skip local quirks like after-market modifications or region-specific variations.

The Value and Limits of Mechanic Tips

Skilled mechanic examining car engine carefully

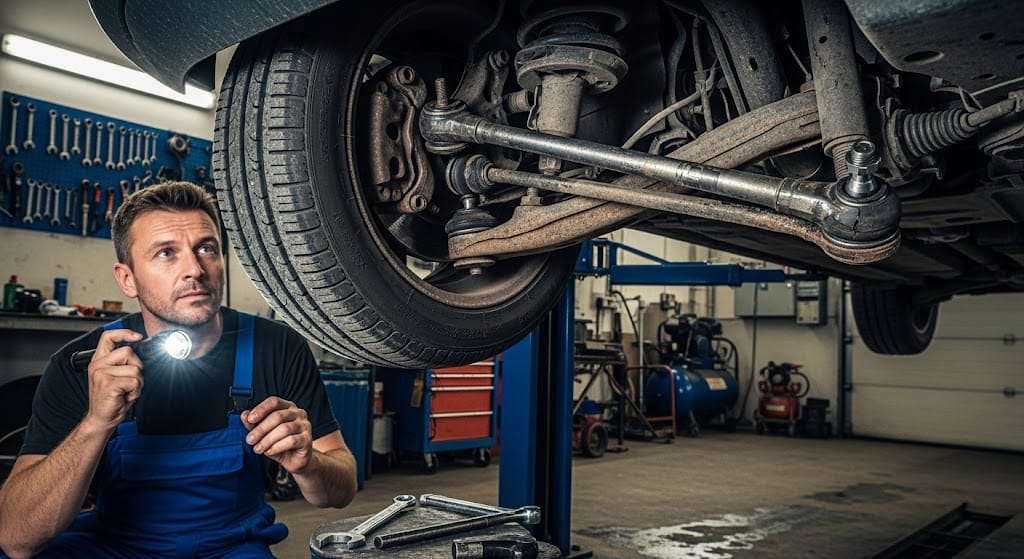
Mechanic tips are born from experience with live cars, often flawed, worn, or assembled by hand. They bring real insight:

  • A seasoned mechanic might know typical failure points for a given model, which seldom appear clearly in a manual.
  • They adapt solutions on the fly: e.g., “heat the bolt first, then tap with a punch,” or “don’t fully loosen that line, they’ll leak fluid.”
  • They can sense hidden symptoms (vibrations, humming, engine tone) that manuals don’t capture.

Yet mechanic advice also has limitations:

  • Sometimes, tips are passed down poorly or from memory, which may clash with precise torque specs.
  • A mechanic might lean on habit or bias—skipping a diagnostic step you’d find in a manual.

Advice tailored to a shop’s tools or parts may not apply in your garage context.

Side-by-Side: When Each Option Helps More

Scenario Digital Workshop Guide Helps More Mechanic Advice Helps More
You need exact torque or sequence for disassembly Yes manual has consistent spec No mechanic may guess approximate
You face a seized or rusted bolt Manual may instruct removal method Tip from mechanic “heat and freeze” may work better
An unusual symptom (knock, vibration) Manual might not list every failing permutation A mechanic’s real experience may recognize pattern
You want to verify a non-standard mod in your vehicle Use online service manuals to check baseline Mechanic can warn about mod pitfalls

In many fundamental tools, you’ll find that digital workshop guide content and mechanic tips are more often complementary than competitive.

How to Structure Your DIY Repair Decision

Person using digital car manual during repair

Making a confident DIY repair decision means layering both information sources smartly. Here’s a suggested decision path:

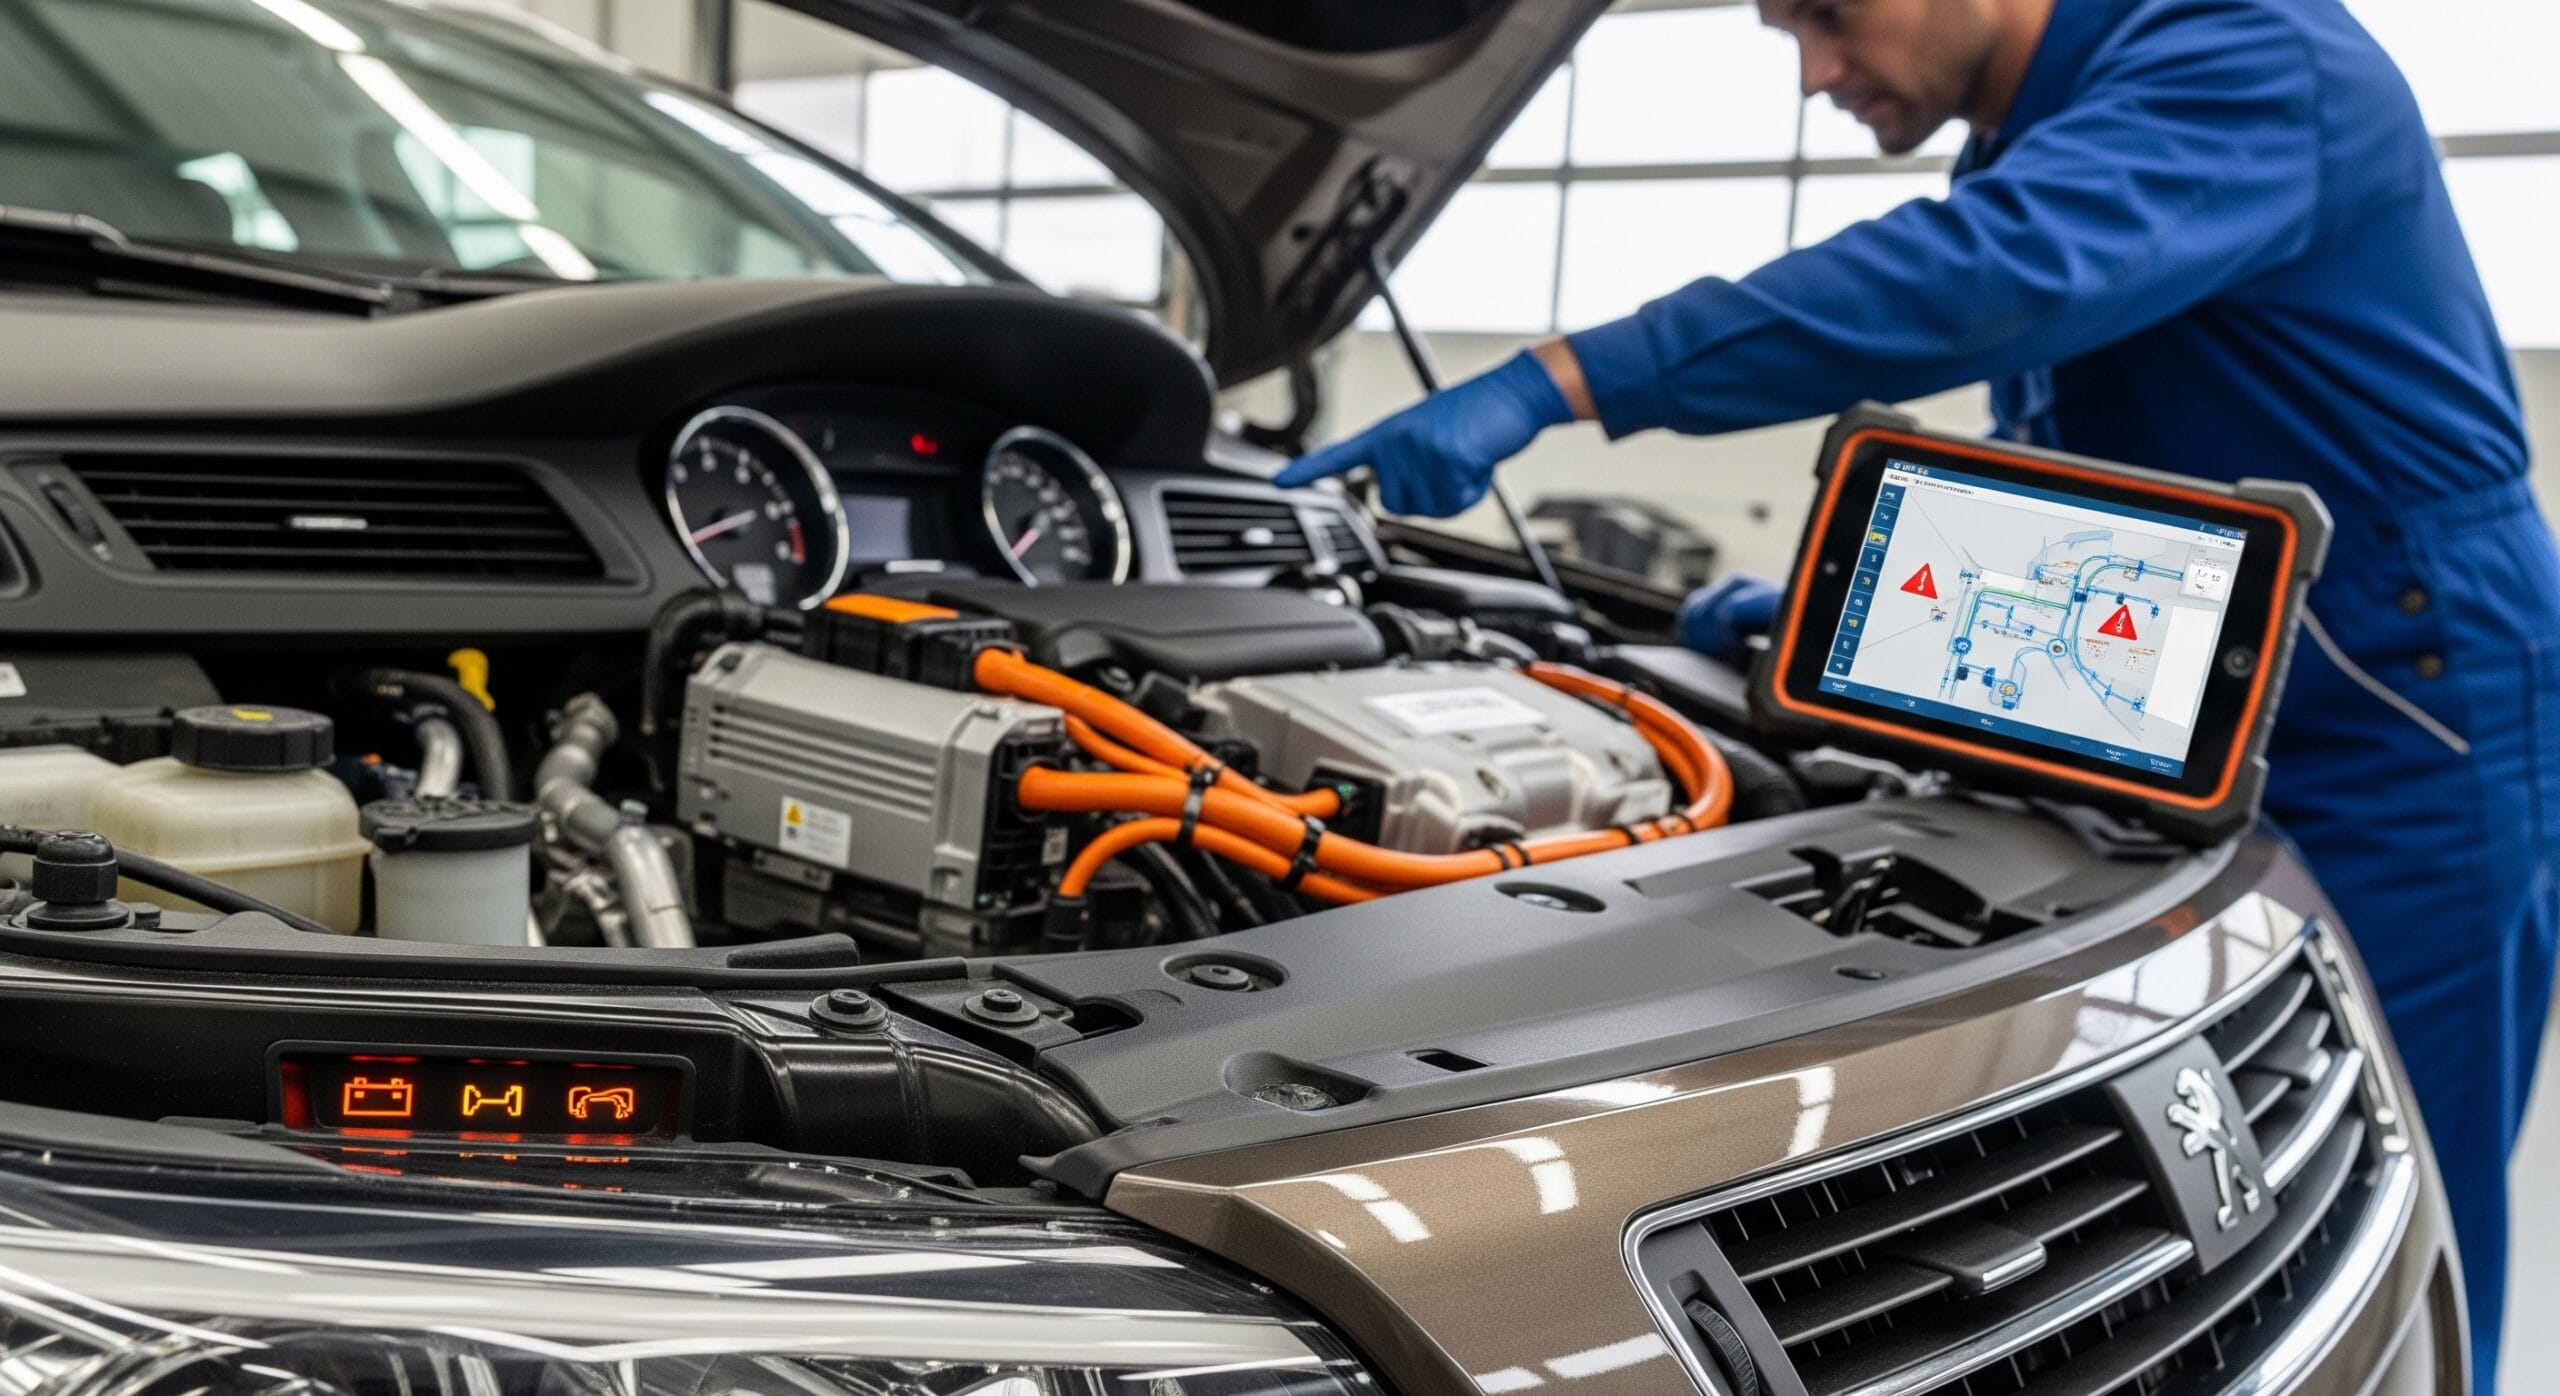
  1. Define the fault clue: Note sounds, leaks, error codes, or dashboard warnings.
  2. Consult your digital manuals: Look up the relevant repair section, diagrams, and special cautions.
  3. Check mechanic tips (forums, trusted techs): See if others with similar models faced the issue and how they adapted the manual.
  4. Compare risks vs your skills and tools: Use the guidance to gauge if a task is safe for you or should be deferred to a pro.
  5. Execute with caution, verifying as you go: Use your digital manual as a map and mechanic insight as road signs that warn you of rough terrain.

With this blended process, you’ll minimize blind spots and avoid common DIY missteps.

Case Examples: When Manuals Failed, Tips Saved the Day

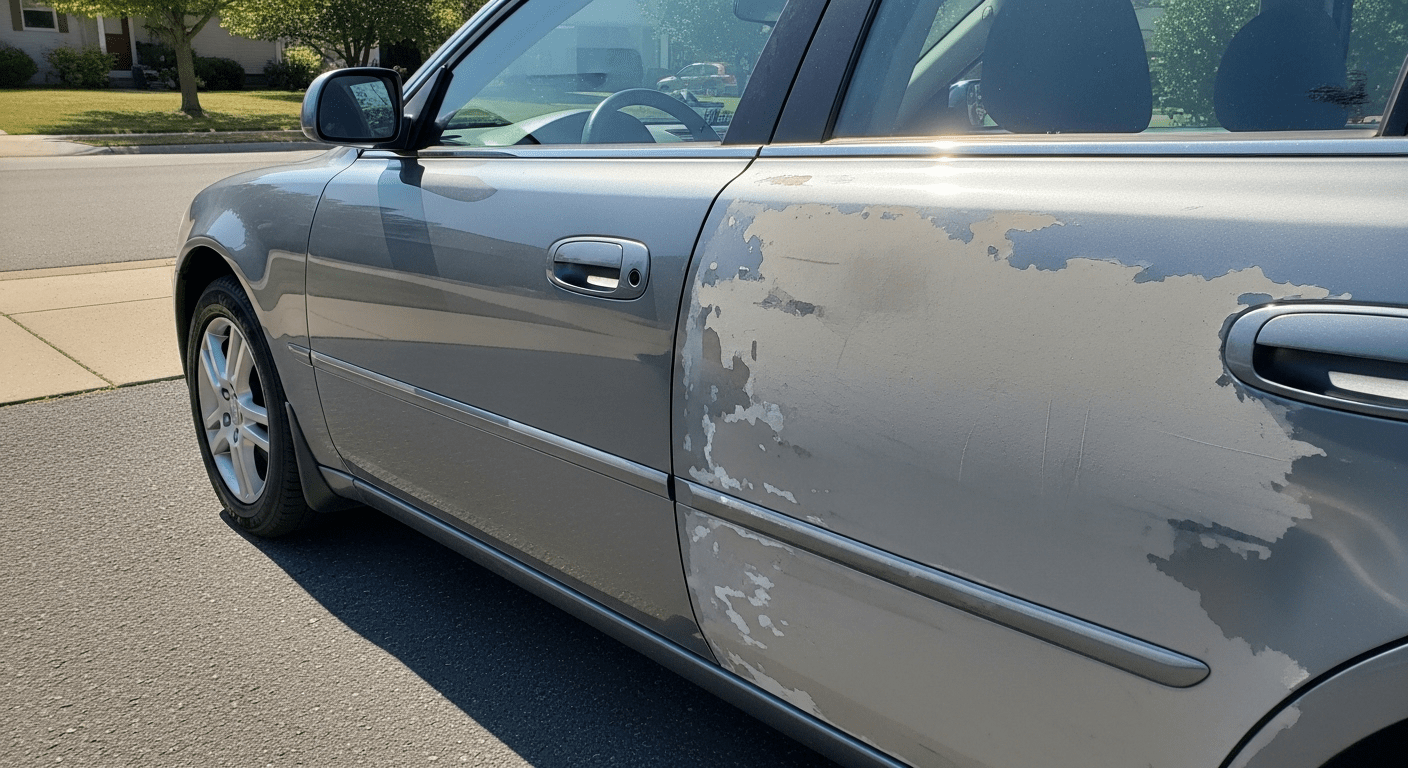
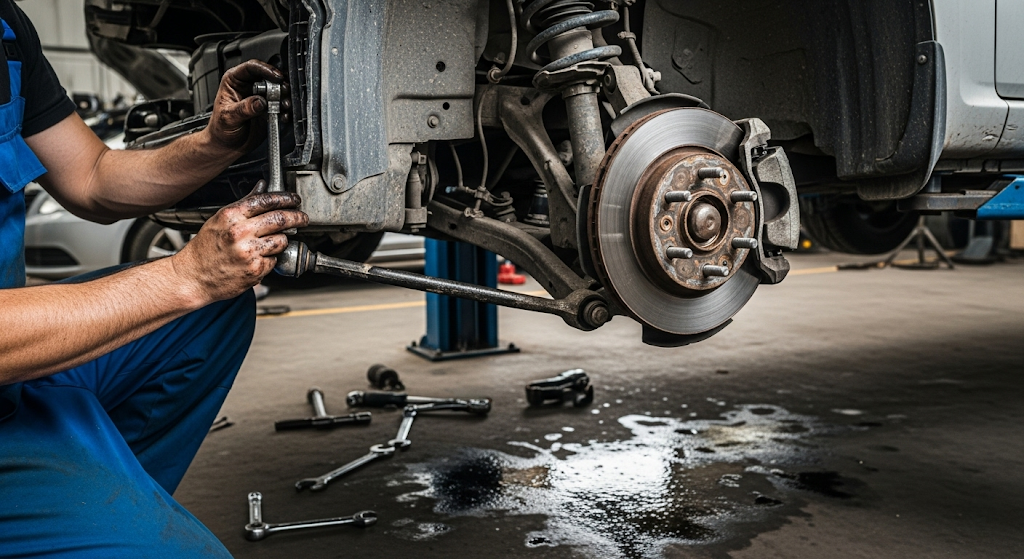
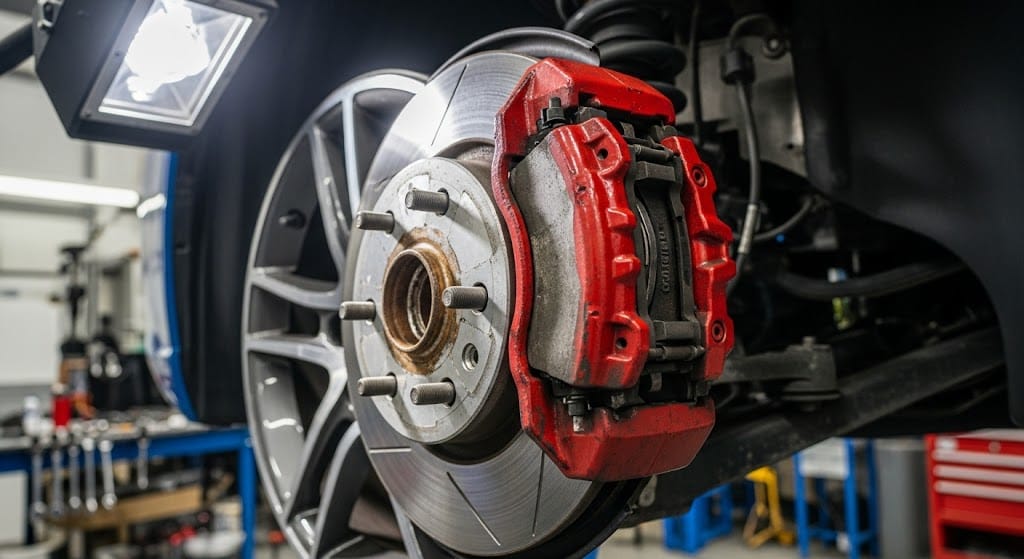
Stuck caliper bolt on a 10-year sedan

The digital workshop guide laid out the removal sequence, but didn’t warn that the bolt was often seized. A mechanic’s thread tip suggested heating with a torch and applying penetrating oil, only after that did removal succeed.

Timing belt re-tension on a mid-range hatchback

The online service manuals gave exact tension specs and the sequence of belt installation. But a local mechanic tip warned that on used engines, the tensioner pulley often exhibits play, so check that part too before relying solely on spec.

These examples show that manuals offer structure, while tip-based insight handles real messy variables.

Common Pitfalls in Relying Solely on One Source

  • Blindly trusting a digital workshop guide when your car has been modified (aftermarket exhausts, engine swaps) can lead you down a false path.
  • Following a mechanic’s tip without confirming alignment or torque specs from manuals can lead to over-tightening or misassembly.
  • Skipping diagnostic checks in a manual because a tip claims “it’s always X on that model” might cause you to misdiagnose a different root problem.

By keeping a crosscheck between sources, you avoid the extremes of overconfidence and confusion.

Optimizing the Balance: How to Use Both Wisely

Person comparing car manual and mechanic tips
  • Always start with the online service manuals to understand the theory, sequence, hazards, and tooling.
  • Filter mechanic tips by reputation, matching your specific model, year, engine variant, and mileage.
  • Document your steps, especially where you deviate from manual guidance based on tip insight.
  • For more challenging tasks, run a “what if” checklist: what happens if I tighten too much, what if I misalign these? These often appear only in a seasoned mechanic’s brain.
  • Use your DIY repair decision map (above) each time: don’t skip steps just because you feel confident.

Summary of Key Insights

  • Digital workshop guide systems bring precision, consistency, and reference structure that human memories struggle to match.
  • Mechanic tips offer adaptability, context, and real-world adjustments unseen in manuals.
  • Many repairs benefit most when combining both sources, using manuals as a foundation and tips to navigate the complexity of objectives.
  • Your DIY repair decision should always weigh your skill, tools, and the risk of mistakes before acting.

Conclusion

When you stand in your garage holding a wrench and staring at a cryptic repair task, the answer is not to choose between a digital workshop guide or mechanic advice, it’s to know when to rely on each. Use online service manuals for structure, exactness, and safe process flow. 

Use mechanic tips for real-world adaptations, pitfalls, and shortcuts that the manual didn’t foresee. By intelligently layering both, your DIY repair decisions become more confident, less risky, and more likely to succeed, even when the engine rattles at midnight.

FAQs: Understanding Digital Workshop Guides, Online Service Manuals, and Mechanic Tips

Yes, but only when approached carefully. A digital workshop guide is structured with official specifications and step-by-step directions, which helps beginners avoid major mistakes. Still, most guides assume a basic understanding of tools and safety procedures. 

If you’re new to car repair, pair your reading with visual tutorials or light mechanic tips before tackling any complex task.

The main advantage of online service manuals is accessibility and speed. You can search instantly by part name or error code, and many digital versions include diagrams, updates, and links to related procedures. 

Printed manuals, though sometimes outdated, can be easier to reference during hands-on work without needing a screen nearby. Most DIYers end up using both depending on the task.

Not all mechanic tips online are accurate. Some are shared from personal experience that might not apply to your specific car model or situation. 

Always double-check any tip with a digital workshop guide or official online service manuals to confirm it won’t conflict with manufacturer standards. 

The safest strategy is to cross-verify advice from multiple credible sources before acting.

The easiest way is to evaluate your DIY repair decision by asking three questions:

  • Do I have the right tools and workspace for the job?
  • Does the repair involve safety-critical systems like brakes or airbags?

Can I reverse my actions if something goes wrong?
If you’re unsure about any of these, it’s smarter to consult a mechanic or seek hybrid guidance using both digital manuals and professional insight.

Most online service manuals and digital workshop guide entries describe procedures in ideal conditions, assuming clean bolts, perfect alignment, and easy access. In reality, corrosion, rust, or old parts can complicate things. 

That’s where human mechanic tips bridge the gap, offering practical adjustments that manuals rarely include.

They can help you narrow down possibilities using troubleshooting charts, but identifying subtle, intermittent issues often requires human intuition. 

A mechanic’s trained ear or sense of touch can spot irregularities that no online service manuals can explain. Combining both perspectives improves diagnostic accuracy.

Posted on

Car Spray Paint: The DIY Shortcut That Could Cost You Thousands

Car with uneven spray paint in garage

A rushed car spray paint job may seem like a fast fix, but poor prep or the wrong product can lead to bubbling, fading, or flaking that reduces your car’s value. Worse, it can expose body panels to corrosion if not sealed properly. That’s why vehicle owners and DIY repairers alike need to treat spray paint projects with the same care as any major car repair.

The key to success is surface prep, the right paint selection, and a steady application method. In this updated 2025 guide, we’ll help you avoid common spray paint disasters with clear, step-by-step tips used by pros and experienced DIYers.

At NXT Motors, we support hands-on vehicle owners. This guide goes beyond generic advice and focuses on techniques that work—whether you’re restoring a faded bumper or repainting an entire panel. Let’s break down everything you need to know before picking up that spray can.

Car Spray Paint Tips Most DIY Guides Skip

Person prepping car for spray painting

Spray painting a car isn’t just about shaking a can and spraying. From material choice to workspace conditions, every factor affects the outcome. Here’s how to set your project up for success.

1. Surface Prep Is Everything

  • Degrease thoroughly using a wax and grease remover. Don’t rely on soap and water alone.
  • Sand with 400–600 grit to level imperfections and help paint stick.
  • Mask adjacent areas with painter’s tape and plastic sheeting to protect windows and trim.
  • Use a tack cloth right before spraying to eliminate dust.

Even top-tier automotive spray paint won’t bond correctly without proper surface prep. Skipping this step guarantees a short-lived finish.

2. Choose the Right Spray Paint Type

Different car spray paint types on workbench
  • Acrylic enamel: Great for a glossy finish; common in DIY kits.
  • Acrylic lacquer: Easy to apply but needs a protective clear coat.
  • Urethane-based: Very durable but requires safety gear and ventilation due to fumes.

Always match your vehicle’s OEM color code to ensure color consistency, especially across panels. You’ll typically find this code on the driver’s door frame or under the hood.

3. Apply Paint Like a Pro

Technique is what separates clean, even coats from streaks and drips:

  • Hold the can 6 to 8 inches from the surface and move in straight lines.
  • Overlap each pass 50% for uniform coverage.
  • Use light coats and allow 10–15 minutes drying time between them.
  • Always finish with a clear coat for shine and UV protection.

4. How Long Will It Last?

Fresh vs faded spray paint on car
  • Properly applied paint with clear coat can last 2–4 years under normal conditions.
  • Low-cost spray paint or skipped prep may begin fading or peeling in under a year.
  • Frequent washing, waxing, and shaded parking help extend lifespan.

High heat, sun exposure, and neglected cleaning routines all shorten spray paint longevity—no matter how good the product is.

5. Avoid These Costly Mistakes

  • Skipping primer: Paint won’t stick to bare or glossy metal without it.
  • Using non-automotive paint: Household spray paint won’t last on a vehicle.
  • Painting in bad weather: Wind, humidity, or extreme temps lead to uneven results.
  • Neglecting safety: Use a respirator and gloves when applying urethane-based paints.
  • Not curing fully: Even if it feels dry, curing can take 24–72 hours depending on paint type.

6. Best Time and Place to Spray Paint

Car spray painting in clean garage
  • Ideal temperature: 65°F to 80°F. Too cold slows curing, too hot causes drying before contact.
  • Humidity: Keep it low. Moisture causes fisheyes and hazing.
  • Location: Spray in a clean, dust-free garage with good airflow. Outdoors only if conditions are calm.

Control your environment as much as possible. A rushed job in bad weather can ruin hours of preparation in seconds.

Conclusion: Is DIY Car Spray Paint Worth It?

DIY spray painting can absolutely be worth it—if done correctly. When you invest time into proper prep, select the right paint, and follow proven application techniques, your results can rival a professional finish.

For small jobs like touch-ups or panel restoration, a high-quality DIY paint job saves money and builds your skills. For full-body repaints or newer cars, consider pairing your effort with a professional or using a reliable repair manual to guide you step-by-step.

At NXT Motors, we believe in hands-on car care. That’s why we offer service manuals, maintenance tips, and reliable guidance for every level of DIYer. Bookmark this page, and check our blog for more guides like this.

Frequently Asked Questions

No. Regular spray paint is not designed for vehicle surfaces. It lacks the adhesion, flexibility, and UV resistance of automotive-grade spray paint. Using the wrong type often leads to peeling, fading, or cracking—especially outdoors.

Primer prepares the surface and promotes adhesion. The base coat adds the color, and the clear coat seals and protects the finish. Skipping any step can lead to poor durability or visible flaws in the paint job.

The OEM paint code is typically found on a label inside the driver-side door, under the hood, or in the trunk. Use this code to buy matching spray paint to avoid color mismatches, especially with metallic or pearl finishes.

It depends on local laws. In some residential zones, DIY auto painting using aerosols may violate air quality or zoning rules. Check your city or state’s environmental guidelines before starting any spray job at home.

Misused spray paint can cause bubbling, cracking, discoloration, or chemical reactions with existing paint. It may cost more to fix a poor DIY job than to have it professionally done in the first place. Always follow correct prep and curing steps.

For full coverage, expect to use around 12 to 20 cans of automotive spray paint for a small sedan—plus separate cans for primer and clear coat. Larger vehicles or multi-coat jobs may require more.

If the spray paint is fresh and hasn’t bonded, products like clay bars or rubbing alcohol can remove it without damage. For cured or stubborn paint, professional detailing is often required to preserve the factory finish.

Posted on

Car Shaking While Driving: What It Means and Why You Shouldn’t Ignore It

Driver’s steering wheel shaking while on road

If your car is shaking while driving, it’s more than just a minor annoyance. Vibrations coming through the steering wheel, floor, or even the seats can signal anything from uneven tires to severe mechanical issues. Left unchecked, this problem can quickly turn from uncomfortable to dangerous.

The good news is that most causes of a car shaking while driving can be identified and fixed once you know what to look for. Whether it’s something as simple as wheel alignment or a more complex engine-related issue, acting early can save you time, money, and safety risks.

In this article, we’ll break down the most common reasons your car might be shaking while driving, explain the warning signs you should watch for, and share what to do next. By the end, you’ll know how to recognize the problem and decide whether it’s something you can handle yourself or needs a mechanic’s attention.

Car Shaking While Driving: Understanding the Causes and What to Do Next

Overheated car engine bay with steam near radiator

Noticing your car shaking while driving can feel alarming, and for good reason. Vibrations often indicate underlying issues that can impact comfort, performance, and even safety. Some causes are minor and easy to address, while others demand urgent repairs. This section breaks down the most common reasons for a car shaking while driving, how to recognize them, and what steps to take.

Uneven or Worn Tires

One of the most frequent causes of a car shaking while driving is related to the tires. When tires are out of balance or unevenly worn, they create vibrations that become more noticeable at certain speeds.

  • Tire imbalance happens when the weight isn’t distributed evenly around the wheel.
  • Worn tread patterns can cause poor road grip, leading to shuddering.
  • Flat spots from long periods of parking in one position can also create shaking.

If you feel vibrations starting around 50–60 mph, it’s often a sign of tire-related issues. Getting your tires balanced, rotated, or replaced usually fixes the problem.

Wheel Alignment Problems

Car tire with uneven wear from misalignment

When the wheels are misaligned, your car will pull to one side, and you may notice shaking while driving at higher speeds. Misalignment often results from hitting potholes, curbs, or regular wear and tear.

  • Uneven tread wear is a telltale sign of alignment issues.
  • Steering may feel “off-center” or less responsive.
  • Left uncorrected, misalignment increases stress on suspension components.

A professional alignment service can quickly restore balance and prevent further damage.

Brake System Issues

If your car shakes while driving, primarily when braking, the issue may lie with the braking system. Warped brake rotors are a common culprit, causing noticeable vibrations when you press the pedal.

  • Warped rotors develop from overheating or heavy use.
  • Worn brake pads can create uneven contact with the rotor.
  • Loose calipers may cause pulsation during braking.

Brakes are a safety-critical system, so if you feel shaking linked to braking, it’s best to have them inspected immediately.

Suspension and Steering Components

Mechanic inspecting worn car suspension parts

Your car shaking while driving could also come from worn or damaged suspension parts. Since suspension links the wheels to the frame, any weakness here can amplify vibrations.

  • Worn ball joints or tie rods make steering unstable.
  • Nasty shocks or struts can’t absorb road bumps effectively.
  • Bushings that are cracked or broken allow excess movement.

These issues often cause shaking at both low and high speeds, sometimes accompanied by clunking sounds over bumps.

Engine or Transmission Issues

Not all vibrations come from the wheels. Sometimes, the engine or transmission is responsible for the shaking. If the car shudders while idling and continues when accelerating, this might be the root cause.

  • Worn engine mounts allow too much movement.
  • Misfiring cylinders create uneven power delivery.
  • Transmission problems can cause shuddering during gear changes.

Unlike tire or brake fixes, engine-related vibrations usually require professional diagnosis.

When the Steering Wheel Shakes the Most

Pay attention to where the shaking shows up. If the steering wheel is shaking while driving, it often points to wheel balance, alignment, or brake rotor issues. On the other hand, if the entire car vibrates, the cause may be deeper in the suspension or drivetrain.

Noticing whether the shake happens during acceleration, braking, or constant cruising is also key to narrowing down the problem.

Quick Checks You Can Do Yourself

Driver checking tires and suspension at home

While some causes need a mechanic, you can do a few quick checks at home to identify possible reasons your car shakes while driving:

  • Inspect tire tread depth with a coin test.
  • Check tire pressure with a gauge.
  • Look under the car for any loose suspension parts.
  • Test if the shaking changes when braking or accelerating.

These steps won’t replace professional care, but they can give you an idea of where the problem lies.

When to See a Mechanic

If your car shaking while driving continues after checking tires and pressure, it’s time to seek help. Constant vibrations may indicate deeper issues, such as suspension wear or drivetrain imbalance. Ignoring these symptoms risks turning a minor fix into a costly repair.

A mechanic can perform detailed inspections of the tires, wheels, brakes, and engine mounts to identify the exact problem.

Conclusion

A car shaking while driving isn’t just inconvenient, it’s a warning sign. From tires and brakes to suspension and engines, vibrations can stem from a variety of issues. Acting early can prevent minor problems from escalating into dangerous ones. By understanding the common causes and knowing when to seek professional help, you’ll keep your car safe, stable, and road-ready.

FAQs About Car Shaking While Driving

Shaking that appears only at higher speeds often points to tire balance or wheel-related issues. The faster the wheels spin, the more noticeable even a slight imbalance becomes.

Yes, leaving the issue unchecked can create extra stress on suspension, steering, and even engine mounts. Over time, this can lead to more expensive repairs.

Short distances might not cause immediate harm, but it’s not safe to ignore vibrations. The problem could worsen quickly, especially if brakes or suspension are involved.

This typically indicates drivetrain or engine issues, such as worn mounts or axle problems. Unlike tire-related vibrations, these tend to appear only under load.

Yes, rough pavement can mimic the feeling of a car shaking, but the vibrations should stop once the road smooths out. If the shaking continues, the issue lies with the vehicle itself.

Cold weather can cause temporary flat spots on tires, making the car feel shaky until the tires warm up. In hot conditions, overinflated tires may also lead to vibrations.

Posted on

Car Overheating: What It Really Means and Why Ignoring It Can Cost You Thousands

Car Overheating

A car overheating on the road can turn a standard drive into a stressful mess. One second, everything feels fine, then suddenly the temperature gauge shoots up or steam starts curling out from under the hood. The thought of being stranded, burning up an engine, or facing a repair bill you can’t afford hits fast.

Here’s the silver lining: most overheating problems can be spotted early and often repaired before they destroy your engine. Something as simple as low coolant, a stuck thermostat, or a failing radiator fan can be the culprit. Quick action can mean the difference between topping up fluids and replacing an engine.

This guide pulls together the top questions drivers ask about car overheating. You’ll see the real reasons it happens, the warning signs to watch for, what to do in the moment, and how much repairs actually cost. On top of that, we’ll look at practical ways to keep your car from reaching that danger zone again.

Car Overheating: Why It Happens, What It Costs, and How to Stop It Early

Car Overheating

A car overheating can be a warning shot or a final blow, depending on how soon you catch it. Sometimes it’s a slow build, other times it hits fast with no apparent reason. The goal here is to break down why it happens, what it actually means for your vehicle, and how you can respond before things spiral into expensive territory.

This section will cover common overheating causes, how to recognize the early signs, what to do in the moment, and the typical cost of repairs. It’s built around real questions drivers are searching for when they’re stuck on the side of the road—or trying to avoid ever being in that spot again.

Why Is My Car Overheating Even with the Coolant Full?

One of the most confusing things for drivers is seeing their car overheating even though the coolant reservoir looks fine. However, just because coolant is present doesn’t mean the system is functioning correctly.

Here’s why this can happen:

  • Thermostat stuck closed: This small part regulates coolant flow. If it gets stuck, coolant won’t circulate, even if it’s full.
  • Air pockets: Trapped air inside the system prevents coolant from moving correctly.
  • Water pump failure: The pump may not be circulating coolant at all, even if there’s plenty of it in the system.
  • Blocked radiator or hoses: Sediment buildup or internal clogs can stop the coolant from reaching where it needs to go.
  • Radiator fan not working: If the fan fails, heat can’t dissipate effectively, especially at low speeds or while idling.
  • Important note: If your coolant is full but boiling, that’s a major red flag. Don’t just top it off and keep driving. Something deeper is wrong.

What Are the Most Common Reasons a Car Overheats?

Most Common Reasons a Car Overheats

It’s not always about coolant. Some of the most frequent car overheating issues have to do with failing components that slowly wear out or go unnoticed.

The most common causes include:

  • Low coolant (even a small leak can lead to big problems)
  • Cracked radiator or leaking radiator cap
  • Broken or loose serpentine belt (which drives the water pump)
  • Malfunctioning thermostat
  • Cooling fan not engaging.
  • Clogged radiator or heater core
  • Head gasket failure (severe, and often the most expensive)

From my own experience, a radiator fan motor failure can sneak up on you. I had no idea until my temperature gauge hit the red zone in stop-and-go traffic. Highway speeds masked the issue altogether.

How to Tell If Your Car Is About to Overheat

Knowing the early signs is key. Catching the issue before things boil over (literally) can save you thousands.

Watch for these warning signs:

  • The temperature gauge is climbing above normal
  • Steam or a sweet smell coming from under the hood
  • Reduced engine performance or sluggish acceleration
  • Warning lights on your dash (coolant, engine temp, check engine)
  • The heater is suddenly blowing cold air, even with the heat on

Tip: If you smell something sweet while driving, it might be leaking coolant. Pull over and check your levels when the engine cools.

What Should You Do If Your Car Starts Overheating While Driving?

Car Starts Overheating While Driving

If your temperature gauge spikes or you see steam, don’t keep driving unless you’re in immediate danger where pulling over isn’t an option.

Here’s a quick step-by-step if your car is overheating on the road:

  • Turn off the AC and turn on the heater full blast. It sounds backwards, but this helps pull heat from the engine.
  • Find a safe place to stop immediately.
  • Turn off the engine, but leave the key in accessory mode to allow the fan to run (if it’s working).
  • Do not open the radiator cap while the engine is hot. Wait at least 30 minutes.
  • Check coolant levels only after the engine has cooled completely.
  • If low, add coolant or water if necessary (this is a short-term fix).
  • Call a tow truck or mechanic if the problem isn’t apparent or quickly resolved.

Driving on an overheating engine, even for a few miles, can lead to cracked heads, warped components, or complete engine failure.

How Much Does It Cost to Fix an Overheating Car?

Repair costs vary depending on the root problem. Some fixes are quick and cheap. Others can total more than the value of the car.

Here’s a rough breakdown of car overheating repair costs:

  • Coolant flush: $100–$150
  • Thermostat replacement: $150–$300
  • Radiator fan repair: $300–$600
  • Water pump replacement: $400–$750
  • Radiator replacement: $500–$900
  • Head gasket repair: $1,200–$2,000+

Prices depend heavily on your car’s make, model, and how fast you caught the issue. Ignoring early signs can easily turn a $150 fix into a $1,500 headache.

Why Does My Car Only Overheat in Traffic or When Idling?

Car Only Overheat

This issue arises frequently in forums and repair shops. If your car overheats while stopped but cools off when driving, that’s a strong clue the radiator fan isn’t working correctly.

When you’re moving, air naturally flows through the radiator to help cool things down. But at idle or low speeds, the fan is the only thing pushing air. If it’s not engaging, the heat builds quickly.

Other possible reasons:

  • Low coolant level reduces circulation at idle
  • Clogged radiator blocking airflow.
  • AC compressor strain (especially on older vehicles in hot weather)

This is one of those problems that can feel random until it becomes constant. If it only happens on hot days or in stop-and-go traffic, get the fan motor and related fuses checked first.

Can Overheating Damage the Engine Permanently?

Short answer: Yes.

The longer your car runs hot, the more likely it is that internal components are getting warped, cracked, or destroyed. The engine block, cylinder head, and head gasket are all at risk.

Potential long-term damage includes:

  • Warped cylinder head
  • Cracked engine block
  • Blown head gasket
  • Oil contamination from coolant leaks
  • Total engine failure

That’s why acting fast matters. Every extra minute your car runs hot is a gamble.

How to Prevent Your Car from Overheating Again

The best way to avoid car overheating issues is to stay proactive. Regular maintenance makes a huge difference, especially before long drives or summer weather.

Here’s what helps most:

  • Check coolant levels monthly and before road trips
  • Flush the cooling system every 30,000 to 50,000 miles.
  • Replace the thermostat and radiator cap during primary services.
  • Inspect belts and hoses for cracks or wear
  • Monitor your temperature gauge while driving.
  • Keep an eye out for leaks on your driveway or garage floor.

If your vehicle has a history of overheating, consider carrying extra coolant and a pair of gloves in your trunk. It’s a small move that can save you enormous stress later.

Conclusion

A car overheating isn’t just a mechanical issue. It’s a chain reaction that can lead to engine failure, towing bills, and repair costs that pile up fast. However, with proper awareness and a quick response, it’s often preventable.

From warning signs to what to do on the road, you now have the key info most drivers don’t learn until it’s too late. Taking care of your cooling system isn’t complicated—it’s just often overlooked.

Don’t wait for that temperature needle to hit red. Pay attention, act early, and keep your engine cool.

FAQs About Car Overheating

While it’s not the most common cause, yes, it can. A failing alternator may not provide enough power to keep the radiator fan or water pump running properly, especially in modern vehicles with electric-driven cooling systems. If the fan isn’t spinning or the pump slows down, overheating can happen.

It can under certain conditions. The AC system adds extra load to the engine and often increases under-hood temperatures, especially in hot weather or during long idling periods. If your cooling system is already struggling, running the AC can push it over the edge.

In most cases, you shouldn’t drive at all once the gauge spikes. Even a few minutes can cause internal damage. If you absolutely must move the vehicle (like getting to the side of the road), limit it to under 1 minute, and turn the heater on full blast to help reduce engine heat. Then shut it down as soon as you safely can.

Not always. If the overheating was mild and caught early, you might get away with just topping off coolant or replacing a thermostat. But if the engine ran hot for too long, there’s a strong chance some components got damaged, even if symptoms don’t show up immediately.

Yes, especially if they haven’t had recent cooling system maintenance. Parts like radiators, hoses, and thermostats wear out over time, and build-up inside the system can block proper flow. Keeping up with maintenance is even more critical as a car ages.

Only as a temporary emergency fix. Water doesn’t have the same boiling point or protective additives as a proper coolant, so it won’t work well long-term. If you’re stuck, adding water can help you get off the road, but flush and refill with genuine coolant as soon as possible.

Posted on

Why Does My Car Shake When I Brake: Hidden Reasons That Could Cost You More Than You Think

Driver gripping vibrating steering wheel while braking

When your car starts to shake when you brake and the steering wheel vibrates during braking, it’s more than just an inconvenience. That sudden pulse under your feet or hands could signal worn parts, unsafe driving conditions, and even a looming repair bill you’re not prepared for. Ignoring those vibrations while braking moments often makes the problem worse, leaving drivers anxious each time they press the pedal.

Most causes of car shake during braking are easy to identify and can be fixed before they become dangerous or expensive. By spotting the issue early, you save time, money, and most importantly, keep your ride safe.

In this guide, we’ll break down the most common reasons your car shakes while braking, how to recognize early warning signs, and what steps you can take next. You’ll learn about worn rotors, tire issues, brake pads, and other culprits that often go unnoticed until the problem escalates.

Why Does My Car Shake When I Brake: The Real Issues Behind the Vibrations

Car braking with focus on wheels and suspension

If you’ve noticed your car begins to shake when you brake, you’re not alone. This issue ranks among the top searches from drivers trying to figure out why their steering wheel vibrates during braking or why the whole vehicle feels unstable when slowing down. 

The causes vary, but they usually point to worn brake components, tire problems, or issues within the suspension system. In this section, we’ll explore each possible reason in detail so you can better understand what’s happening and how to respond before the problem grows worse.

Warped Brake Rotors and Why They Make Your Car Shake

One of the leading causes of a car shake when braking is warped or uneven brake rotors. The rotors are the flat, round discs that your brake pads clamp down on to stop the vehicle. Over time, heat buildup and friction can cause the rotors to wear unevenly. When that happens, the pads can’t make smooth contact, which leads to the shaking sensation in your steering wheel or floorboard.

Key signs of rotor issues include:

  • Pulsing the brake pedal when you slow down
  • A steering wheel that vibrates when braking at higher speeds
  • Longer stopping distances than usual.

If left unchecked, damaged rotors can reduce overall braking performance, which makes driving more dangerous.

Worn Brake Pads That Cause Uneven Braking

Close-up of worn brake pads causing uneven braking

Another common reason your car shakes when braking is worn or uneven brake pads. Pads wear out over time, and when they’re too thin or worn unevenly, they can’t grip the rotor evenly. This leads to a jerky braking experience that feels like vibration through the pedal.

Things to look out for:

  • Grinding or squealing noises during braking
  • A brake pedal that feels too soft or spongy
  • Noticeable shaking that worsens the harder you press the brakes

Replacing pads before they wear down completely is critical because they directly protect your rotors from damage.

Tire Problems That Lead to Shaking During Braking

Not every shake when braking comes from the brake system itself. Tires play a huge role in stability. Worn tread, uneven tire wear, or unbalanced wheels can all create vibration when you slow down. In fact, many drivers mistake tire problems for brake issues because the symptoms feel similar.

Tire-related causes include:

  • Out-of-balance tires that vibrate more as speed increases
  • Uneven tread that grips the road inconsistently during braking
  • Loose lug nuts or poorly mounted wheels

Simple fixes like tire rotation, balancing, or tightening lug nuts can often solve the issue if caught early.

Suspension and Steering Components That Add to the Shake

Mechanic inspecting worn suspension and steering components

The suspension system is designed to keep your car steady when braking, but worn parts in this area can contribute to unwanted vibration. Loose or failing ball joints, tie rods, or control arms may exaggerate the shaking you feel when pressing the pedal.

Warning signs of suspension-related issues:

  • Excessive vibrates when braking at slower speeds
  • Uneven tire wear caused by poor alignment
  • A clunky or knocking sound when driving over bumps

Because suspension parts also affect steering, problems here can quickly turn into safety hazards if ignored.

How Heat and Driving Habits Can Make Things Worse

Driving habits play a significant role in why your car shakes when braking. Hard braking from high speeds or riding the brakes downhill can generate extreme heat. This heat warps rotors faster and accelerates pad wear. Even new components can fail early under repeated stress.

Ways to prevent heat-related damage:

  • Avoid riding the brakes on long descents by downshifting when possible
  • Give your brakes time to cool between heavy uses.
  • Have your braking system inspected regularly during tire rotations or oil changes.

Simple changes in how you brake can extend the life of the system and keep vibrations away.

When a Professional Inspection Becomes Necessary

Mechanic using diagnostic tools for brake inspection

While some issues, like loose lug nuts, are easy to handle, many causes of car shake during braking require a mechanic’s expertise. Professionals use diagnostic tools to measure rotor thickness, check pad condition, and inspect suspension parts that aren’t visible to the average driver.

You should seek professional help if:

  • The shaking gets worse over time.
  • The brake warning light comes on.
  • You feel vibrations even when not pressing the brake pedal.

Delaying repairs could lead to higher costs and unsafe driving conditions.

Conclusion

If your car vibrates when braking, it’s not something to ignore. The shaking could be due to warped rotors, worn brake pads, tire issues, or suspension problems, and each of these can impact your safety on the road. 

By paying attention to early warning signs and taking action, you protect not only your vehicle but also your peace of mind. Next time your car shakes when you brake, you’ll know the possible reasons and the smartest steps to take.

Frequently Asked Questions About Car Spoilers

If your car vibrates when braking at highway speeds, it often points to heat-related issues like slightly warped rotors or unbalanced tires that only become noticeable at higher rotations. The faster the wheels spin, the more obvious those minor imperfections feel.

Yes. Even if the pads and rotors are new, improper installation, low-quality parts, or uneven tightening of wheel lug nuts can still make your car shake when braking. In some cases, fresh parts need a short break-in period before they perform smoothly.

Braking downhill creates extra stress on the brake system, which builds heat quickly. If the rotors are already slightly uneven, the added pressure exaggerates the feeling of vibration. That’s why your steering wheel often shakes when braking on steep grades.

Yes, because any vibration while braking signals that something isn’t working as it should. Even mild shaking under light pressure could mean the start of rotor wear, pad glazing, or an early suspension issue. Minor problems tend to get worse with time.

If the shaking disappears as soon as you lift your foot, the problem is almost always connected directly to the braking system. The pads or rotors are most likely the culprits, since they only come into play when the brake pedal is pressed.

Yes. Poor alignment puts uneven pressure on tires, which then transfers that imbalance through the steering wheel and suspension. While it’s not the most common cause, misalignment can amplify vibrations that show up most clearly during braking.

Posted on

How Much Does It Cost to Wrap a Car in 2025? Full Pricing Guide

Car partially wrapped with vinyl by professional installer

If you’ve ever wondered how much it costs to wrap a car, you’re not alone. Quotes can range anywhere from budget-friendly jobs to premium invoices that rival high-end paintwork. Without understanding the breakdown, many drivers overpay, cut corners, or end up with a poor wrap that harms their vehicle’s look and long-term value.

The good news: car wrapping doesn’t have to be a guessing game. This guide explains every cost factor, what professional shops include in their pricing, and how to budget smartly without falling for common traps.

We’ll cover price ranges, material and labor differences, and hidden costs people often overlook. Whether you’re considering a full-body wrap, a partial design, or comparing vinyl wraps to paint jobs, this article gives you the numbers and insights you need to decide.

Car Wrap Pricing: What Really Impacts the Cost

Different cars with varied vinyl wrap finishes in workshop

When people ask “how much to wrap a car?”, the answer depends on several variables:

  • Vehicle size: Coupes and compacts take less material; SUVs, trucks, and vans require more vinyl and labor.
  • Wrap material: Standard gloss vinyl is the cheapest. Specialty films like carbon fiber, metallic, or chrome cost significantly more.
  • Finish type: Matte, satin, and color-shifting wraps demand higher prices and skill.
  • Labor quality: Experienced installers charge more, but deliver cleaner edges, fewer bubbles, and longer-lasting results.
  • Car condition: Dents, rust, or damaged paint surfaces often require prep work, which adds to cost.

How Much Material Does a Car Wrap Use?

Vinyl rolls with compact sedan and SUV examples

Material costs depend on vehicle size and square footage:

  • Compact car: 50–60 feet of vinyl
  • Sedan: 65–75 feet
  • Truck or large SUV: 90–100+ feet

Premium vinyl brands (3M, Avery Dennison) and specialty finishes raise the price per foot.

Average Car Wrap Price Ranges (U.S. 2025)

  • Small cars (compact/coupe): $1,500 – $2,500
  • Sedans: $2,000 – $3,500
  • SUVs or trucks: $3,000 – $5,000
  • Luxury/exotic cars: $5,000 – $10,000+

These prices cover full-body wraps with standard materials. Custom graphics, metallics, or complex installs can easily push totals higher.

Partial Car Wraps: Cheaper Alternatives

Partial car wrap showing vinyl application on hood
  • Roof or hood: $250 – $600
  • Accent panels or stripes: $500 – $1,000
  • Half-wraps (sides or top-to-bottom designs): $1,000 – $2,500

Partial wraps save money but require careful color-matching with your existing paint.

Does Wrap Finish Affect Price?

  • Gloss wraps: Most affordable, clean, paint-like look.
  • Matte or satin: Higher cost, more prone to fingerprints and scratches.
  • Chrome/metallic: Among the most expensive options, often doubling costs.
  • Color-shifting wraps: Premium films that change shades with light, priced at the top end.

Other Factors: Location & Installer Experience

Urban shops often have higher labor rates, but installer experience matters most. Paying more upfront for a professional saves money long-term since poor application can lead to peeling or bubbling.

Car Wrap vs Paint: Which Lasts Longer?

Comparison of wrapped car vs painted car over years

A vinyl car wrap typically lasts 5–7 years with proper care, sometimes up to 10 with premium films. High-quality paint jobs last longer but cost significantly more. Wraps are removable, making them ideal for style changes without hurting resale value.

Hidden Costs to Ask About

  • Prep work: Rust or dent repair before wrapping
  • Panel removal: Handles, mirrors, and bumpers for seamless coverage
  • Protective coatings: Ceramic or PPF applied over vinyl
  • Wrap removal: $500–$1,000 when it’s time to change

Is Wrapping a Car Cheaper Than Painting?

Yes, in most cases. A quality paint job can start at $3,000 and exceed $10,000, while most wraps range between $2,000 and $5,000. Wraps also win on flexibility—you can remove or change them without damaging the original paint, protecting resale value.

Conclusion: Car Wrap Costs Explained

The cost to wrap a car depends on size, material, finish, installer skill, and prep work. Expect anywhere from $1,500 for small cars with standard vinyl to $10,000+ for exotic vehicles with specialty finishes. The key is choosing the right installer and being realistic about the add-ons.

At NXT Motors, we provide not just pricing insights, but also repair manuals and DIY resources to help you care for your car before and after a wrap. Whether you’re planning a full transformation or a partial accent, the right knowledge ensures your investment lasts.

Frequently Asked Questions About Car Wrap Costs

In most cases, car wraps don’t increase insurance premiums. However, insurers may require you to report the modification if it alters the vehicle’s value or appearance. Ask your provider if wrap damage is covered under comprehensive insurance or if separate coverage is needed.

Yes. Many professional wrap shops offer payment plans or partner with third-party financing providers. This lets you break the total cost into smaller monthly payments, especially helpful for high-end or custom wrap jobs.

Maintaining a vinyl-wrapped car is generally low-cost. Use gentle soap, microfiber towels, and avoid abrasive cleaners. Touchless car washes are usually safe, but harsh chemicals or automatic brushes can reduce the wrap’s lifespan.

Yes, in some cases. A well-installed wrap protects your factory paint from sun damage and scratches. If removed before resale, the original paint underneath may look newer, helping preserve or increase resale value—especially on collector or luxury vehicles.

Custom-designed wraps for business branding or advertising usually cost more than a standard vinyl color change. Expect to pay $500 to $2,500 more depending on the complexity of the design, printing, and installation. These wraps often include logos, patterns, and full-vehicle coverage.

DIY wrapping can save money upfront, but it comes with a learning curve. You’ll need heat guns, squeegees, surface prep tools, and a clean space to work in. Mistakes like bubbles, wrinkles, or torn vinyl may lead to costly rework. For full wraps or expensive vehicles, professional installation is often a smarter investment.

Posted on

Car Spoiler: Why Your Ride Demands This Critical Stability Upgrade

How a rear car spoiler improves vehicle stability

Imagine cruising down the highway and feeling your car subtly lose its grip. This unsettling aerodynamic lift can quickly turn a routine drive into a dangerous situation. Without understanding what a car spoiler does, you might be overlooking a crucial safety feature. The types of car spoilers, such as rear spoilers or front spoilers, offer real benefits. Even a simple lip spoiler or a powerful wing spoiler can make a difference.

A car spoiler is an aerodynamic device designed to manage airflow, reducing lift and increasing downforce on your vehicle. This crucial addition keeps your tires firmly planted on the road.

This article will dive deep into the purpose of spoilers, explore their many types, and detail the tangible benefits they provide for your vehicle’s performance and stability.

Car Spoiler: Understanding Aerodynamics for Enhanced Driving

Spoiler creating real downforce at high speed

A car spoiler isn’t just about looks. It significantly impacts your vehicle’s performance and safety. We’ll explore how these aerodynamic devices work to keep your car stable.

What Does a Car Spoiler Do? Understanding Aerodynamic Control

Believe it or not, a car spoiler plays a crucial role in managing how air moves around your vehicle. Think about an airplane wing, only reversed. At high speeds, a car’s natural shape can generate “lift,” essentially trying to make the car float. This reduces tire contact with the road. That’s certainly not ideal for stability or control, particularly when cornering or braking.

A car spoiler “spoils” this unfavorable airflow. It disrupts the smooth movement of air over the car’s body. This action helps create a high-pressure zone on top of the car, pushing it downwards onto the road. 

This downward force is called downforce, and it’s key to maintaining grip and traction. For example, some sources even suggest a properly designed spoiler on a 1.6L vehicle might offer a 10% decrease in highway fuel consumption, which is neat.

Types of Car Spoilers: Exploring Diverse Designs

Different real spoilers: lip, rear, pedestal and wing

When you picture a car spoiler, you probably imagine a large fin on the back of a sports car. And while that’s undoubtedly one type, the world of types of car spoilers is quite varied. They come in many shapes, sizes, and mounting locations, each with a specific purpose or aesthetic. Understanding these variations helps appreciate their proper function.

The Ubiquitous Rear Spoiler

Often mounted on the trunk lid or the rear of a car’s roof, the rear spoiler is the most recognized. Its primary function is to reduce lift at the rear of the vehicle. This helps prevent oversteering and improves rear-wheel traction, leading to better high-speed stability. These are familiar sights on everything from sporty sedans to larger SUVs. You’ll see a lot of them, just on the average daily commute.

  • Lip Spoiler: A more subtle variety, the lip spoiler just sits on the edge of the trunk. It offers minor aerodynamic benefits, gently modifying airflow. Most people choose these for their sleek, understated look. They truly blend well with a car’s existing lines.
  • Pedestal Spoiler: These are mounted on “pedestals” that raise the main spoiler surface above the trunk. You’ll usually find them on high-performance cars and racing vehicles. They provide more significant downforce than a lip type, clearly designed for function over pure aesthetics.
  • Wing Spoiler: This is what many people mistakenly call a general “spoiler.” A wing spoiler is typically larger and more prominent, resembling an airplane wing, but inverted. It’s explicitly designed to generate substantial downforce by actively manipulating airflow over and underneath its shape. These are crucial for race cars, allowing for maximum grip during extreme cornering. While they add downforce, they also tend to increase drag.

The Grounding Front Spoiler

Front spoiler reducing underbody airflow and improving grip

Don’t forget the front of the car! A front spoiler, sometimes called an air dam or front splitter, is located beneath the front bumper. Its job is to manage the airflow that goes underneath the vehicle. By reducing this airflow, the pressure under the car decreases. 

This action generates downforce, keeping the front tires firmly planted. Additionally, a front spoiler can direct cool air into the engine bay, helping with cooling, which is a real bonus, particularly on performance vehicles. It’s a practical piece of kit.

Other Notable Types of Car Spoilers

Beyond the most common rear spoiler and front spoiler, a few other types contribute to a vehicle’s aerodynamics and style.

  • Roof Spoiler: Typically seen on hatchbacks, SUVs, and crossovers, a roof spoiler is mounted at the top of the rear window. It helps smooth out airflow over the roof and down the rear glass. This can reduce drag and improve fuel efficiency. They can also minimize dirt accumulation on the rear window, a common issue I’ve noticed on my hatchback.
  • Side Skirts: While not a spoiler in the traditional sense, side skirts run along the lower sides of the car. They help manage airflow along the vehicle’s sides. This reduces turbulence and improves overall aerodynamic efficiency, contributing to better handling.

Benefits of Car Spoilers: More Than Just Aesthetics

Spoiler improving stability and reducing drag at speed

It’s easy to dismiss car spoilers as purely cosmetic. Yet, their functional benefits of car spoilers are significant, especially at higher speeds. They do contribute to a safer, more stable, and sometimes more efficient driving experience.

  • Improved Aerodynamics and Reduced Drag: A primary advantage is how spoilers improve airflow around the vehicle. By “spoiling” air movement, they minimize air resistance or drag. Less drag means the engine doesn’t have to work as hard, potentially leading to better fuel economy, especially on long highway trips. It’s quite the efficiency booster.
  • Enhanced Stability and Traction: This is perhaps the most critical benefit. At high speeds, without a spoiler, a car can experience lift, reducing tire contact with the road. Spoilers generate downforce, pushing the car onto the road. This boosts tire grip and traction, resulting in superior stability and handling. This is particularly noticeable when taking sharp turns or driving in windy conditions. You just feel more planted.
  • Better Braking Stability: An often-overlooked benefit is how spoilers contribute to improved braking. With increased downforce, tires maintain better contact during hard braking. This allows for more effective stopping and improved control, which is undeniably essential for safety.
  • Reduced Risk of Losing Control: Building on enhanced stability, an adequately designed car spoiler can reduce the chance of skidding or losing control. This is especially true in adverse conditions or during sudden maneuvers. It gives you that extra bit of confidence.
  • Aesthetic Appeal: Of course, we can’t ignore the visual impact. Spoilers instantly give a car a sportier, more aggressive, or even sleek and sophisticated look. For many, this is the main reason for adding one, and a good-looking spoiler can complete a car’s profile.

When considering a car spoiler, remember its functionality generally becomes more pronounced at speeds over 70-75 mph (around 110-120 km/h). For typical city driving, the aerodynamic benefits are less noticeable. Even at lower speeds, a well-integrated spoiler can make a car feel more grounded.

Materials used in modern spoilers vary, affecting performance and cost. Carbon fiber is a popular choice for high-performance vehicles due to its excellent rigidity, durability, and lightweight nature. It’s expensive, but boy, does it look good. Other materials include more affordable ABS plastic or flexible polyurethane. 

These are good options for daily drivers, as they are less prone to cracking from minor bumps. I recall scraping my old Civic’s front lip once, and it just flexed without breaking, which was a relief. Fiberglass is also used, allowing for custom shapes, but it can be brittle.

Conclusion

Ultimately, the car spoiler is a fascinating component of automotive design. It serves a dual purpose: enhancing a vehicle’s aesthetics while significantly contributing to its aerodynamic performance. From the subtle lip spoiler to the aggressive wing spoiler, and the functional front spoiler working discreetly, each type plays a part. 

They manage airflow, reduce lift, and generate crucial downforce, ultimately improving stability and traction, especially at speed. So, when you see a car with a spoiler, remember it’s probably doing more than just looking good. It’s working to keep that vehicle firmly on the pavement.

Frequently Asked Questions About Car Spoilers

For most daily commutes, a spoiler’s functional advantages are subtle. Aerodynamic improvements kick in above 70-75 mph. That said, even at lower speeds, some factory spoilers might offer a slight reduction in drag, contributing marginally to fuel efficiency. Often, their primary appeal on passenger cars is visual, undeniably giving a vehicle a sportier or more aggressive look.

Oh, absolutely, it can! A significant spoiler, especially a large wing type designed for substantial downforce, will add considerable pressure to your vehicle’s rear. This added force might require stiffer springs in the suspension to accommodate the change and maintain balanced handling properly. Installing a poorly designed spoiler, however, could actually worsen handling or even reduce front-wheel grip at speed. So, careful selection is essential.

It’s a common point of confusion, but there’s a clear difference. A spoiler primarily “spoils” existing airflow over your car’s body, disrupting air movement to reduce lift and sometimes drag. Conversely, an automotive wing actively generates downforce. It’s designed like an inverted airplane wing, allowing air to flow both over and underneath it. This creates significant downward pressure, vital for high-performance cornering, though it typically adds more drag.

Yes, there can be a few. A poorly designed spoiler may increase aerodynamic drag, potentially impacting fuel efficiency or even reducing overall performance. Improper installation, particularly without proper seals, can lead to frustrating water leaks into the trunk. Very large spoilers, like some wing types, might also obstruct your rear visibility. Furthermore, they add weight, which can marginally affect acceleration.

For sure, active spoilers offer distinct advantages. These smart devices retract at lower speeds, providing a cleaner aesthetic and preventing scrapes on curbs. When your car hits a certain speed, they automatically deploy, optimizing aerodynamics for various conditions. Fixed spoilers, while effective at high speeds, may increase drag or offer negligible benefits during low-speed city driving. Active ones provide the best of both worlds, really.

Posted on

Ford Laser Sedan: Is It Still Reliable, or a Costly Mistake?

2001 Ford Laser sedan with engine and interior details for reliability guide

Finding a dependable budget car like a 2001 Ford Laser sedan or other Ford Lasers for sale can feel like a win, but what if that seemingly reliable Ford Laser holds hidden pitfalls? For many, an appealing Ford Laser review might suggest a safe bet, yet overlooked issues could quickly transform a bargain into a costly headache.

The 2001 Ford Laser sedan, including the LXi and GLXi variants, remains a remarkably reliable and cost-effective vehicle, often praised for its longevity and practicality. However, savvy buyers must be aware of its specific quirks and common problems to avoid surprises down the road.

This comprehensive guide dives deep into everything you need to know about the Ford Laser sedan’s performance, features, common issues, and how to spot a genuinely good 2001 Ford Laser for sale. We’ll equip you with the insights to make an informed decision and ensure your next budget-friendly ride is truly a wise investment.

Performance and Engine Options: What to Expect From Your 2001 Ford Laser

2001 Ford Laser LXi and GLXi engine comparison with key specs

When you’re considering a 2001 Ford Laser sedan, the engines on offer are straightforward. You’ll primarily find two petrol options, both four-cylinder units, offering a balance of efficiency and everyday usability. The 2001 Ford Laser LXi typically came equipped with a 1.6-liter engine, producing around 79 kW (that’s about 106 horsepower for those of us who prefer the imperial system) and 145 Nm of torque. This setup is perfectly adequate for city driving and provides enough oomph for highway cruising without feeling stressed.

Now, if you want a bit more zing, the 2001 Ford Laser GLXi steps it up with a 1.8-liter engine. This one pushes out approximately 90 kW (121 horsepower) and 160 Nm of torque. That extra displacement helps, making the GLXi feel noticeably peppier, especially off the line. For instance, a GLXi with a 5-speed manual transmission could hit 100 km/h in about 9.9 seconds. The LXi, on the other hand, would take around 11.1 seconds. So, you see, there is a tangible difference in acceleration. Both engine types typically feature multi-point fuel injection, which was quite modern at the time, helping with efficiency. Transmissions were either a 5-speed manual or a 4-speed automatic, standard for the era.

1.6L Engine (LXi):

  • Power: 79 kW (106 hp)
  • Torque: 145 Nm
  • 0-100 km/h (manual): ~11.1 seconds

1.8L Engine (GLXi):

  • Power: 90 kW (121 hp)
  • Torque: 160 Nm
  • 0-100 km/h (manual): ~9.9 seconds

Fuel economy is another strong suit for the Ford Laser 2001. You can generally expect combined fuel consumption figures around 9.0 L/100km for both engines, though real-world numbers vary, naturally, with driving style and maintenance. Some manual transmission owners even report getting upwards of 500 km from a single 55-liter tank on the open road. Not too shabby for a car of that vintage.

Ford Laser Reliability: Can it Go the Distance?

2001 Ford Laser reliability and common maintenance points diagram

Ah, reliability, the million-dollar question for any older vehicle! Well, for the Ford Laser, especially the 2001 Ford Laser sedan, the news is mainly positive. Owners and mechanics consistently praise its dependability. I’ve heard stories of these cars hitting 300,000 km, even 500,000 km, with proper care and attention. Think about it: a car from 2001, still running strong? That’s quite impressive.

That said, no car is perfect, and the 2001 Ford Laser does have its quirks. You should be aware of a few common issues that might crop up. For example, some owners have reported that the Mazda FS-DE engines, which were used in some Ford lasers, can start to burn a bit of oil at higher mileages. It’s not necessarily a deal-breaker, just something to keep an eye on during your regular oil checks.

Another thing, the clutch pedal rubbers can wear out surprisingly quickly in manual models, sometimes in as little as 20,000 km. It’s a minor annoyance, not a major mechanical problem. Additionally, issues such as the water pump or radiator top hose may require attention, particularly if the car has high mileage, exceeding 275,000 km. These are everyday wear-and-tear items for any vehicle with that kind of mileage.

Common Mechanical Concerns:

  • Oil Consumption: Possible in higher mileage Mazda FS-DE engines.
  • Clutch System: Watch for worn pedal rubbers and occasional fluid seepage from the master cylinder.
  • Cooling System: Water pump and radiator hoses can eventually leak at very high mileages.

Electrical Nuances:

  • Central Locking: The driver’s door sometimes has trouble opening from the inside.
  • Electric Windows: Front windows may occasionally malfunction.
  • Intermittent Engine Stalling: This is tricky to diagnose, as it could be due to sensors or wiring issues.

The main takeaway is that consistent, basic maintenance, such as oil changes and timing belt replacement every 100,000 km, as recommended by Ford, makes these Ford lasers incredibly durable. Parts are generally standard, and heck, you can even find parts at junkyards, which says a lot about their prevalence and repairability.

What to Look For When Buying a 2001 Ford Laser for Sale

2001 Ford Laser pre-purchase inspection and key checks diagram

If you’re in the market for a 2001 Ford Laser for sale, you’ll be glad to know they’re pretty affordable on the used car market. Prices can vary quite a bit, though, ranging from approximately AUD 1,650 to AUD 4,100, depending on its condition, mileage, and specific variant. A 2001 Ford Laser LXi with lower kilometers, say under 86,000 km, might command a higher price, perhaps even around $4,000. Conversely, a car with more significant cosmetic issues or higher mileage would, naturally, be much cheaper.

When you go to inspect a potential Ford Lazer, here are a few things to keep in mind, in addition to the usual checks:

  • Rust: It’s an older car, so check for rust, especially in less obvious spots. Surface rust on non-essential parts, like wiper arms, isn’t a huge deal, but body rust is something else.
  • Engine Noise: Listen for any rattling from the engine bay or unusual squealing when cold, which could point to a slipping accessory belt or other issues.
  • Transmission Check: If it’s an automatic, pay attention to any jerking, shuddering, or delayed engagement. A flashing “Hold” light on the dash? That’s a red flag for the Jatco FN4AEL automatic transmission, possibly signaling diff bearing issues. Manuals, on the other hand, should feel smooth through the gears.
  • Electricals: Test all the lights, power windows, and central locking. Intermittent issues can be a real pain to track down later.
  • Service History: Always, always, try to get a service history. It tells you a lot about how well the car’s been maintained. The suggested service schedule for the 2001 Ford Laser was every 6 months or 10,000 km.

Remember, what might seem like a cosmetic flaw, like peeling paint, isn’t nearly as important as solid mechanics. These cars were built to be dependable workhorses.

Features of the Ford Laser LXi and GLXi Models

2001 Ford Laser LXi and GLXi key features and interior details diagram

The 2001 Ford Laser sedan was available in several variants, primarily the LXi and GLXi, and they offered a decent set of features for their time. Both were 4-door, 5-seat vehicles, designed with practicality in mind.

Standard across the board, you’d typically find a 4-speaker stereo with a radio and cassette player. Yes, a cassette player! That dates it, doesn’t it? Air conditioning was a standard comfort feature, which is a blessing in warmer climates, and power steering, often with a tilt-only steering column, made maneuvering a breeze. The interiors usually featured velour trim, which was a nice touch, giving it a slightly more upscale feel than some of its competitors. Central locking and an engine immobilizer were also standard, providing a basic level of security.

Regarding safety, this is where age becomes a factor. While a driver’s front airbag was standard on most models, a passenger airbag only became optional on the LXi and standard on other variants after the April 2001 facelift. ABS brakes were also optional from April 2001. You won’t find modern active safety features like Automatic Emergency Braking, Electronic Stability Control, or reversing cameras. This is a crucial consideration, especially if you’re looking for a first car for a younger driver. For its time, it was adequate, but today, it’s certainly limited in that regard.

The Ford Laser: A Shared History with Mazda

It’s fascinating, really, the history behind the Ford Laser. It wasn’t purely a Ford design. Instead, the Ford Laser was essentially a rebadged and restyled version of the Mazda Familia/323. This collaboration came about because Ford acquired a 25% stake in Mazda back in 1979. What a brilliant idea, right? Share platforms and assembly lines to save on costs. It meant the Laser benefited from Mazda’s strong engineering. This is why many parts are interchangeable with the Mazda 323, making maintenance and finding components a bit easier, honestly.

The Ford lasers were particularly popular in regions like Australia, New Zealand, and parts of Asia and Africa. In Australia, the sedan version was even sold as the Ford Meteor between 1982 and 1987. The 2001 Ford Laser belongs explicitly to the KN/KQ series, which was the final generation before the model was ultimately replaced by the Ford Focus in 2002. So, what you’re looking at is the culmination of two decades of compact car development under this shared lineage.

Finding Your Community: Ford Lazer Forums and Groups

Online communities and forums for 2001 Ford Laser owners sharing tips

Even for an older car like the 2001 Ford Laser, there are still communities out there where owners share advice, tips, and sometimes even parts. While you might struggle to find a Facebook group specifically for the “2001 Ford Laser sedan,”  it’s just too niche; you’ll have much better luck with broader groups. Try searching for “Ford Laser owners,” “Ford Laser KN KQ,” or even “Mazda 323 BJ owners,” since they’re mechanically very similar.

Forums like the Australian Ford Forums or even general automotive subreddits like r/CarsAustralia often have discussions about these reliable old workhorses. People frequently ask about common problems, maintenance tips, or even where to find obscure parts. It’s always a good idea to tap into these resources; you’d be surprised by the wealth of knowledge and helpfulness of fellow enthusiasts. They’ve lived with these cars, after all.

Conclusion

Ultimately, the 2001 Ford Laser sedan holds a rather interesting position in the used car market. It’s pretty clear this car wasn’t a costly mistake for most owners; in fact, many laud its enduring reliability and impressive longevity. Equipped with either a 1.6L or 1.8L engine, it offers practical performance and reasonable fuel economy for daily driving. Yes, it lacks many modern safety features and can be a bit noisy on the highway, but considering its low purchase price, these trade-offs are often perfectly acceptable.

For those seeking a straightforward, economical, and notably dependable vehicle, a well-maintained 2001 Ford Laser can indeed be a very smart buy. It has its quirks, sure, like some of us do, but its core dependability and the general availability of parts truly make it a standout for budget-conscious buyers looking for solid transport that’s still got plenty of life left in it. Just make sure to get a good pre-purchase inspection!

Frequently Asked Questions (FAQs)

Many owners consistently report these vehicles surpassing 300,000 kilometers, with numerous examples even reaching 500,000 kilometers with diligent care. Seriously, this longevity stems from its fundamentally robust engine and straightforward mechanical design, allowing it to withstand years of regular use when appropriately maintained. Essentially, these cars were built to last, proving their endurance time and again.

Yes, finding parts for a 2001 Ford Laser is relatively easy. Given its shared platform with the Mazda 323, many components are interchangeable, vastly expanding your sourcing options. You’ll often find parts at local auto wreckers or junkyards due to their past popularity. Furthermore, online auto parts retailers and specialist Ford or Mazda parts suppliers typically stock a wide array of new and aftermarket components, ensuring continued repairability.

For a first car, the 2001 Ford Laser can be a very economical and dependable choice, truly. However, it’s crucial to acknowledge its safety limitations by modern standards. While a driver’s front airbag was standard, a passenger airbag and Anti-lock Braking System (ABS) became optional or standard on higher trims only after an April 2001 facelift. You simply won’t find advanced active safety features like Electronic Stability Control, automatic emergency braking, or reversing cameras. This is a significant consideration for inexperienced drivers navigating today’s roads.

Passenger comfort in a 2001 Ford Laser is acceptable for shorter commutes, but it does show its age on extended journeys. Owners frequently mention a noticeable level of cabin noise, especially when cruising at highway speeds. This is often because the engine tends to operate at higher RPMs, around 3000 rpm at 100 km/h, leading to a persistent drone. Additionally, the seating might become uncomfortable after several hours of driving, lacking the ergonomic support found in newer vehicles.

Posted on

Hyundai ix35 Service: Prevent Costly Breakdowns & Tackle Common Issues Now

Hyundai ix35 SUV being serviced in professional garage

Are you a Hyundai ix35 owner feeling a nagging worry about unexpected repair bills? Many owners face significant issues, from costly Hyundai ix35 diesel particulate filter problems to baffling electrical glitches and alarming engine concerns, especially with models like the 2013 Hyundai ix35. Neglecting your Hyundai ix35 service schedule can quickly turn minor hiccups into major headaches, jeopardizing your vehicle’s reliability and your peace of mind.

By understanding the specific vulnerabilities of your Hyundai ix35 and sticking to a proactive maintenance plan, you can significantly extend its lifespan, improve performance, and avoid the wallet-draining surprises many others experience. Regular checks and timely interventions are your best defense.

This guide will walk you through the essential Hyundai ix35 service intervals, highlight critical common issues to watch out for – including insights into specific model years like the 2013 Hyundai ix35 1.7 CRDi – and provide practical advice on how to keep your SUV running smoothly. We’ll also cover how to find reliable information on the 2013ix35 manual and wiring diagrams for DIYers and informed repairs.

Main Focus Keyword: Navigating Hyundai ix35 Service and Common Issues: Your Guide to a Reliable Ride

Professional Hyundai ix35 maintenance in modern garage

Understanding the specific maintenance needs and potential trouble spots for your Hyundai ix35 is paramount for long-term ownership satisfaction. This section will walk you through essential service considerations and shed light on frequent problems, enabling you to maintain your vehicle proactively. After all, nobody wants a breakdown, do they?

A guide to the Hyundai ix35 Service Schedule and Intervals

Keeping up with your Hyundai ix35 service schedule is the single most effective way to ensure its longevity and prevent unexpected issues. There are often varying recommendations, depending on whether you consider “normal” or “adverse” driving conditions. Frankly, for a used vehicle, adhering to the “adverse conditions” schedule isn’t a bad idea at all. It means more frequent, albeit minor, attention.

  • Interim Service: Typically, an Interim Service is suggested every 6 months or 6,000 miles, whichever comes first. This involves critical checks like fluid levels, lights, tires, and a visual brake inspection. It’s particularly useful for those doing lots of short trips or accumulating high mileage quickly.
  • Full Service: An annual Full Service or every 12,000 miles is usually recommended. This expands on the interim checks, including a more rigorous look at brake health, radiator pipes, and power steering fluid levels. An air filter replacement is also usually part of this service.
  • Major Service: Every 24 months, a Major Service is advised. This comprehensive service covers everything, including significant items like brakefluid and pollenfilter replacements, ensuring your vehicle runs as intended.
  • Key Component Intervals: Specific components have their timelines. For instance, engine oil and filter changes for Hyundai ix35 2.0 diesel models are often every 15,000 km or annually. The fuel filter on these diesels typically needs changing at 30,000 km. Engine coolant might be every 90,000 km or five years initially, then every 30,000 km or two years subsequently. Interestingly, the timing chain, designed to last the engine’s life, generally doesn’t have a fixed replacement interval but should be checked periodically after 200,000 km, especially if you notice unusual noises.

Tackling Hyundai ix35 Diesel Particulate Filter Problems

Mechanic inspecting Hyundai ix35 diesel particulate filter in garage

One of the most talked-about concerns for owners of diesel models, particularly the 2013 Hyundai ix35 1.7 CRDi, revolves around Hyundai ix35 diesel particulate filter problems. These issues commonly arise when the filter can’t effectively regenerate itself. 

That’s usually because the car isn’t getting hot enough for long enough, a common scenario for those of us mostly driving in urban areas.

  • Symptoms to Watch For: You might notice reduced engine power, often described as the car feeling sluggish, or perhaps smoke, possibly black, during acceleration. A drop in fuel efficiency is another tell-tale sign. Sometimes, the car enters a “limp mode”—power severely limited—which can be unnerving on the motorway. Crucially, the DPF warning light might illuminate; a solid light suggests a blockage, while a flashing one indicates it’s nearly complete. Occasionally, you won’t get any warning light, making diagnosis tricky.
  • Causes of DPF Issues: The main culprit is usually a lack of proper DPF regeneration, which requires high exhaust temperatures. Short, frequent journeys are the primary reason for this. Also, a faulty exhaust back pressure sensor or temperature sensor can really mess things up, preventing the system from kicking in to clean itself.
  • Solutions and Prevention: The best defense here is preventative driving. Try to take your Hyundai ix35 on a freeway drive at consistent speeds (around 60 MPH) for at least 15-20 minutes every few weeks. This allows for automatic regeneration. If the problem persists, a professional diagnostic check is necessary. They suggest DPF cleaning, which can involve chemical additives or a professional machine clean. In severe cases, a DPF replacement becomes unavoidable, and yes, it’s not cheap, potentially costing upwards of £1000. For instance, a 2013 Hyundai ix35 diesel with over 90,000 km had a defective DPF that needed significant repair, estimated at 1550€. Oh, and be aware of engine oil dilution; persistent incomplete regenerations can introduce diesel into your engine oil, leading to accelerated wear.

Common Mechanical and Electrical Issues Beyond the DPF

Mechanic diagnosing Hyundai ix35 suspension, clutch, and electrical problems

While Hyundai ix35 diesel particulate filter problems get a lot of attention, the Hyundai ix35 has other common issues that owners, particularly of the 2013 Hyundai ix35, have reported. Being aware of these can help you identify problems early and prevent more significant repairs.

  • Suspension Noises: Creaking from the front suspension, especially over bumps, is relatively standard. It often comes from movement between the shock absorber rod protection and the upper bearing. A bit of sealant can sort this, thankfully. Rear suspension knocking has also been noted.
  • Clutch Problems: Many Hyundai ix35 owners have reported clutch issues like a burning smell or difficulty engaging gears. A soft clutch pedal often points to a faulty clutch master cylinder. This is especially problematic in stop-and-go traffic.
  • Electrical Quirks: Sometimes, the entertainment system just decides to shut down. This often relates to a low battery, especially if you’re only making short trips. Instrument panel gauges dropping to zero while driving is another known, albeit less frequent, electrical issue.
  • Gearbox Concerns: For manual versions, gearbox synchro failure is a common repair request, often surfacing around 115,000 km. It’s a costly repair, involving gearbox removal and clutch replacement.
  • Recalls: It’s really important to check for any outstanding recalls. The 2013 Hyundai ix35, for example, was part of a significant recall for fire risk due to a manufacturing defect where brake fluid could leak into the ABS module. There were also recalls for seatbelt tensioner cables and airbag retention nuts. If you’re looking at a used model, confirming these fixes have been done is, well, just smart.

Finding Your ix35 Manual 2013 and Wiring Diagrams

Mechanic using manuals and wiring diagrams for Hyundai ix35 troubleshooting

For the proactive owner or a seasoned DIY enthusiast, having access to proper documentation is invaluable. Whether you own a 2013 Hyundai ix35 1.7 CRDi or another variant, knowing where to find your 2013 Hyundai ix35manual or the necessary wiring diagram can save you time and money.

  • Owner’s Manuals: You can often find a digital version of the 2013 Hyundai ix35 owner’s manual in PDF format online, sometimes even specific to UK specifications. If you prefer a physical copy, 584-page English-language manuals for the 2013-2014 models are available for purchase.
  • Service & Repair Manuals: For more in-depth mechanical and electrical information, dedicated service and repair manuals are your best bet. Haynes, for example, offers online repair guides for the Hyundai ix35 starting from 2013, which are great for diagnostics and servicing. These include details on electronic diagnostics tools and mechanical guides.
  • Wiring Diagrams: Need to trace an electrical fault? A Hyundai ix35 wiring diagram is what you’re after. These are typically found within the comprehensive service and repair manuals, covering everything from engine components and fuse boxes to specific sensors and relays. You can often find these manuals as downloadable PDFs. Be sure to specify your exact model year, as diagrams can vary. For example, diagrams for the Hyundai ix35 D4HA-H/2 engine are available and quite detailed.

Engine Insights for Your Hyundai ix35

Detailed Hyundai ix35 engine components and wiring overview for maintenance

The Hyundai ix35 engine diagram might seem intimidating at first glance, but understanding its basic components helps in knowing what’s going on under the hood. The Hyundai ix35 was available with various engine options, including 1.6L and 2.4L petrol engines, and 1.7L and 2.0L diesel engines. 

The 2013 Hyundai ix35 1.7 CRDi is a good example, known for its decent fuel economy and lower servicing costs compared to the 2.0 CRDi variant.

  • Key Engine Components: A typical Hyundai ix35 engine diagram would illustrate components like the engine block, cylinder head, pistons, crankshaft, and camshafts. Crucial ancillary systems like the fuel system, air intake system, and exhaust system are also mapped out.
  • Electrical Components: On the electrical side, expect to see the placement and connections of various sensors (e.g., accelerator pedal position sensor, AC refrigerant pressure sensor) and actuators, along with their electrical connections and relays. This is where an exemplary Hyundai ix35 wiring diagram really comes into its own for troubleshooting.
  • Maintenance of Engine Components: Regular engine oil and oil filter changes are absolutely vital for any Hyundai ix35 engine. For diesel variants, maintaining a clean fuel filter is particularly important, given its common fault of needing replacement around every 20,000 km. Checking the timing chain periodically, even though it’s designed for life, is also wise, especially as mileage climbs over 200,000 km.

Making the Most of Your Hyundai ix35 Ownership

Ultimately, keeping your Hyundai ix35 in top shape boils down to a blend of diligent maintenance and informed observation. It’s not just about addressing issues when they arise, but anticipating them. 

Many owners find joining online Hyundai ix35 owner forums or even Facebook groups incredibly helpful for sharing experiences and getting practical advice. 

You’d be surprised what a shared bit of wisdom can do for troubleshooting a mysterious knocking sound or that odd entertainment system glitch.

Whether you’re dealing with the everyday frustrations of Hyundai ix35 diesel particulate filter problems or simply keeping up with your Hyundai ix35 service schedule, being proactive is key. 

Don’t be shy about consulting your ix35 manual 2013—it’s there for a reason! Remember, a well-maintained vehicle isn’t just about avoiding costly repairs; it’s about ensuring your vehicle performs safely and reliably for years to come. That piece of mind? Priceless, if you ask me.

Frequently Asked Questions (FAQs)

Generally, a basic interim service might run you around £77 to £133. A more comprehensive full service typically falls between £106 and £178, while a significant service, performed every two years, usually starts from £179 and can go up to £289. Keep in mind, specific costs for things like a brake fluid flush or a transmission service can add a couple of hundred pounds to the bill, so do check with your mechanic.

The Hyundai ix35 maintains a solid reputation for reliability, particularly when regularly serviced. Owners often report repairs starting at an average age of 9.3 years or around 80,000 miles. With consistent, proactive maintenance, you can expect your ix35 to perform dependably for many years beyond that.

While the AWD system provides enhanced traction, owners have occasionally reported specific issues. These include corrosion and spline problems with the intermediate support of the right axle shaft. Lubricant leakage from the center coupling and failures of the electric motor within that coupling have also been noted. Naturally, such repairs can be pretty involved.

For most Hyundai ix35 diesel models, specifically the 2.0 diesel, a 5W-30 viscosity is typically recommended. When performing an oil change, you’ll generally need about 8 liters of oil, though the total engine oil capacity might be slightly higher at around 8.8 liters. Always consult your owner’s manual for the most precise specification for your exact model.

It’s an interesting point that many owners discuss! While manufacturer figures for the ix35, like the 1.7 CRDi’s official 5.2 L/100km combined, sound great, real-world driving often yields different results. User reviews commonly suggest an actual average closer to 6.4 L/100km. So, expect your mileage to vary. It’s typical for cars to perform less efficiently than their official ratings.

Posted on

Peugeot 508 RXH Common Problems: Crucial Insights to Avoid Costly Hybrid Faults!

Peugeot 508 RXH hybrid inspection in garage

Is your Peugeot 508 RXH showing signs of trouble? Owners frequently report common problems that, if ignored, can lead to spiraling repair costs, particularly concerning its complex hybrid battery system and notorious transmission issues. Without proper knowledge of these potential pitfalls and a diligent maintenance schedule, you could find yourself facing unexpected breakdowns and significant financial strain.

Identifying and addressing these issues early can save you thousands. This comprehensive guide reveals the most prevalent faults and provides actionable insights to keep your 2012 Peugeot 508 RXH running smoothly.

Dive in to uncover critical maintenance schedules, understand complex electrical and mechanical issues, learn about potential hybrid battery replacement costs, and gain essential service tips directly from other owner’s experiences.

Peugeot 508 RXH Common Problems: Understanding the Hybrid’s Quirks and Keeping it on the Road

Peugeot 508 RXH Common Problems

The Peugeot 508 RXH, especially the 2012 model, carved out a unique niche with its diesel-electric hybrid powertrain and distinctive crossover styling. For prospective and current owners, however, knowing the common problems associated with this specific vehicle is crucial. This insight can help prevent significant service costs and keep your RXH performing as it should.

Understanding Electrical System Glitches and Related Issues

One of the most frequently cited common problems across Peugeot 508 RXH models, and particularly the 2012 iteration, revolves around its electrical system malfunctions. Oh, the joys of modern car electronics! Owners have reported various strange occurrences, making diagnosis a head-scratcher sometimes.

  • Infotainment and Dashboard Errors: It’s not uncommon for the infotainment system to freeze or simply go blank, or for the satellite navigation system to turn itself off. Dashboards can light up with seemingly random warning lights and messages, too, which can be unsettling. A simple software update, thankfully, sometimes sorts these out.
  • Wiper and HVAC Troubles: Issues with the air conditioning system are reported, as are quirks with the wipers. You might even find the wipers hitting the A-pillars, which is undoubtedly a unique problem! General Electric can behave oddly; for instance, some owners have experienced the car not detecting the key or seeing no lights on the dashboard. Now, a low 12V battery condition in the engine bay or boot, surprisingly, can often be a root cause for many of these electrical anomalies, affecting systems like the electronic parking brake and hill-start assist.

Navigating Engine and Drivetrain Challenges

Beyond the purely electrical, the Peugeot 508 RXH isn’t entirely immune to mechanical problems, especially with its innovative hybrid setup. The engine, generally a robust 2.0L HDi, can still present specific concerns, particularly as the vehicle ages.

  • AdBlue System Faults: For diesel Peugeot 508 models, the AdBlue tank system can be a persistent headache, often flaring up between 80,000 and 100,000 miles. You’ll get that pesky AdBlue warning light staying on, even after a refill, and sometimes, reduced engine performance. Repairing these issues isn’t cheap; you’re looking at potentially £1,500 to £1,800. Some folks have even opted to remap the ECU to bypass the system entirely, if you can believe that.
  • Timing Belt and Auxiliary Belt Concerns: A critical element for diesel engines is the timing belt. Neglecting its replacement at the scheduled interval can lead to catastrophic engine damage. Costs for a timing belt and water pump replacement are typically £600 to £1,200, but an engine rebuild? That’s easily £3,000 to £4,000. Additionally, a failed auxiliary belt tensioner can destroy an engine, and if your car isn’t staying in electric mode or shows an “engine repair needed” warning, an overdue auxiliary belt replacement (around 50,000 miles) might be the culprit.

Engine Cutting Out in Cold Weather: We’ve even heard of some instances where the engine cutting out in cold weather has been reported by owners, which, frankly, isn’t ideal when you’re trying to get to work on a frosty morning.

Decoding the Semi-Automatic Gearbox Experience

Dashboard warning lights on Peugeot 508 RXH hybrid

The Peugeot 508 RXH relies on a 6-speed EGS (Electronic Gearbox System) automatic gearbox, and honestly, it’s a talking point amongst owners. While the electric motor is supposed to smooth things out, it’s not always as seamless as a traditional automatic.

  • Jerky Shifting and Indecisive Gear Changes: This EGS gearbox can be quite jerky, especially in low-speed, stop-start traffic. Think of it like a new driver learning to use a clutch – sometimes it’s a bit rough. It can also be indecisive, occasionally finding neutral at low speeds, which can be alarming.
  • Motor Reducer Issues: A significant mechanical component linked to the gearbox and hybrid system is the motor reducer. This part converts electric motor energy to the rear wheels. If it fails, you’re looking at a costly replacement, potentially around £2,600. When it goes, the car often refuses to drive in anything but auto mode, which sort of defeats the purpose of the hybrid system, doesn’t it?
  • Clutch Biting Point and Actuator: Problems with calibrating the clutch biting point or issues with the semi-automatic clutch and its actuator have also been reported. Proactive service or even replacement of these components might be advisable for high-mileage vehicles.

Hybrid Battery Life and Replacement Realities

The hybrid battery is, naturally, a central component of the Peugeot 508 RXH, and its longevity is a common question. For the 2012 model, a Ni-MH (Nickel-Metal Hydride) 200V high-voltage battery is located under the boot floor.

  • Battery Life Expectancy: Peugeot initially suggested a 15-year life expectancy for these batteries. Many sources and owners corroborate this, stating hybrid batteries are generally expected to last around 10 years or between 100,000 and 150,000 miles. Good news, really, for those looking at older models.
  • Overheating and Fire Risk: A critical concern, one that should give anyone pause, is the reported potential for hybrid battery overheating, which, in rare cases, poses a fire risk. This underscores the importance of proper battery management and adherence to any recall notices.
  • Replacement Costs: While individual Ni-MH battery cells can be found for $36 to $85, a complete hybrid battery pack replacement is a different ballgame. One supplier listed a new hybrid battery for €3,800.00 (excluding tax) back then, without labor. In the UK, total replacement costs for a hybrid battery can easily exceed £2,000, and sometimes even reach £6,500 without fitting. Labor alone can add $500 to $1,500. It’s a specialist job, demanding certified mechanics due to the high voltage. Luckily, many hybrid vehicles, including this one, come with an 8-year or 100,000-mile warranty on the battery, sometimes even 10 years, which offers some peace of mind for the original owner.

Essential Maintenance Practices for Your 508 RXH

Mechanic servicing Peugeot 508 RXH hybrid engine

Keeping your Peugeot 508 RXH in tip-top condition demands a diligent maintenance schedule. Because it’s a hybrid, it blends the needs of a conventional engine with those of an electric vehicle.

  • Service Intervals: Peugeot generally recommends servicing the 508 RXH every 12 months or 20,000 km (approximately 12,500 miles), whichever comes first. However, if you’re driving under “arduous” conditions—think lots of stop-and-go city traffic, short journeys, or heavy loads—that interval might shrink to every 12 months or 15,000 km (around 10,000 miles). It’s in the manual, you see, and it’s best to stick to it.
  • Minor vs. Major Service: A minor service typically happens annually or every 10,000 miles/12 months. This includes the usual suspects: an oil and oil filter change, fluid top-ups, and checks of the vehicle, screenwash, and pollen filter. The major service usually comes around every 24 months or 20,000 miles. This involves everything from the minor service, plus air filter and fuel filter replacement, checks of the suspension and drive belt, and inspection/replacement of spark plugs and brake fluid. By the way, brake fluid should be changed every two years, without fail.
  • Hybrid-Specific Care: Due to the sophisticated diesel-electric Hybrid4 system, which includes the high-voltage battery, electric motor, and associated electronics, specialized servicing is highly beneficial. Most standard garages might not have the right expertise or diagnostic equipment for complex hybrid issues. It’s also worth noting that the hybrid cooling system, for both the engine and hybrid battery/inverter, needs attention. Incorrect coolant replacement or air in the system can lead to overheating issues and “Engine Fault” warnings.

Accessing Manuals and Diagrams for DIY and Pro Repairs

For Peugeot 508 RXH owners seeking to understand their vehicle better or perform their service, finding the right manuals and diagrams is essential. Goodness knows, these cars are a bit more complex than your average saloon!

  • Owner’s Manual PDF: If you own a 2012 Peugeot 508 RXH, you’re in luck; the owner’s manual PDF (around 302 pages) is readily available online for free. Later years, like 2013 (308 pages) and 2014 (338 pages), are also out there. These manuals are invaluable for understanding everything from the hybrid system’s operation to the layout of the instrument panel.
  • Service Diagrams and Workshop Manuals: For more in-depth repairs, service and workshop manuals are your best bet. A “2012 Peugeot 508 RXH Hybrid4 PDF Manual” is a fantastic resource, complete with high-quality diagrams and wiring schematics. These types of manuals walk you through everything from removing the exhaust gas recirculation module to troubleshooting those tricky hybrid system warnings.
  • Wiring Diagrams: Electrical wiring diagrams are handy for tackling electrical glitches. You can find specific Peugeot 508 hybrid wiring diagrams that detail components, coding, numbering, and symbols. These are indispensable if you’re trying to trace a fault that’s causing those frustrating “error in the electric system” messages or issues with the telematics system.

Conclusion

The Peugeot 508 RXH, a vehicle that bravely combined diesel power with electric assistance in the 2012 model and beyond, offers a compelling package of efficiency and unique four-wheel-drive capability. Yet, like any intricate machine, it has its quirks. Understanding the common problems, from the peculiar behavior of its EGS gearbox to the complexities of its hybrid battery and occasional electrical gremlins, is paramount for current and prospective owners.

Adhering to the recommended maintenance schedule, consulting the owner’s manual, and utilizing readily available service diagrams can significantly mitigate potential issues and the associated replacement costs. Ultimately, being informed is your best defense against unexpected repairs, ensuring your 508 RXH continues to be a reliable and enjoyable vehicle for years to come.

Frequently Asked Questions (FAQs)

While the Peugeot 508 RXH certainly has its known quirks, many owners do report satisfaction and commendable long-term reliability, particularly if maintenance has been diligent. Frankly, like any complex hybrid, its longevity significantly hinges on adherence to the prescribed service schedule and proactive attention to early warning signs. 

Actual owners often emphasize that the robust 2.0L HDi diesel engine is generally a strong performer. However, overlooking routine hybrid system checks or delaying critical maintenance, especially around the 80,000 to 100,000-mile mark, where AdBlue and timing belt issues frequently arise, can, unfortunately, lead to substantial and unexpected outlays.

Should your Peugeot 508 RXH’s hybrid battery be degrading, you’ll likely notice a marked reduction in its electric-only (ZEV) driving range. Drivers commonly report the car struggling to maintain electric mode for more than a mile or two, particularly on inclines or at slightly higher speeds (beyond 35-40 mph), where it prematurely reverts to diesel power.

Moreover, a less responsive electric assist during acceleration or the hybrid system consistently showing a low charge, even after periods of regenerative braking, might suggest the battery isn’t holding capacity as it once did.

The Peugeot 508 RXH utilizes an ingenious “semi 4WD” system. Effectively, the conventional 2.0L HDi diesel engine powers the front wheels, while a dedicated electric motor handles power delivery to the rear wheels. 

This allows for genuine all-wheel-drive capability without a mechanical link between the front and rear axles, which is pretty clever! 

When driving, the car’s system seamlessly manages power distribution, engaging both sources for optimal traction, especially useful on slippery surfaces or during brisk acceleration.

Indeed, while the 6-speed EGS (Electronic Gearbox System) gearbox in the Peugeot 508 RXH can be somewhat jerky, particularly in stop-start traffic, mindful driving can noticeably mitigate this. Many owners find that anticipating gear changes and slightly lifting off the accelerator just before a shift allows the transmission to engage more smoothly. 

Furthermore, ensuring the gearbox’s clutch biting point is correctly calibrated and its hydraulic actuator is well-maintained can make a significant difference. Regular, specialized servicing for this transmission, encompassing software updates and fluid checks, is also certainly beneficial.

Firstly, don’t panic! Upon seeing an “Engine Fault: Repair Required” message, it’s advisable to safely pull over when possible and turn the vehicle off for a few minutes before restarting. Sometimes, this can reset a transient electrical glitch. 

However, if the warning persists, you should promptly arrange for a diagnostic scan. This particular message can unfortunately stem from various issues, including a low 12V battery, an overdue auxiliary belt replacement, or more complex hybrid system communication errors. 

Knowing the specific fault code will be paramount for accurate diagnosis and repair.

Given its hybrid nature, the Peugeot 508 RXH’s luggage capacity is slightly impacted by the high-voltage battery located beneath the boot floor. With the rear seats in place, you can expect around 400 liters (approximately 14.1 cubic feet) of cargo space. 

When those rear seats are folded down, the capacity expands significantly to roughly 1,423 liters (about 50.2 cubic feet). While this is less than a non-hybrid 508 estate, Peugeot did integrate some clever compartmentalized storage under the boot floor to maximize utility.

Beyond the broader “electrical system malfunctions” that can affect infotainment or wipers, specific components in the Peugeot 508 RXH do seem particularly prone to issues. Owners frequently report problems with the vehicle not detecting the key or the entire dashboard going blank. 

Moreover, the telematics system has been known to stop working abruptly. Surprisingly, a weak or dying 12V starter battery (located in both the engine bay and boot) often underlies many of these seemingly disparate electrical anomalies, affecting everything from the electronic parking brake to the car’s ability to enter electric mode.

Given the Peugeot 508 RXH’s inherent weight, thanks to its hybrid components, its suspension and brake components tend to experience accelerated wear compared to lighter, conventional vehicles. While a specific rigid interval for shock absorber replacement isn’t universally stated, reports of rear shock absorber failure at relatively low mileages (e.g., between 42,000 and 46,000 miles) are not uncommon. 

Therefore, owners should have the shock absorbers—and indeed, all suspension components—inspected during every major service, typically every 24 months or 20,000 miles. Should one fail, replacing them in pairs is strongly recommended for balanced handling.

A persistent AdBlue warning light in your Peugeot 508 RXH, even after a fresh refill, typically points to issues beyond simply needing more fluid. Often, the culprit is the AdBlue tank system itself, which can suffer from crystal buildup within its lines, pumps, or sensors, particularly in vehicles between 80,000 and 100,000 miles. Additionally, overfilling the AdBlue tank has been known to cause electrical shorts in the system’s circuit board. These issues prevent the system from accurately registering the correct AdBlue level or functioning properly, consequently keeping the warning light illuminated and potentially triggering reduced engine performance.